

First Download the .zip file from Codecanyon on your PC and then extract the file.
Upload the tlcommerce.zip file to your server public_html or any other directory as you like.
Now extract the zip file in that directory.
Create a new database from your server MySQL database.
Create a DB user and link that database to the DB user.
Now go to your site link and it will automatically take you to the installation.
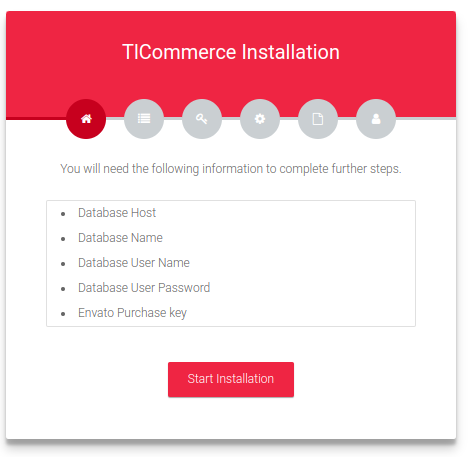
Click on the Start Installation. You will get the Server Requirements page.
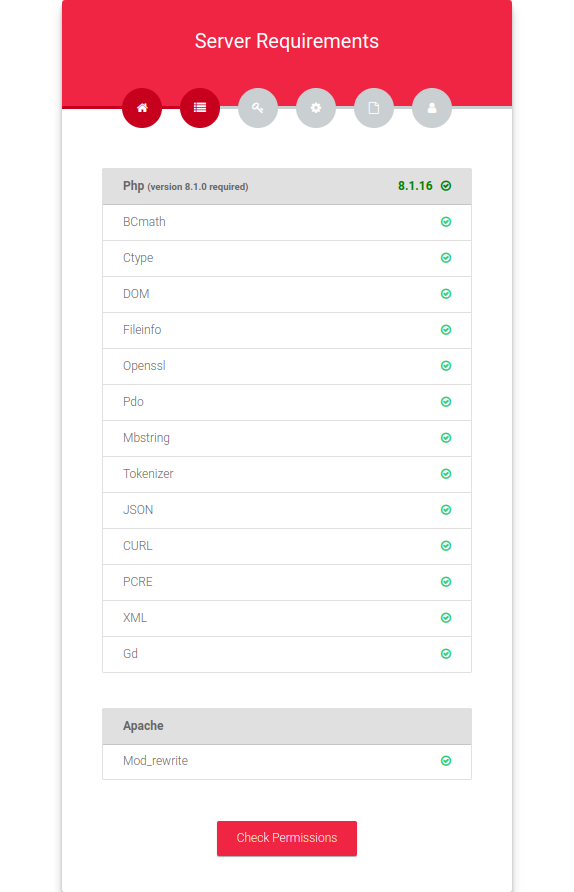
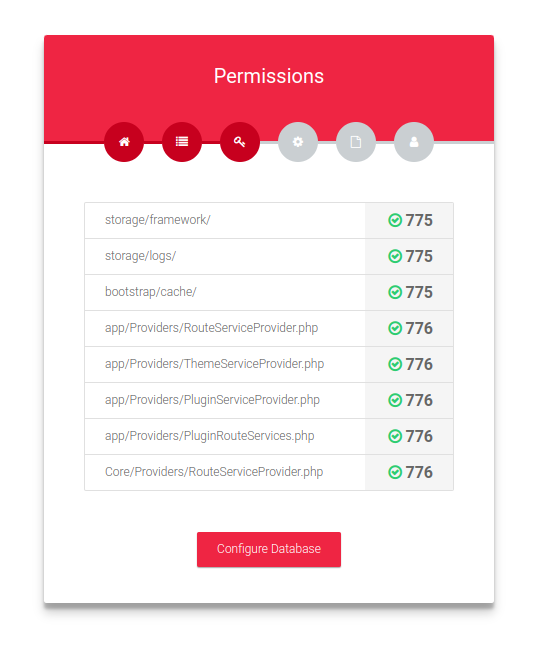
Click on Check Permissions and go to the permission page.
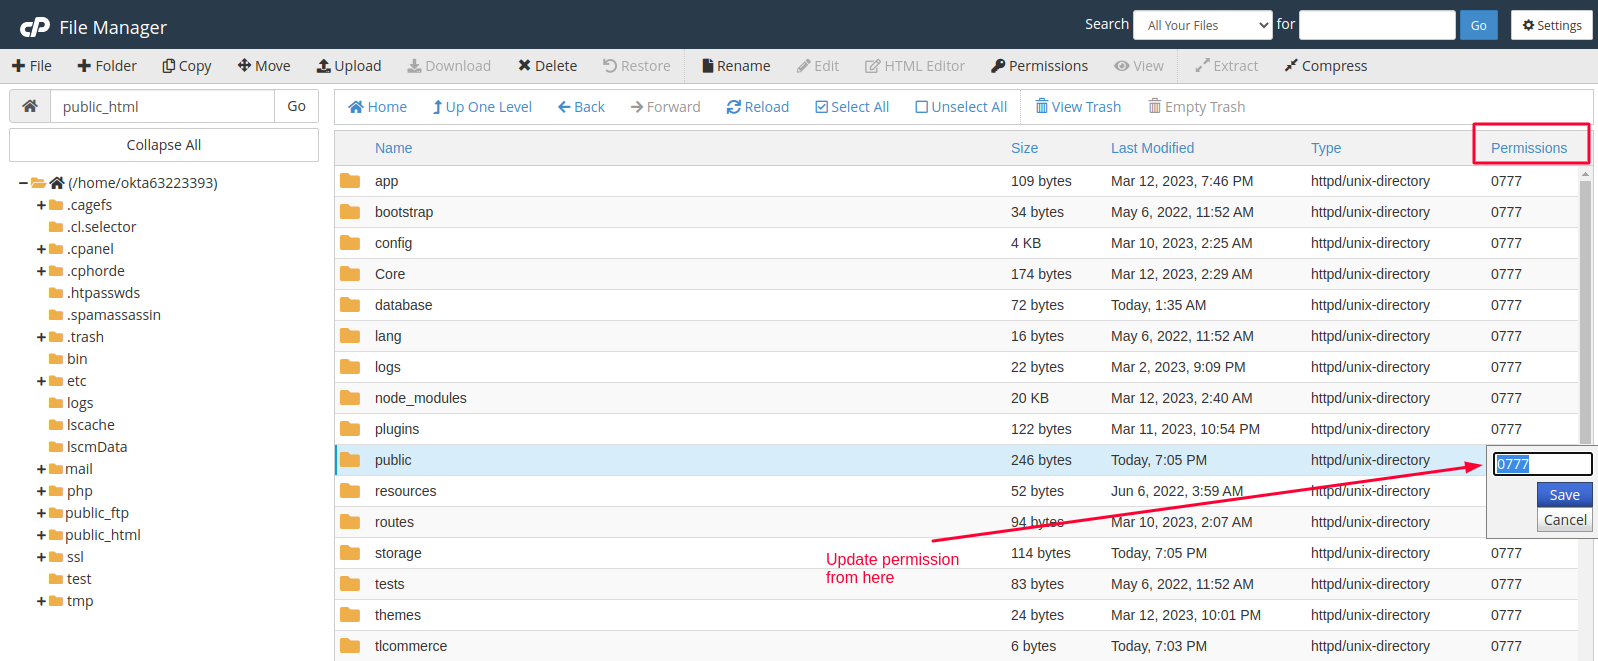
Following image has an example of how you can change folder permission in cpanel.
If everything is ok then click Configure Database.
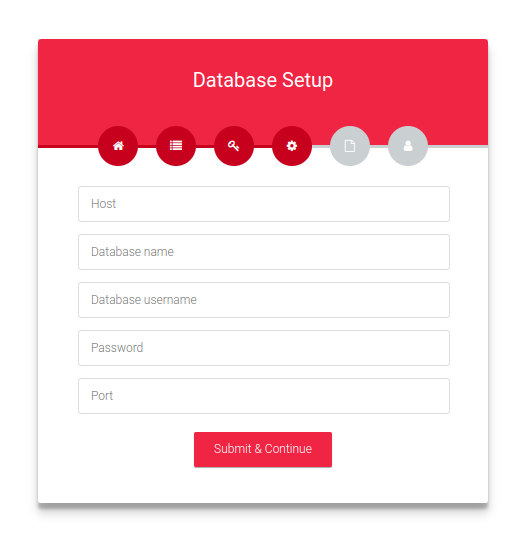
Now in the Database Setup page, you need to set DB Host, DB Name, DB Username, DB Password, and DB Port. Now click Submit & Continue.
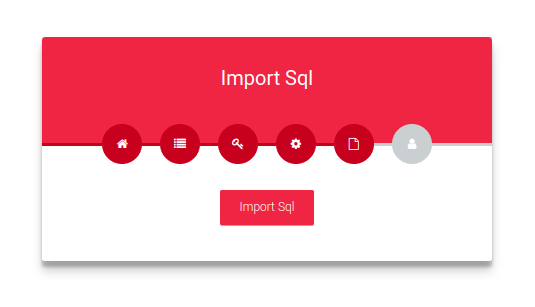
Now you need to import the SQL file. Click Import Sql.
While importing sql file, you may encounter "max_allowed_packet" limitation problem,
as like as the following image.
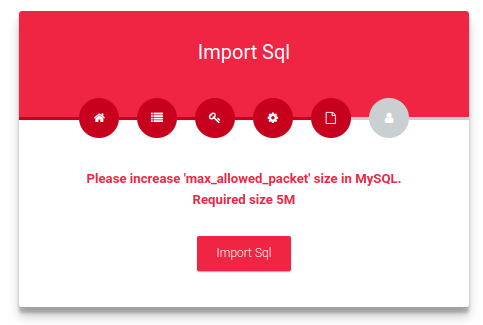
In that case you can ask your server administrator to increase mysql "max_allowed_packet"
limit to "5M".
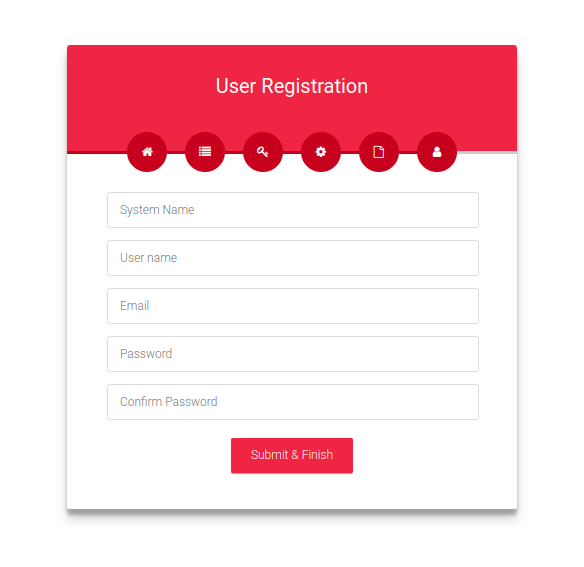
Fill in the information for your website and click Submit & Finish.
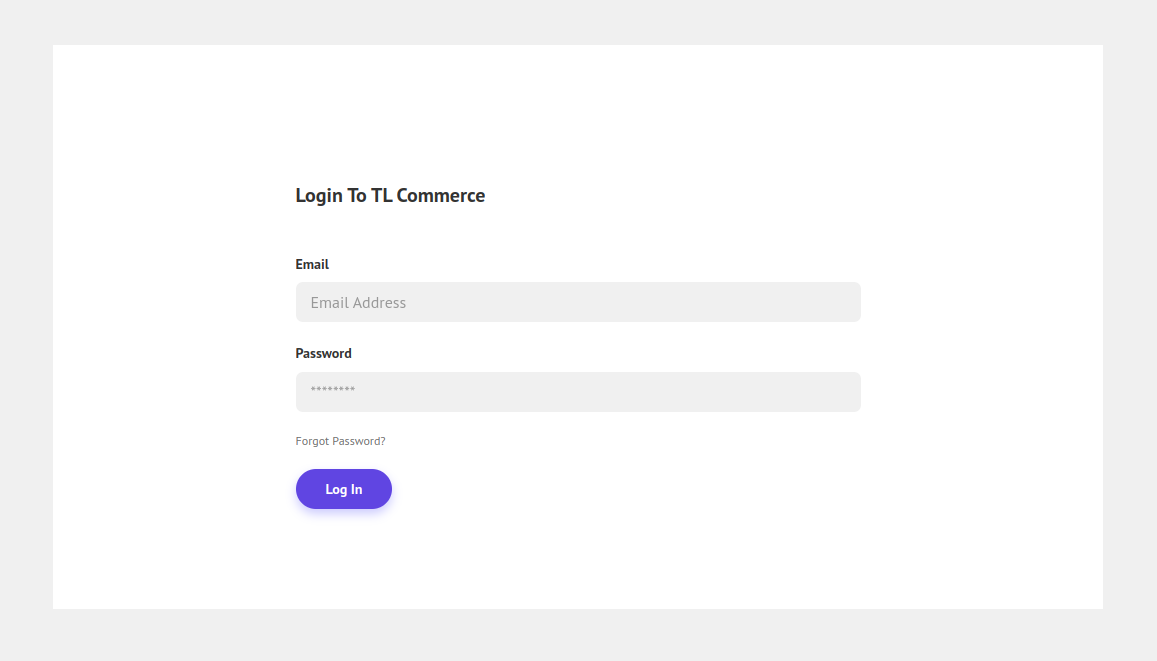
Now insert your Email and password and click Log In.
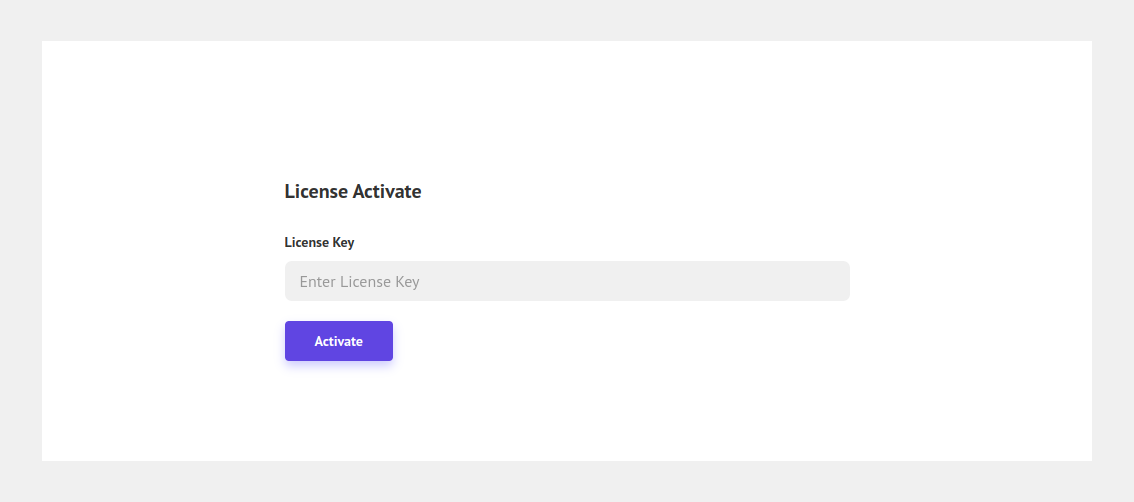
Give the License Key and click Activate.
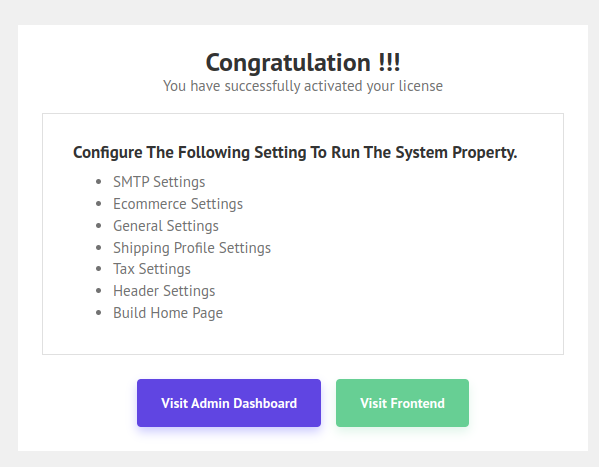
Congratulation you successfully installed the script. Now you can visit the frontend and backend of your website.
Here is a video tutorial on how to install TLCommerce to make it easy for you.
After successfully install the script you need to complete the flowing steps to run the system properly
- SMTP Setup
- Add Cron job
- E commerce Settings
- General Settings
- Shipping Profile , Zone and rate settings
- Setup website header
- Build home page
Note: If you does not complete cron job setup, the email is not sending to client .