

Once you successfully install the POS Plugin, a new menu item called Sales -> POS will appear in the sidebar. You may also see a POS button in the header. Click either option to open the POS page.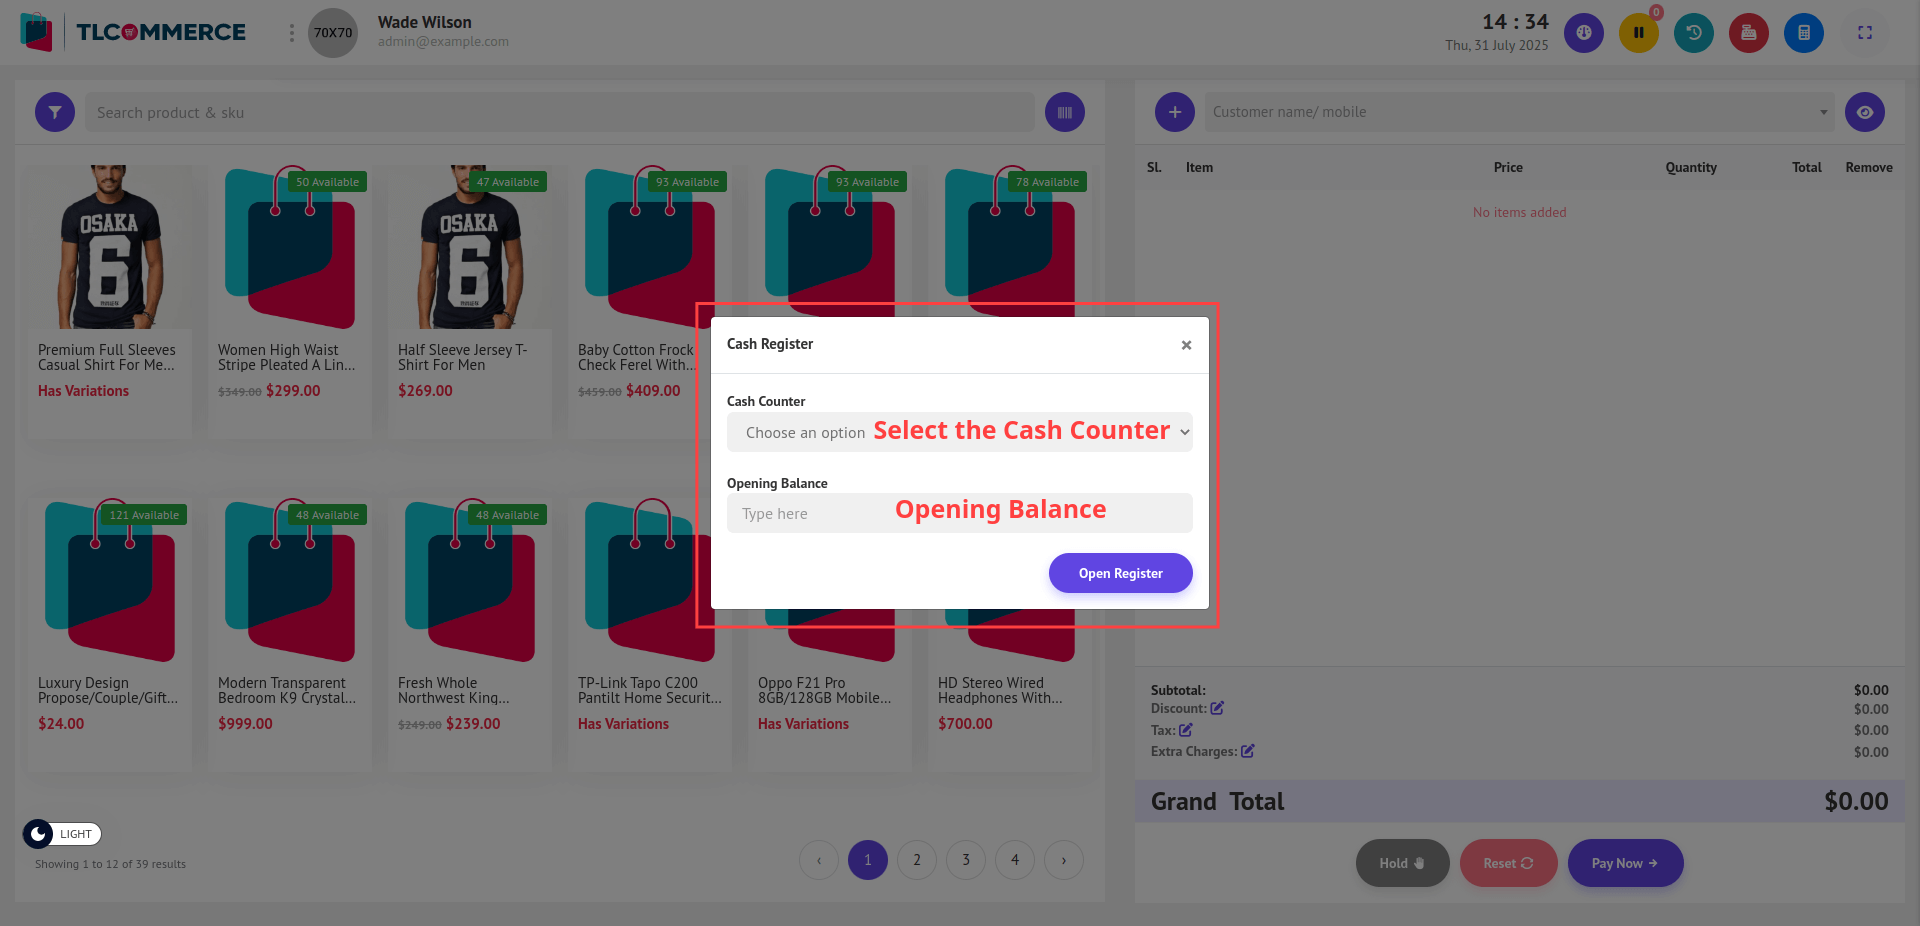
To access the POS page, follow these steps:
Select a Cash Counter: When the POS page opens, a pop-up will appear asking you to select a Cash Counter from the dropdown.
[Note: If no counters are available, go to Sales -> Settings -> Cash Counter and create a new counter. Once added, return to the POS page and select it from the dropdown.]
Opening Balance: Enter the initial amount of cash in the register under Opening Balance.
[Note: If you close the pop-up without opening a register, you will be redirected back to the dashboard automatically.]
Once the cash counter is selected and the opening balance is provided, click the Open Register button.

1. Single Product: Clicking on a single (non-variable) product will directly add it to the cart.
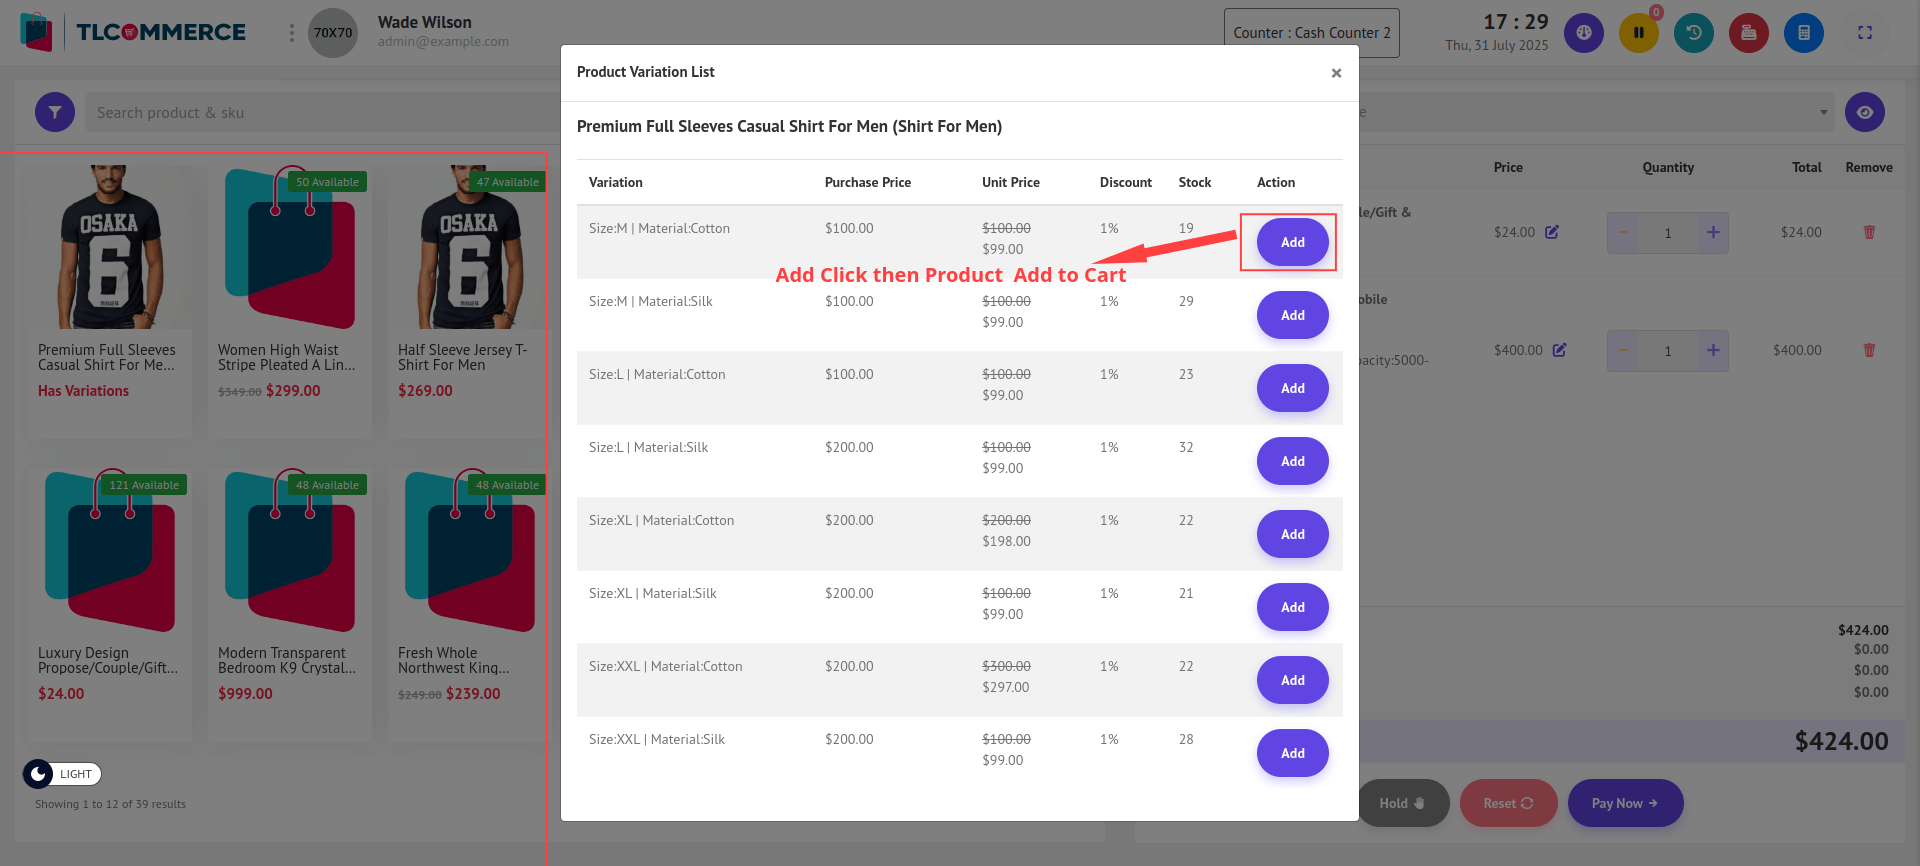
2. Variation Product:
Clicking on a product with variations (e.g., size, color) will open a pop-up. Select the variant and click Add to insert it into the cart.
3. Filter Option:
Click the filter icon beside the product search bar to open a filter pop-up.
From here, you can filter products in the following ways:
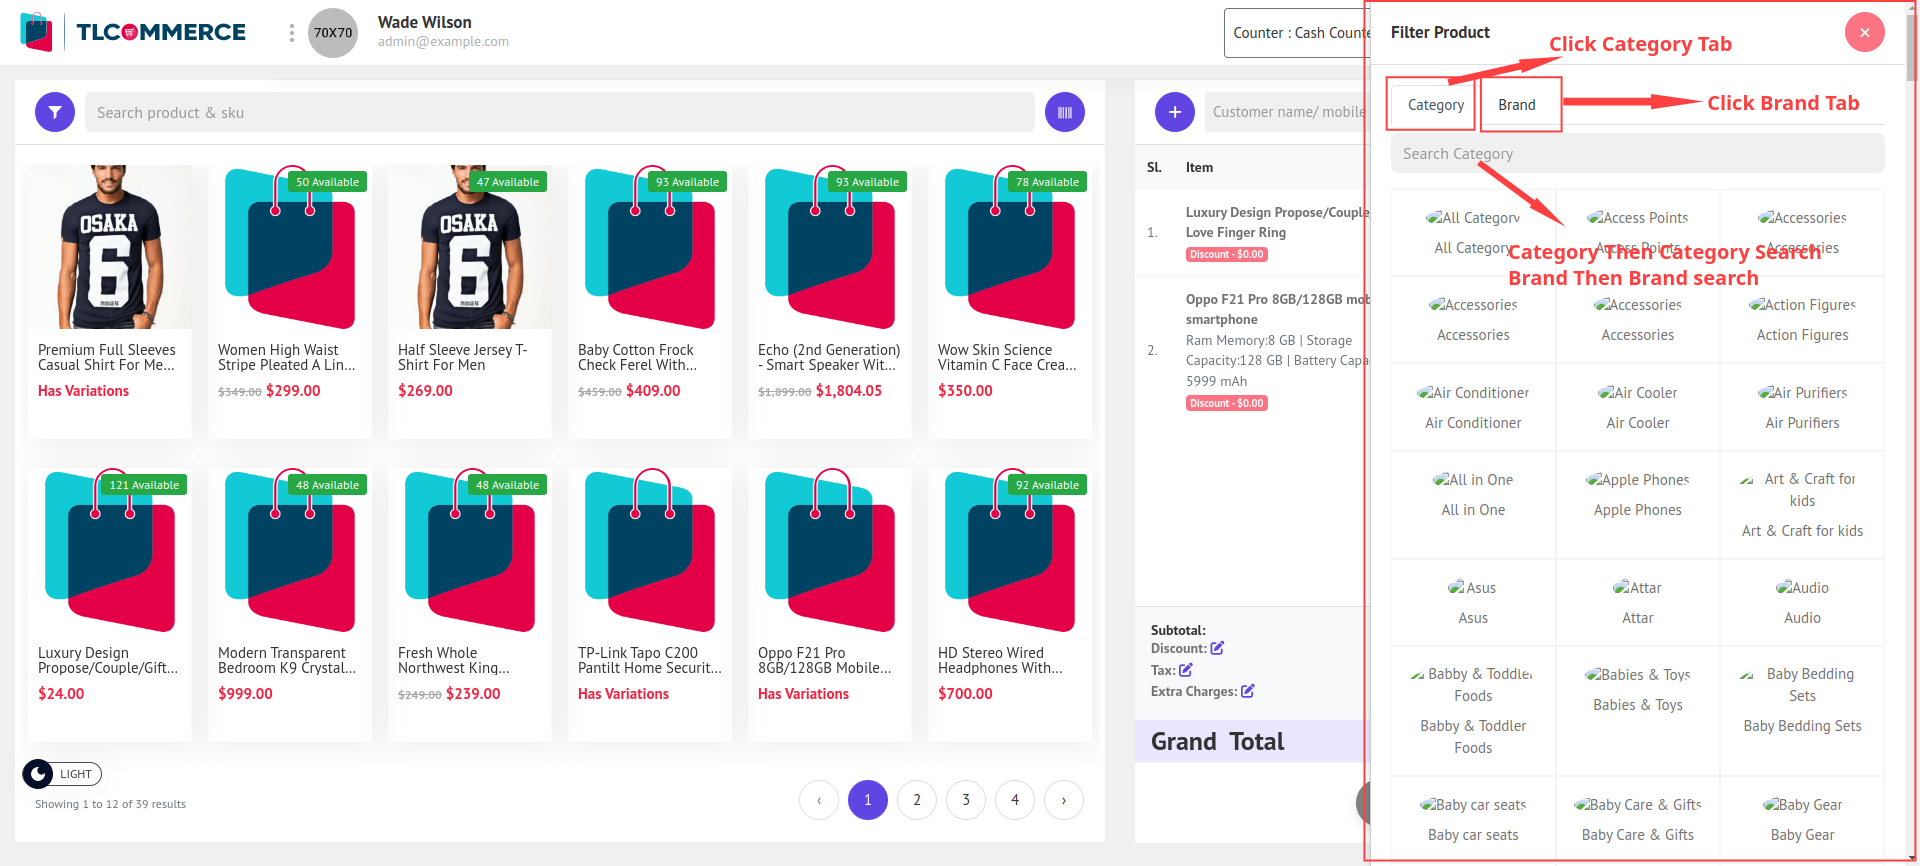
- By Category: Click the Category tab to view all available product categories. You can also search for a specific category using the search bar.
- By Brand: Click the Brand tab to see a list of brands. You can search by brand name to quickly narrow down the list.
4. Product Search: Use the search input to find products by name or SKU instantly.
5. Barcode Scan:
- Click the barcode icon to scan products.
- If the scanned product is single, it will be added to the cart directly.
- If it's a variation product, a variant selection pop-up will open (Same as Variation Product).
6. Add Customer: Clicking the Add Customer button opens a pop-up where you can enter:
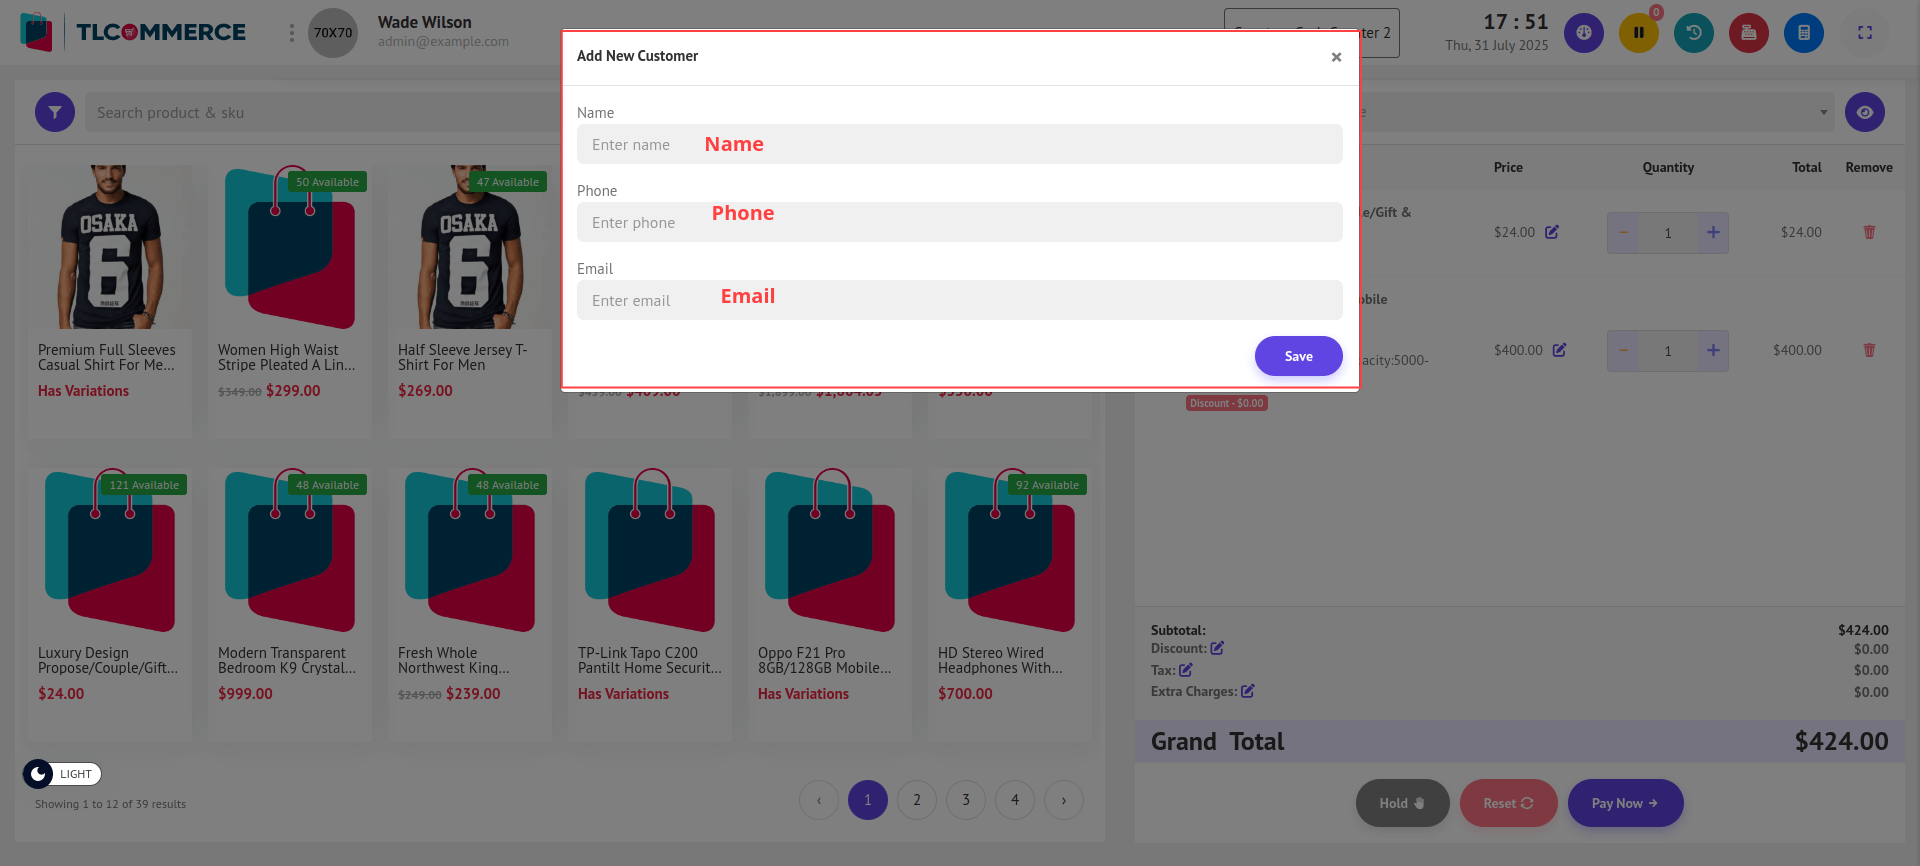
- You can now create a customer by providing the necessary details. Enter the Name, Phone, and email.
7. Customer Select: You can search for and select an existing customer using name or phone number.
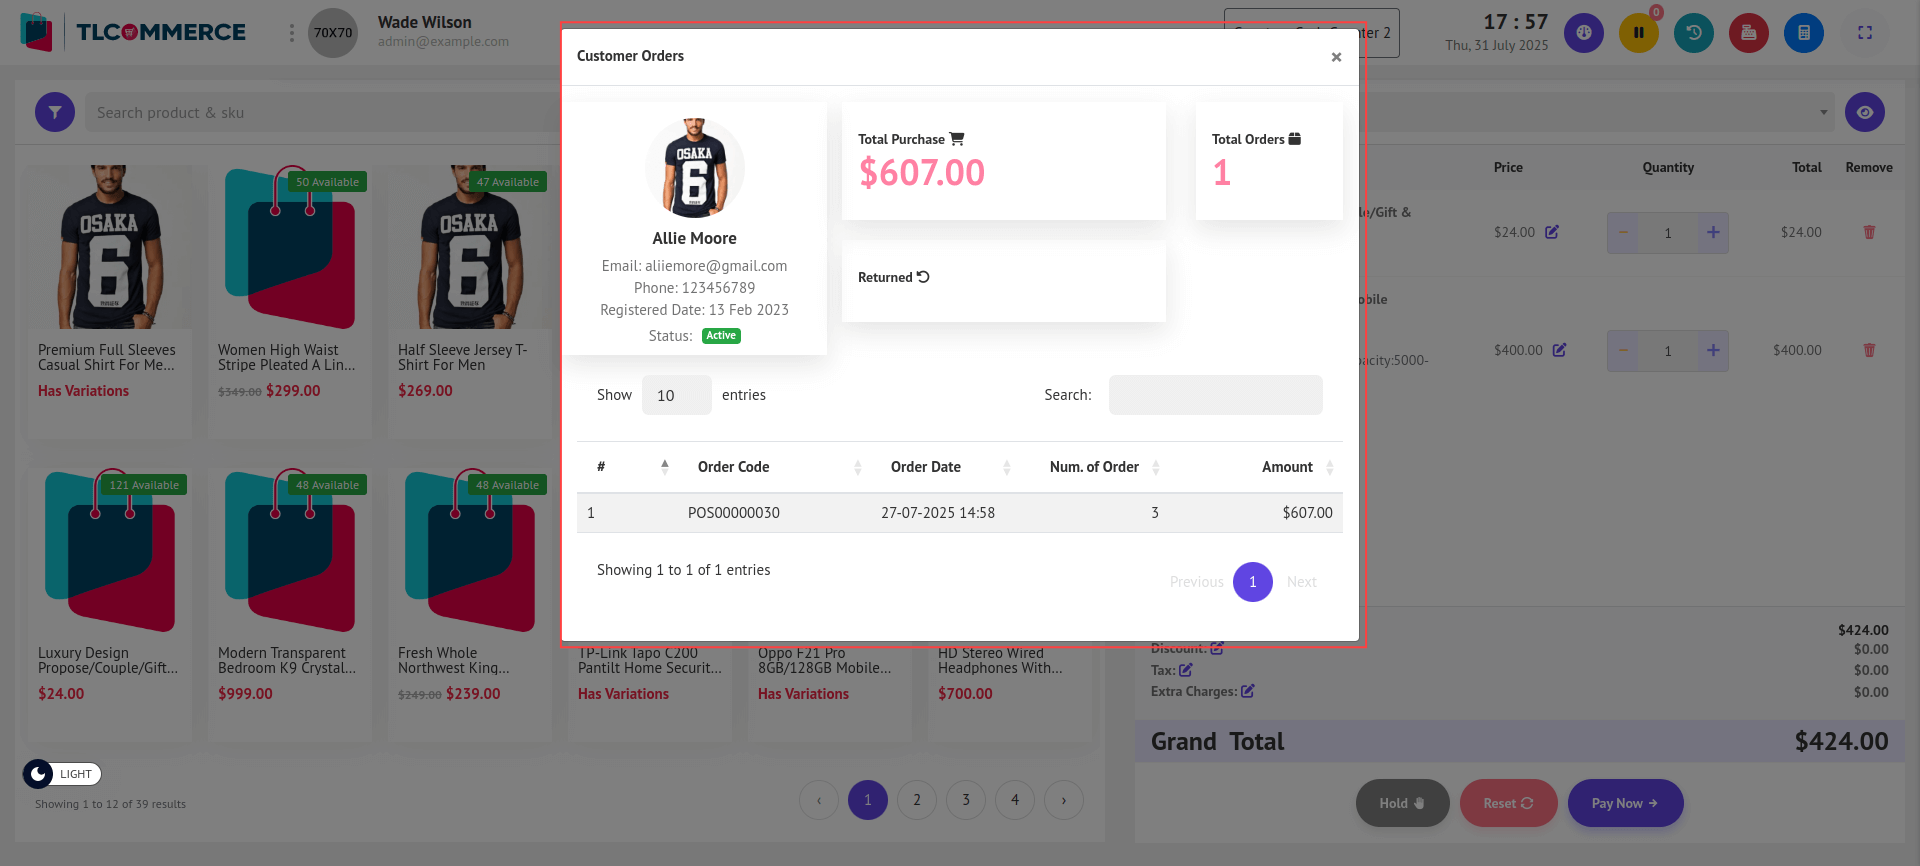
8. Customer Order: After selecting a customer, click the view icon beside their name to open a pop-up showing all orders made by that customer.
9. Dashboard: Clicking the Dashboard icon will redirect you to the main Home page of the admin panel.
10. Hold Order: Click the Hold Order button to save the current cart temporarily.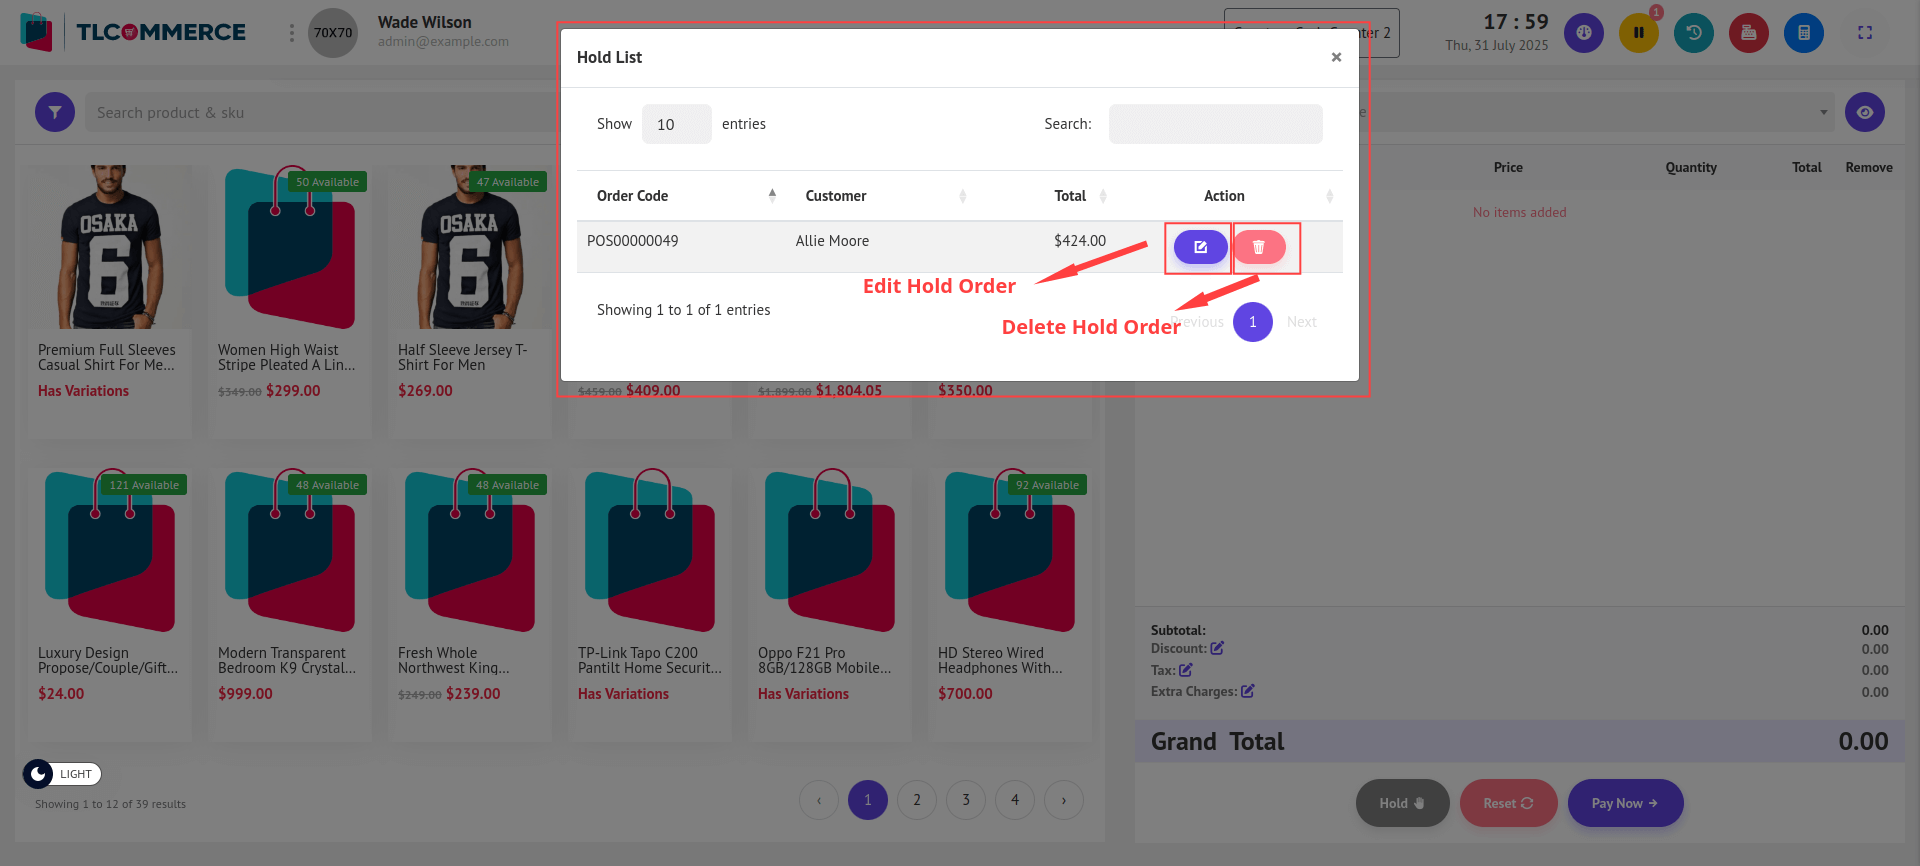
- Click the edit Icon beside an order to restore it to the cart.
- Click the Delete Icon, then delete this hold order
11. Recent Order: Clicking Recent Order will open a pop-up showing all orders made today.
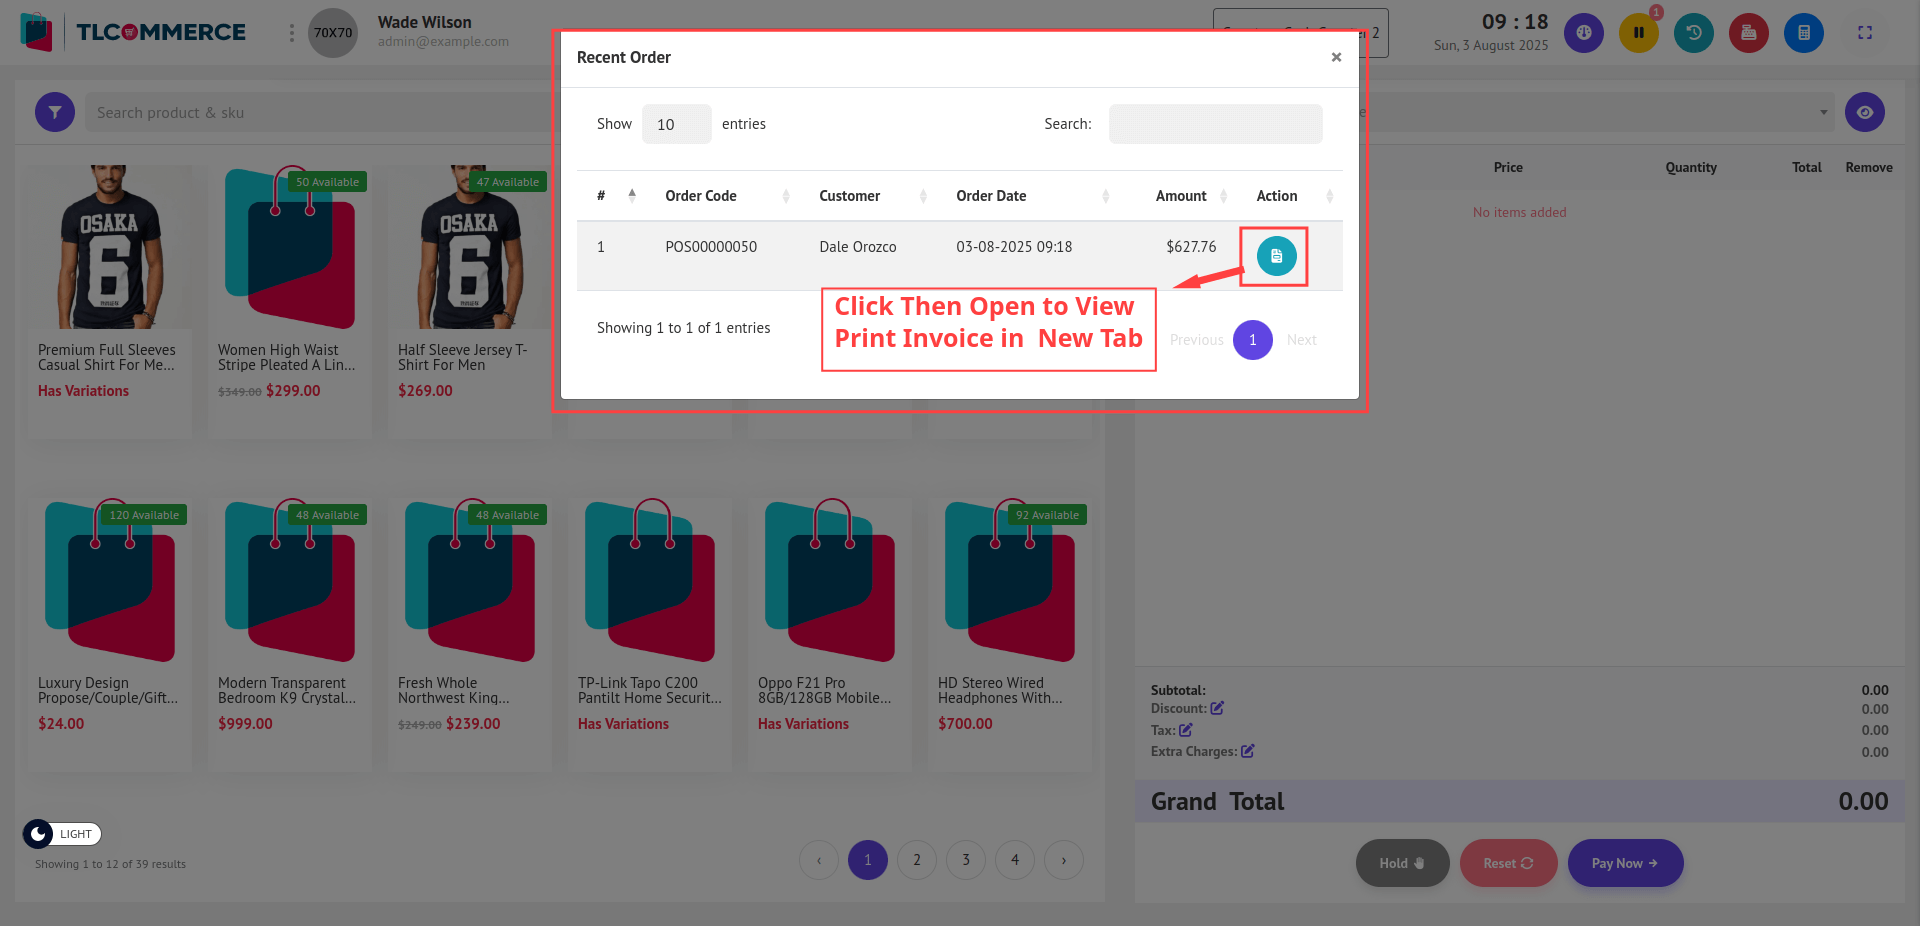
- Click the invoice icon to open that invoice in a new browser tab.
12. Cash Register: Click Cash Register Details to view a pop-up with today's sales summary.
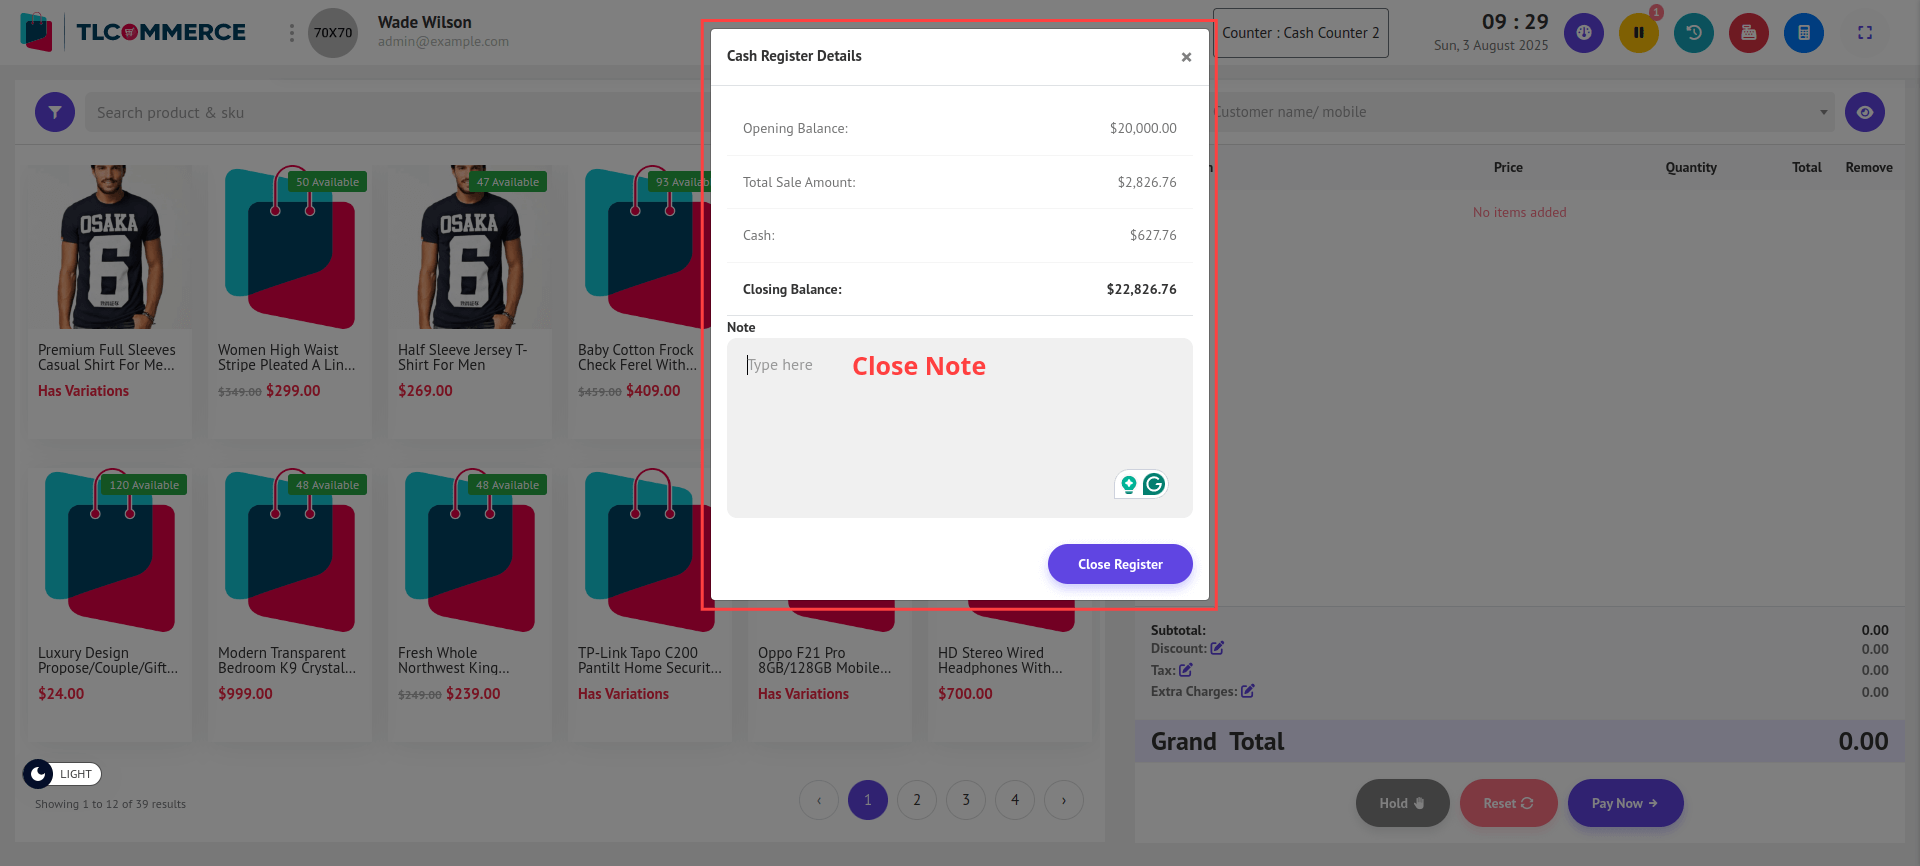
- After reviewing the cash register details, you can enter a note (optional), then click Close Register. The closing balance will be recorded and stored for the day.
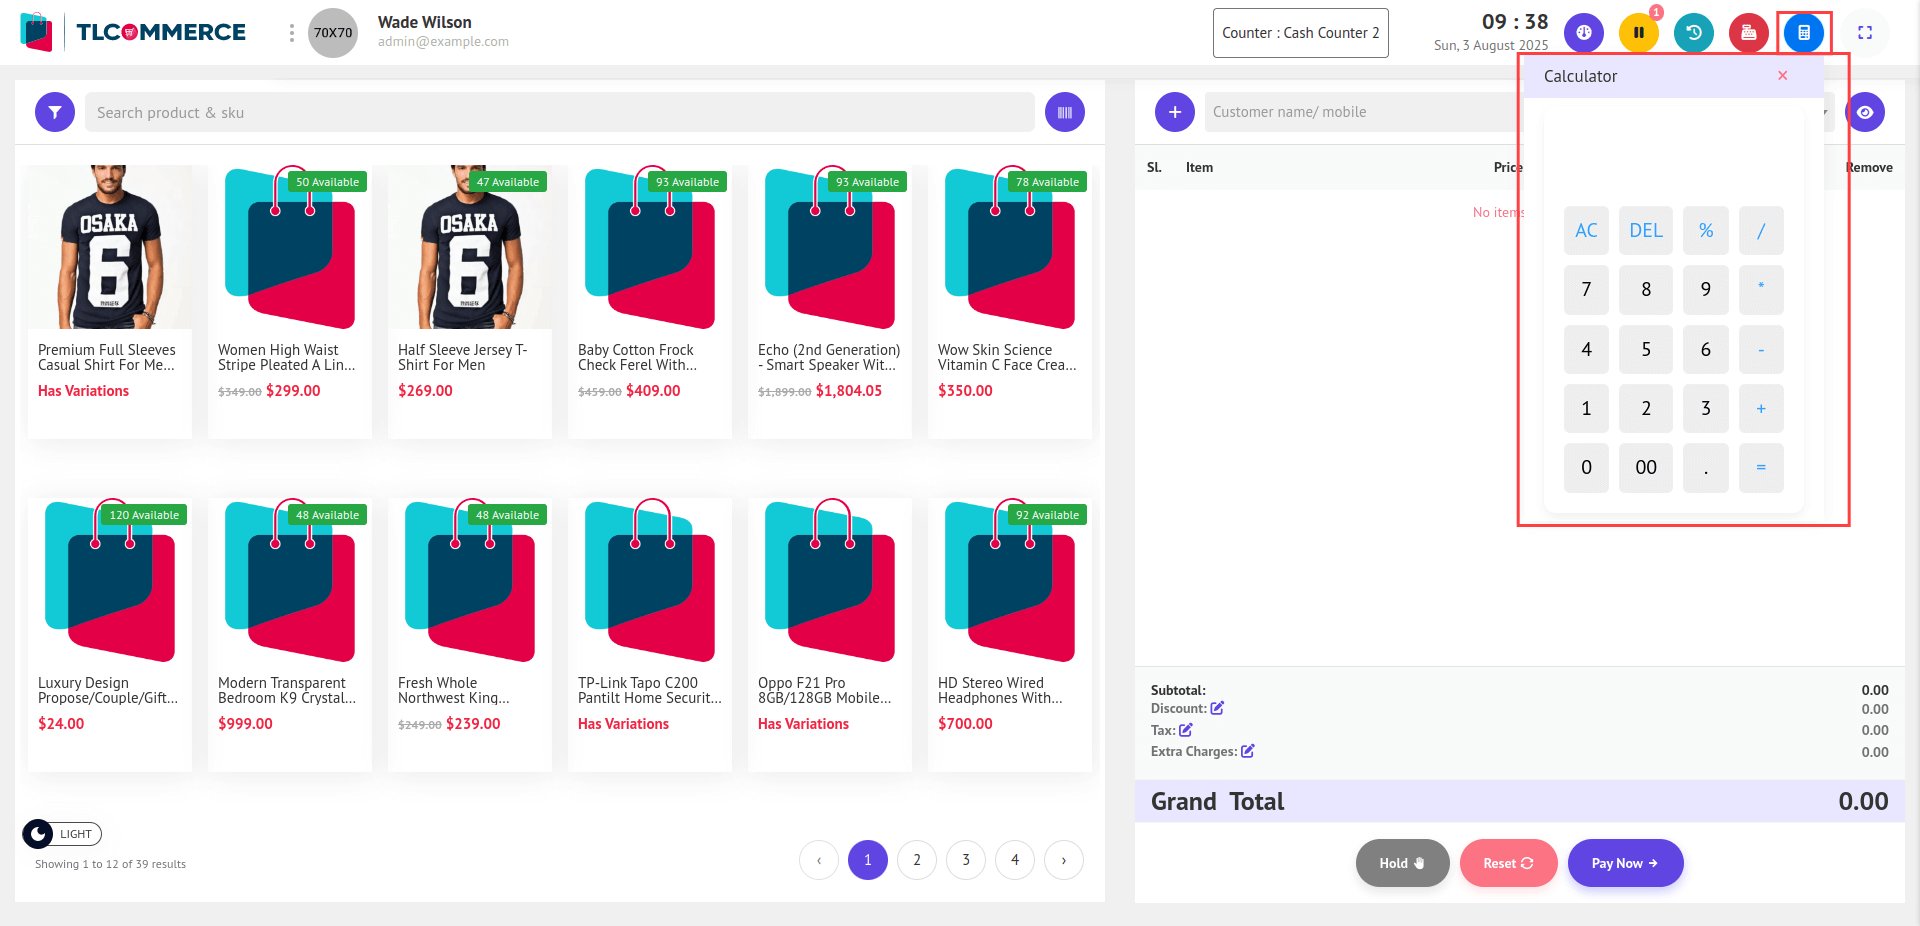
13. Calculator: Click the Calculator icon to open a built-in calculator pop-up.
14. Full Screen: Click the Full Screen icon to toggle the POS interface into full screen mode.
15. Item Edit: Click the Edit icon beside a cart item to open a pop-up where you can,
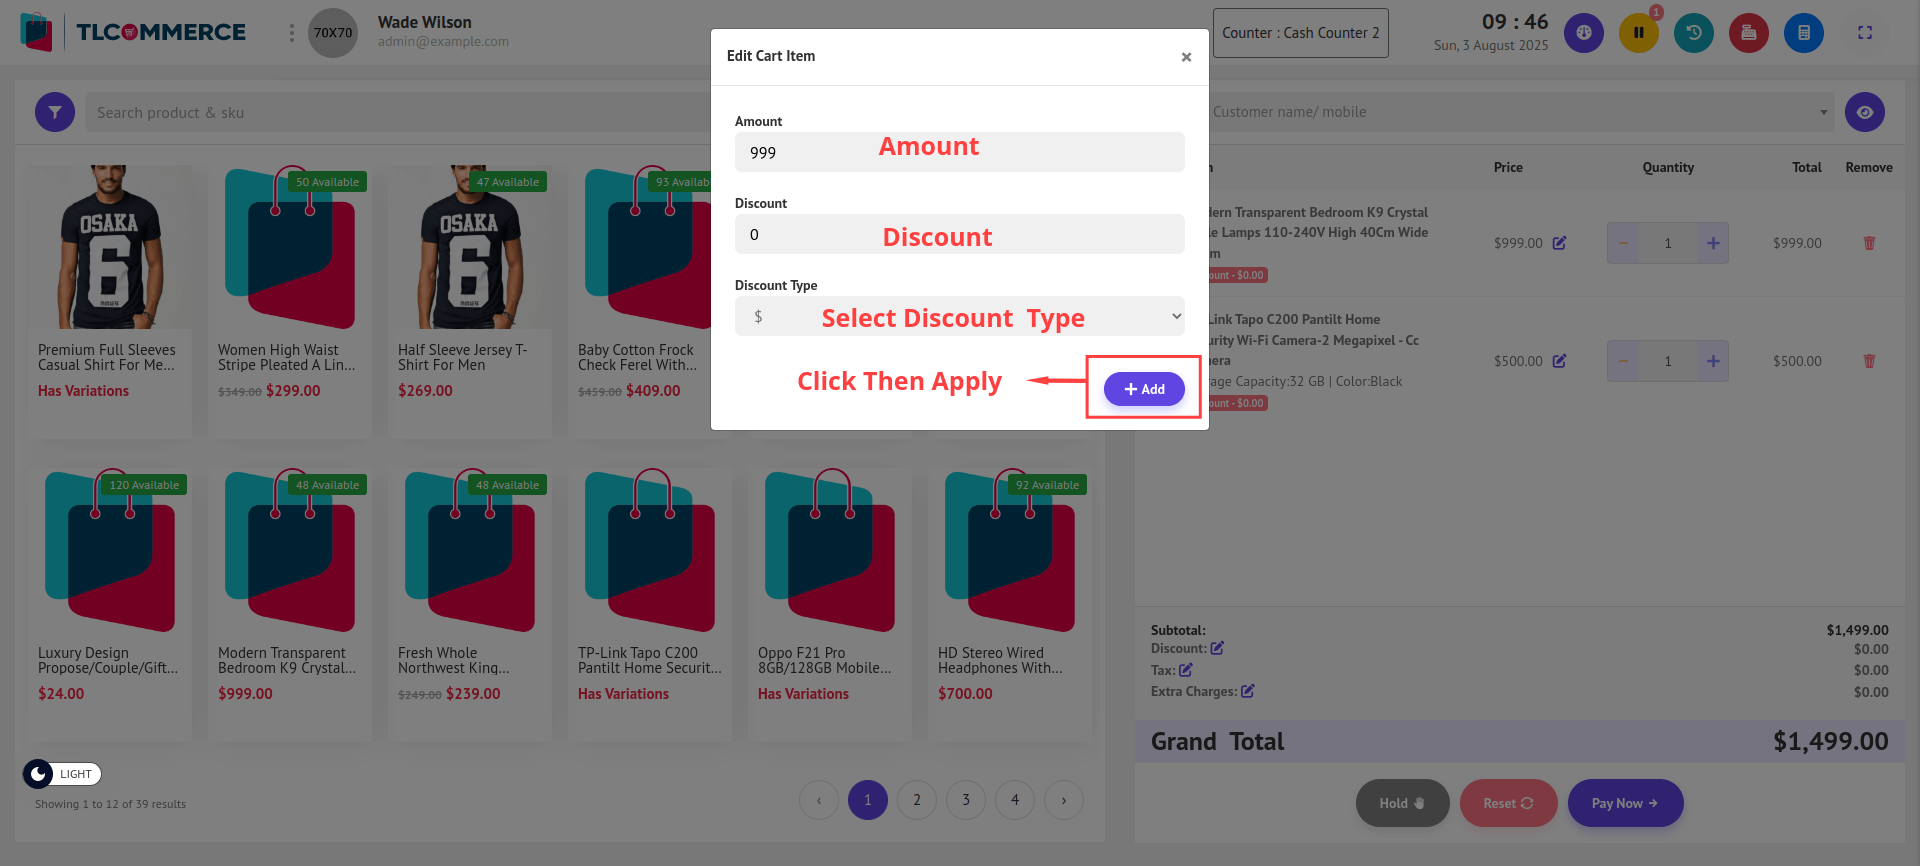
- Set the Changed Amount, Discount, and Discount Type, then click Add. The updated information will be applied to the selected cart item
16. Quantity:
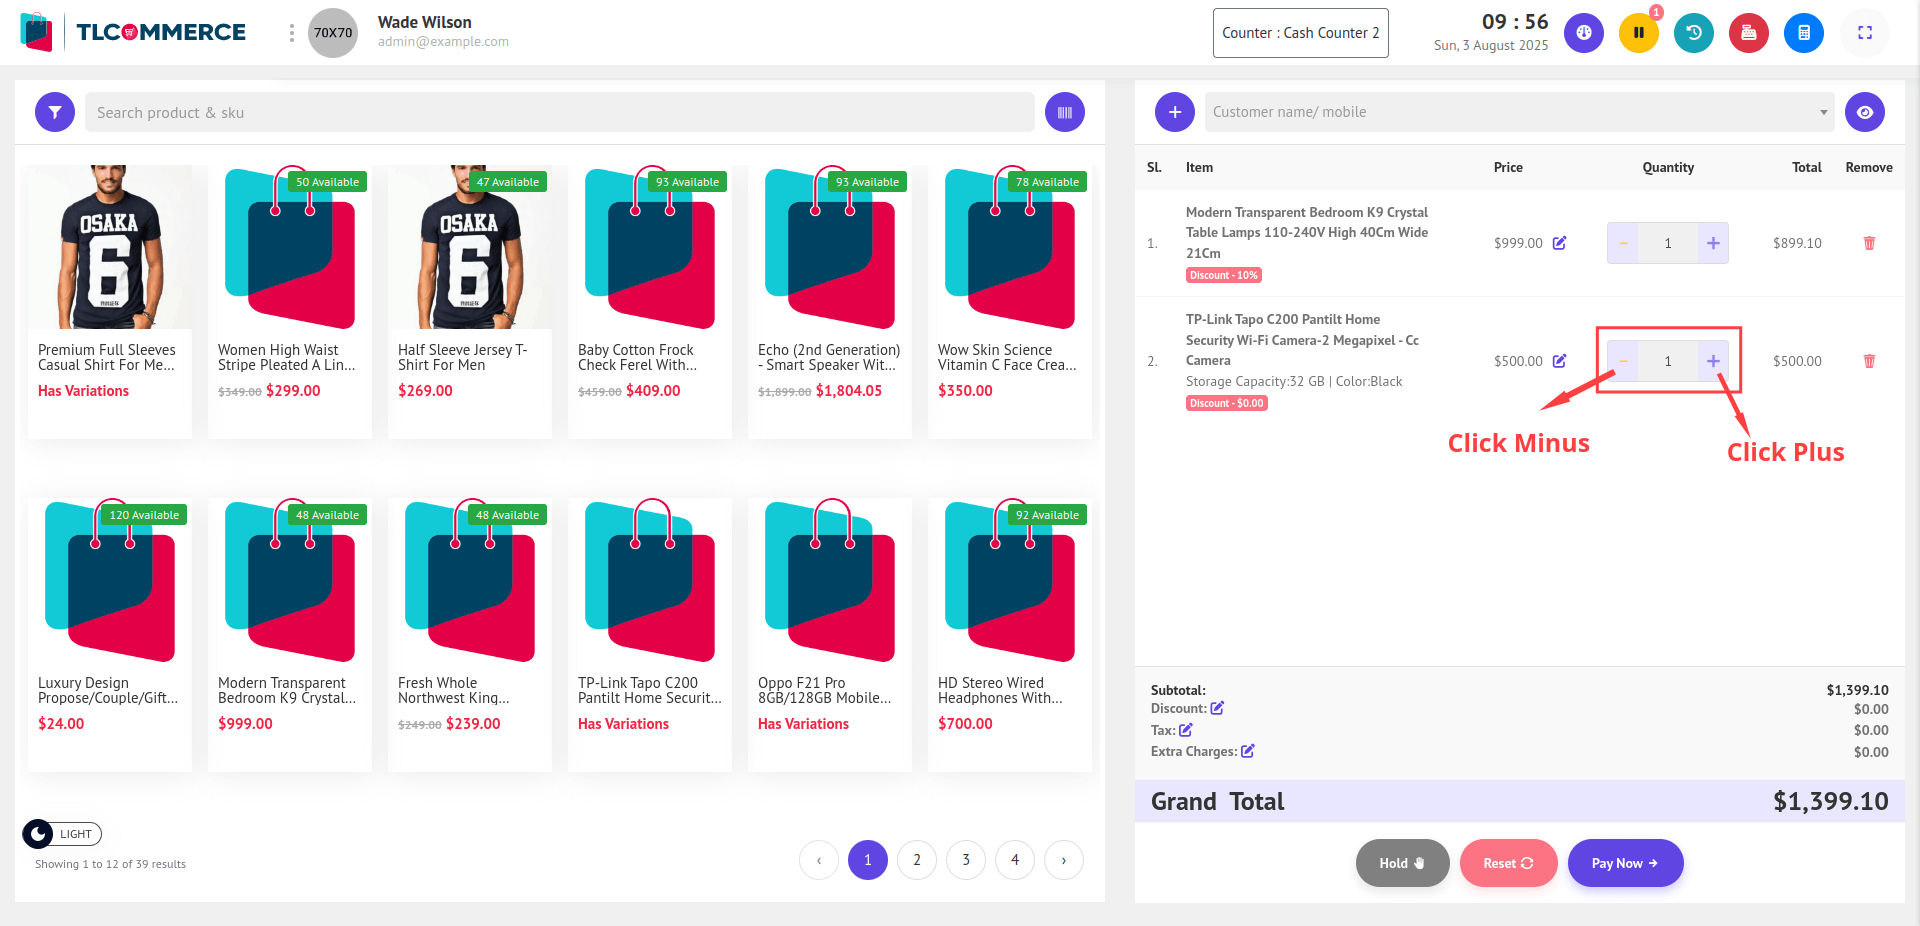
- Use the + and – buttons next to a cart item to increase or decrease its quantity.
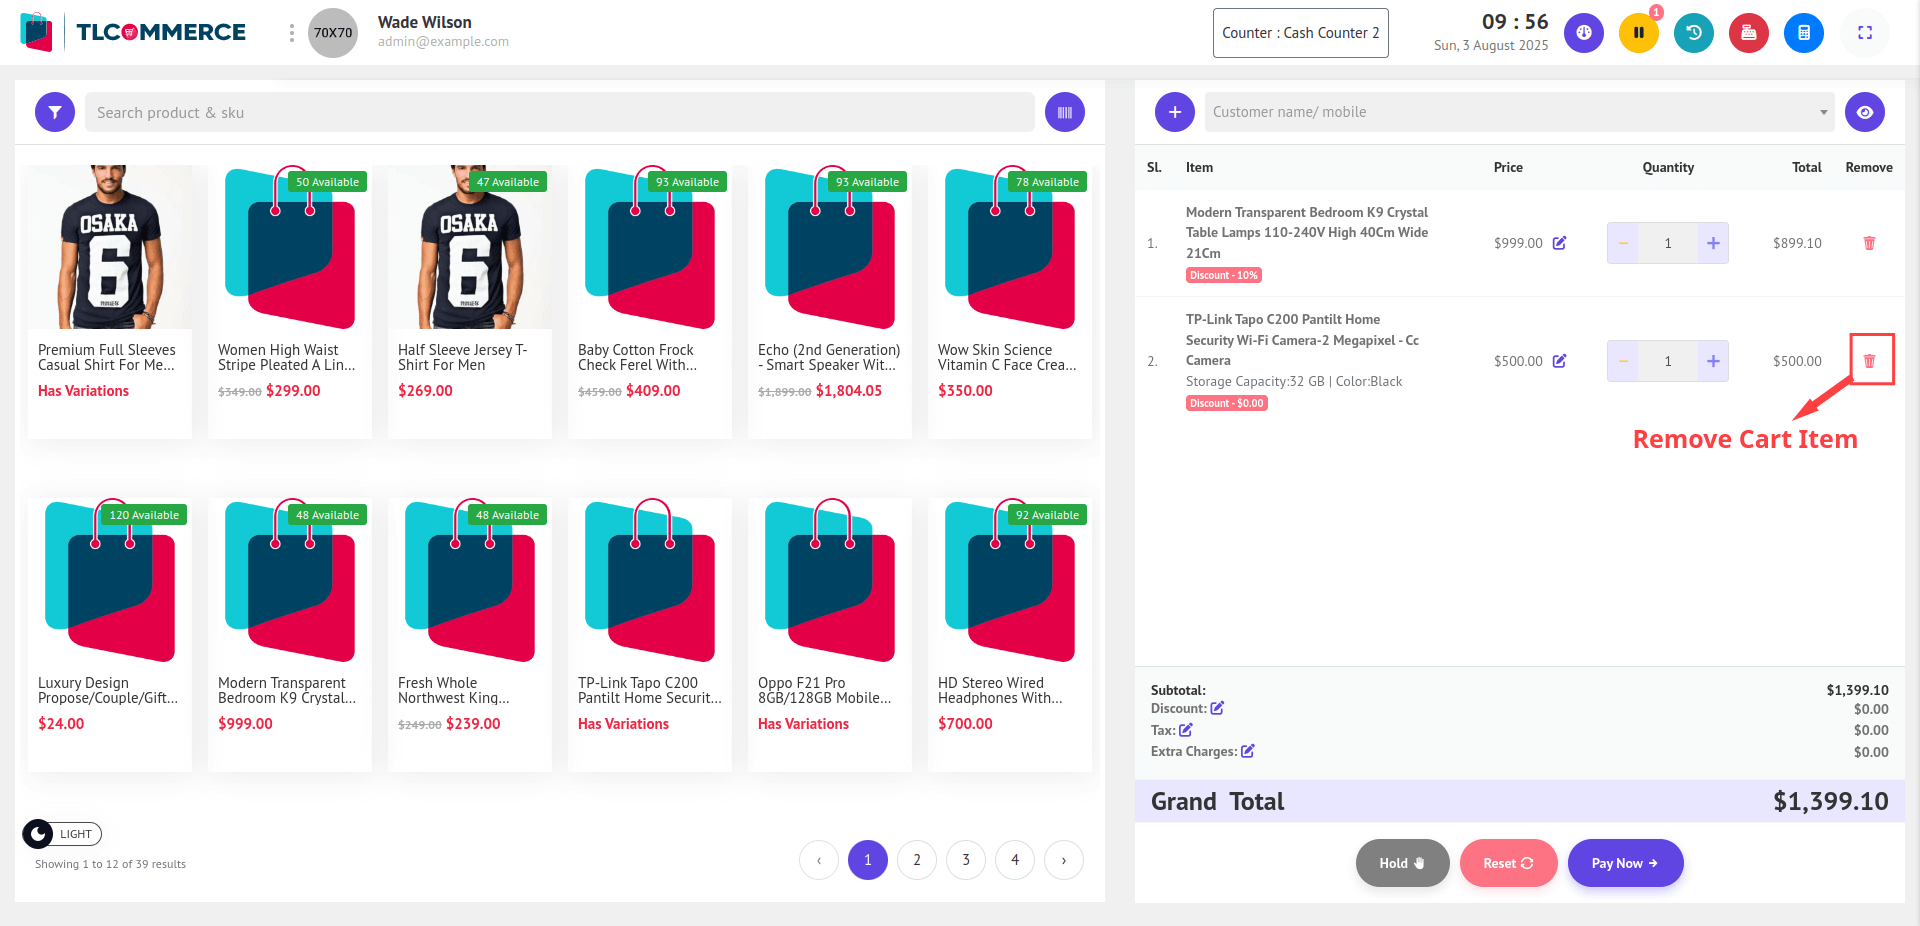
17. Remove Item: Click the Trash icon next to a cart item to remove it from the cart.
18. Add Discount: Click the Edit icon a pop-up will open on your screen.
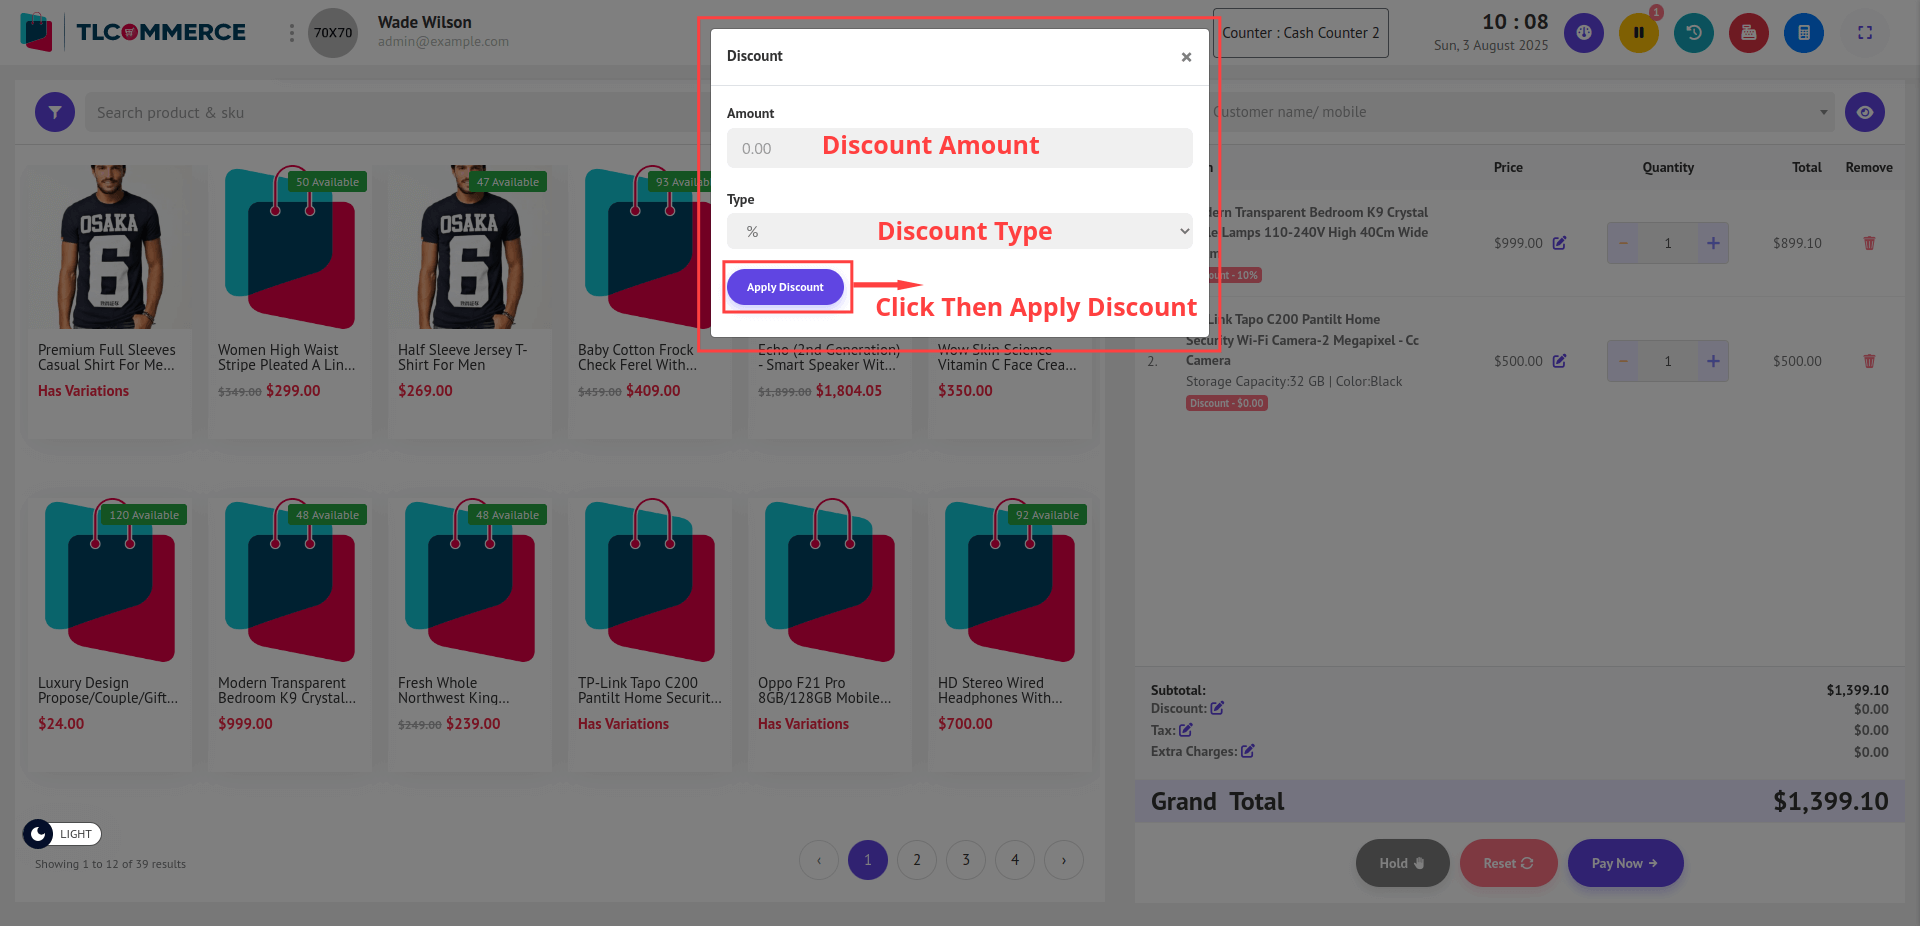
- Enter the discount amount, select the discount type (percentage or fixed), and click Apply Discount. The new discount will be applied.
19. Add Tax: Click the Edit icon a pop-up will open on your screen.
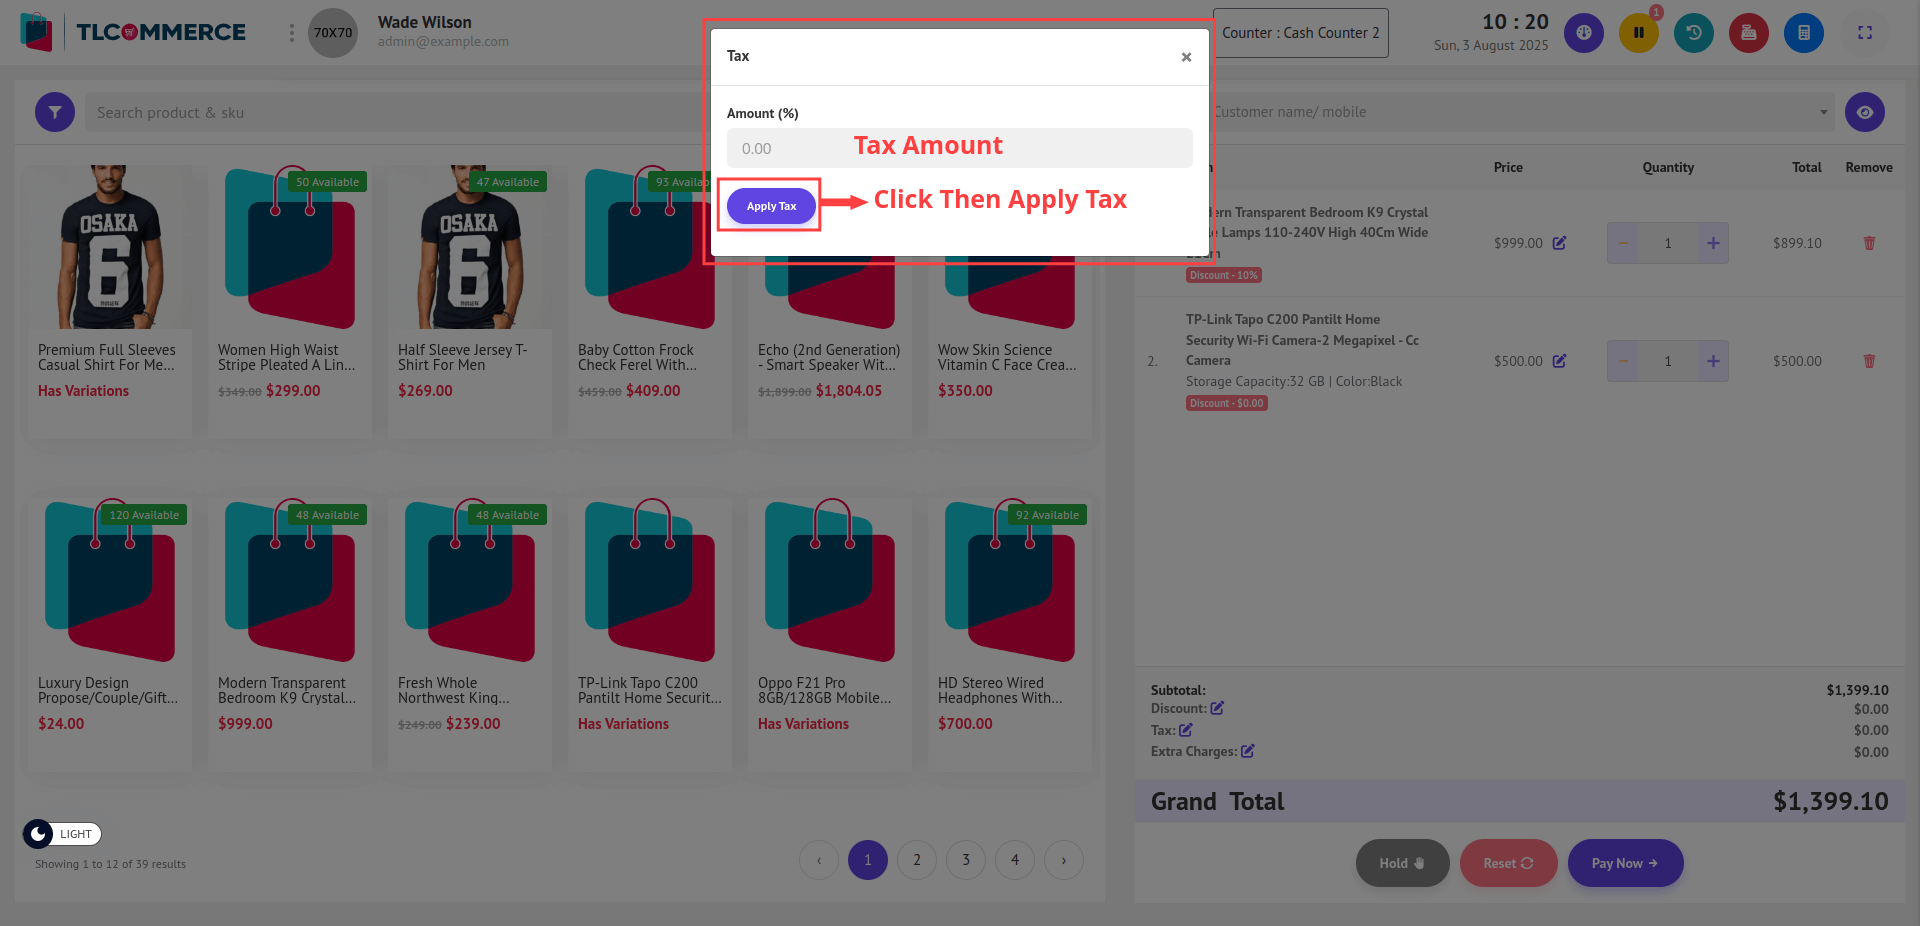
- Set the Tax Amount and click Apply Tax. This will update the tax information and apply it.
20. Add Extra Charge: Click the Edit icon beside Extra Charges. A pop-up will open on your screen.
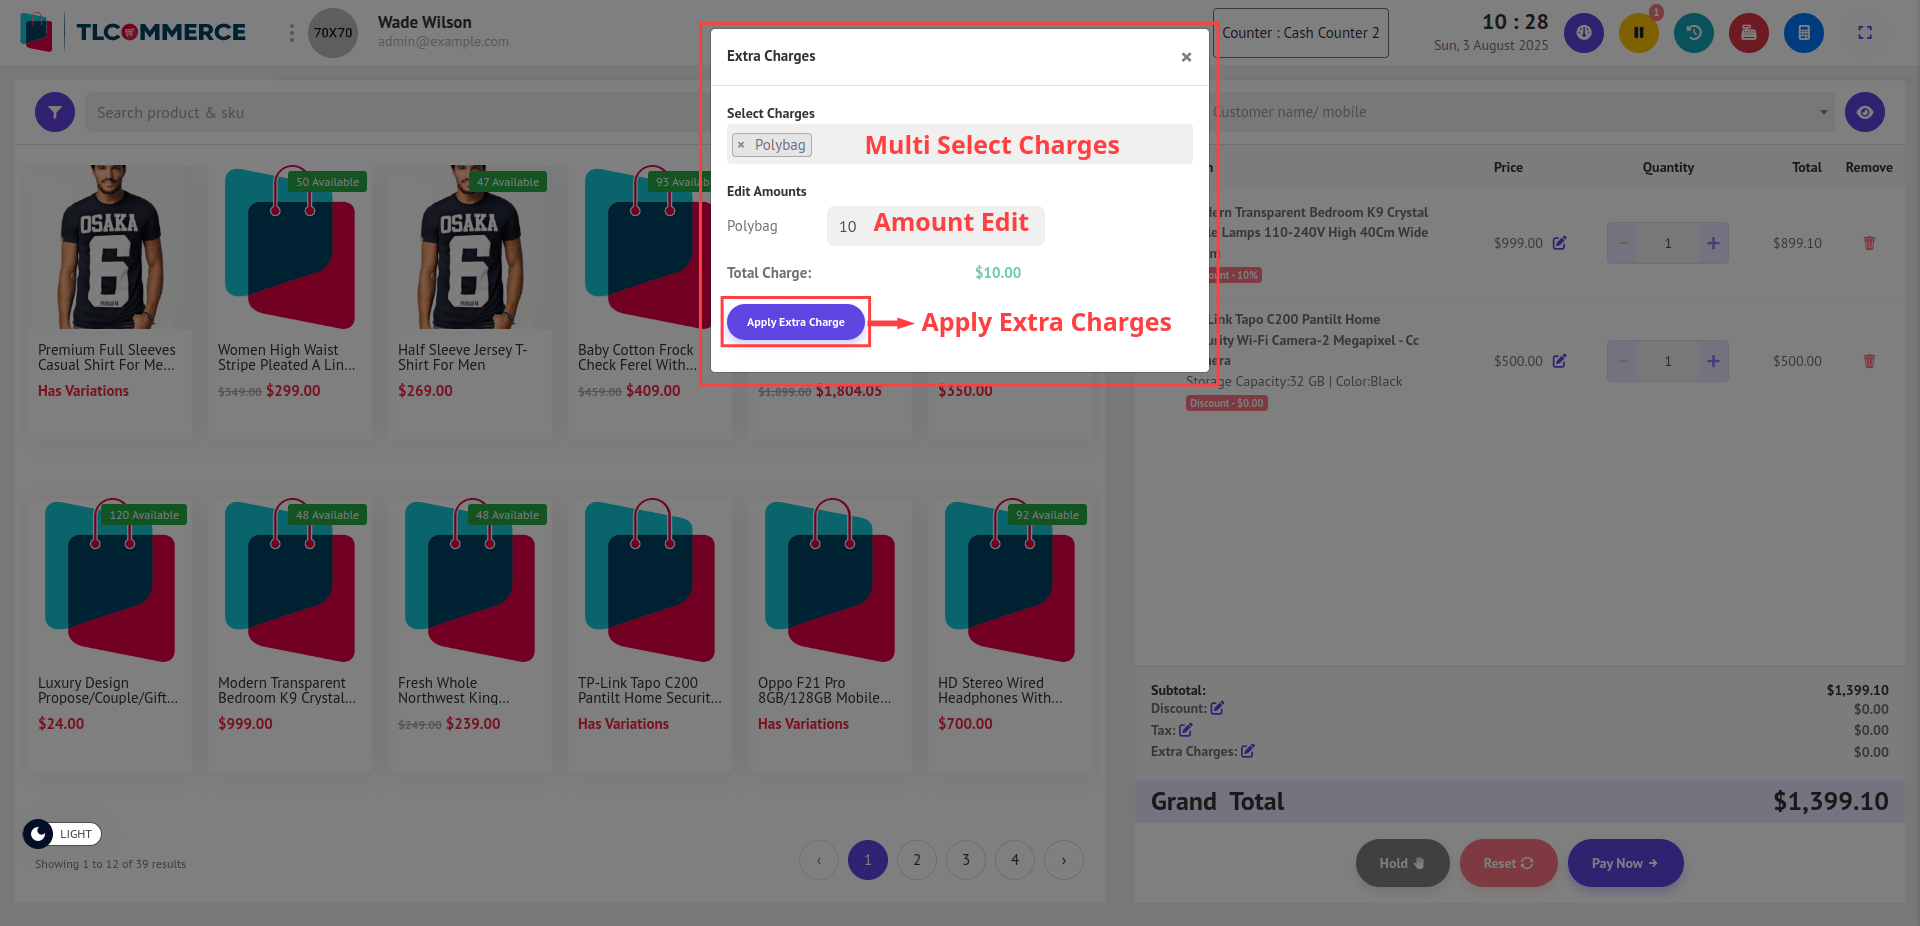
- Select one or more extra charges using the multi-select dropdown. Once selected, you can edit the amounts if needed. Then, click Apply Extra Charge to update and apply the information.
21. Hold Order: When you click the Hold button, all items currently in the cart will be saved as a Hold Order List, allowing you to retrieve and resume it later.
22. Reset: Click the Reset button to clear the entire cart and start fresh.
23. Pay Now: Click Pay Now to open the payment pop-up screen and complete the transaction.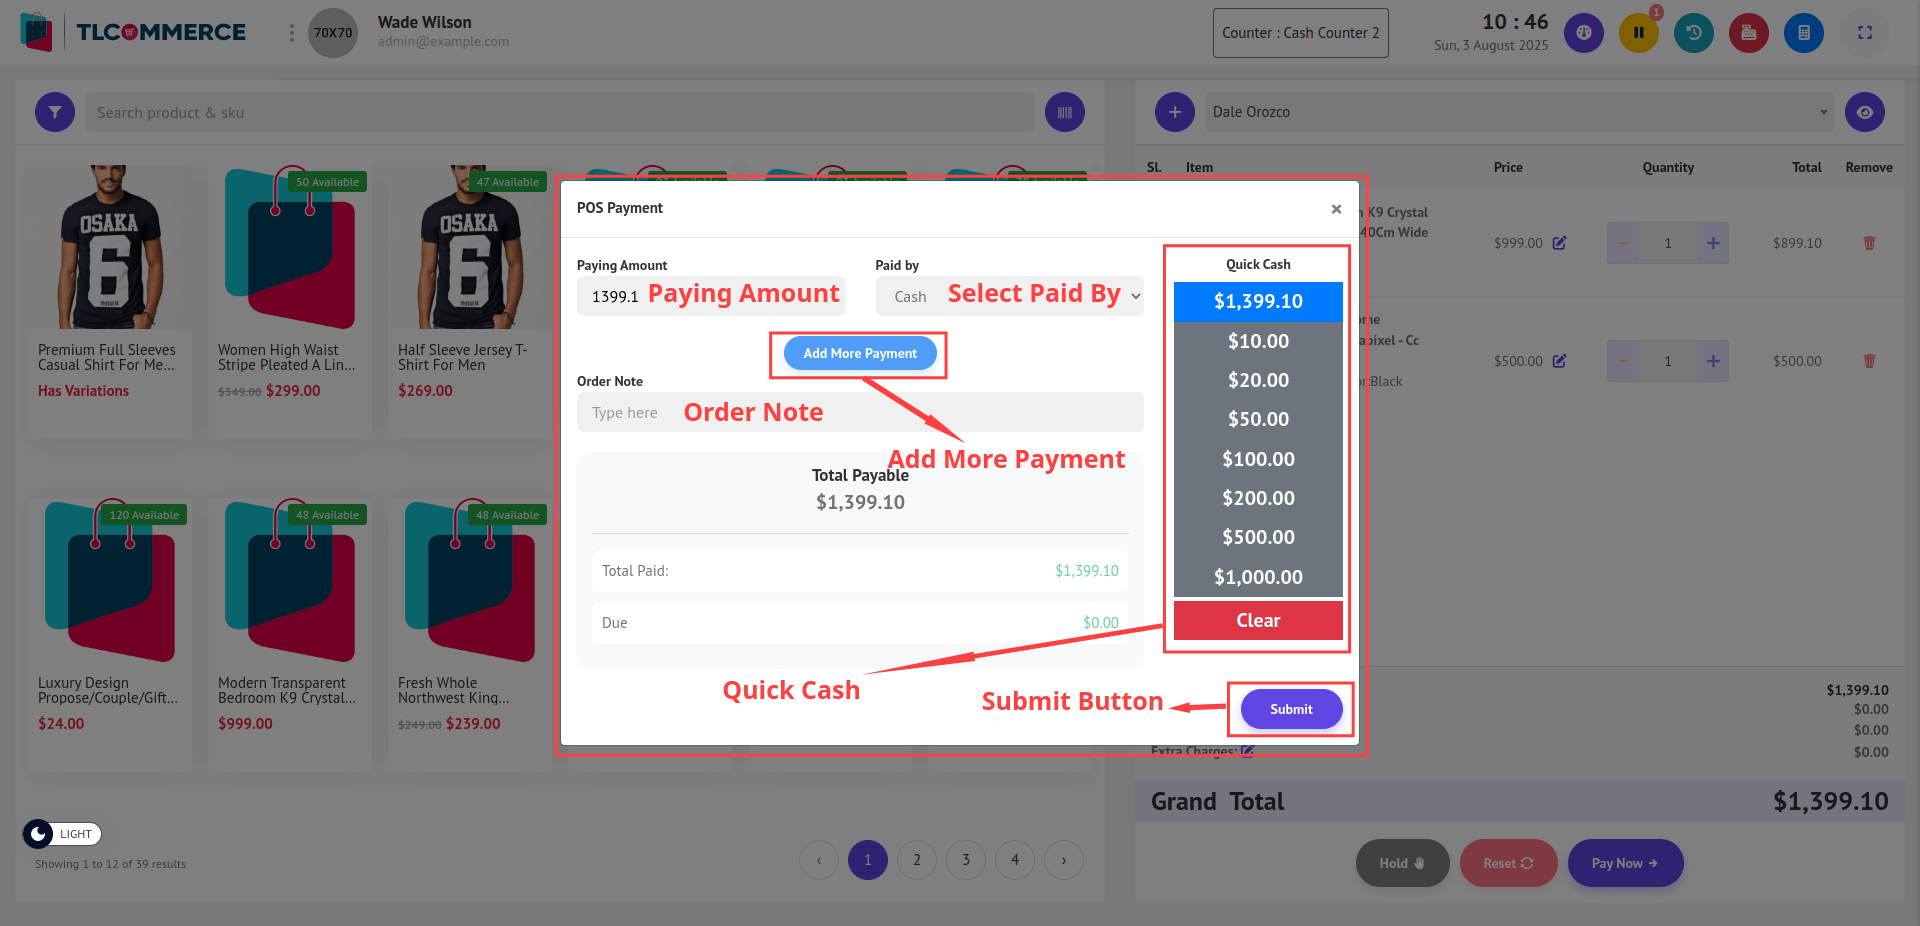
Paying Amount: The Paying Amount field is automatically filled with the total amount due.
Paid By: You can select the Paid By method from available options such as Cash, Bank, Card, etc.
Payment Input: The user can enter an amount to pay manually.
- If the entered amount is more than the due amount, the Change field updates automatically to show the amount to be returned.
- If the payment is partial (less than the total amount), the Due field updates accordingly to show the Change Amount.
Quick Cash: The user can select predefined amounts using Quick Cash buttons for faster payment input.
Multi-Payment Option: The user can pay using multiple payment methods.
- Clicking the "Add More Payment" button (located above the payment fields) will add a new payment entry section.
- Each payment entry allows the user to select the Paying Amount and the Paid By Method (e.g., Cash, Bank).
After entering the payment details, click the Submit button.
Once submitted, the invoice will automatically open in a new browser tab for printing.