

Once the POS Plugin is successfully installed, a new sidebar menu item called Sales will appear.
To view the Barcode Generator, navigate to: Sales → Barcode Generator.
Here, you will see the Barcode Generator page
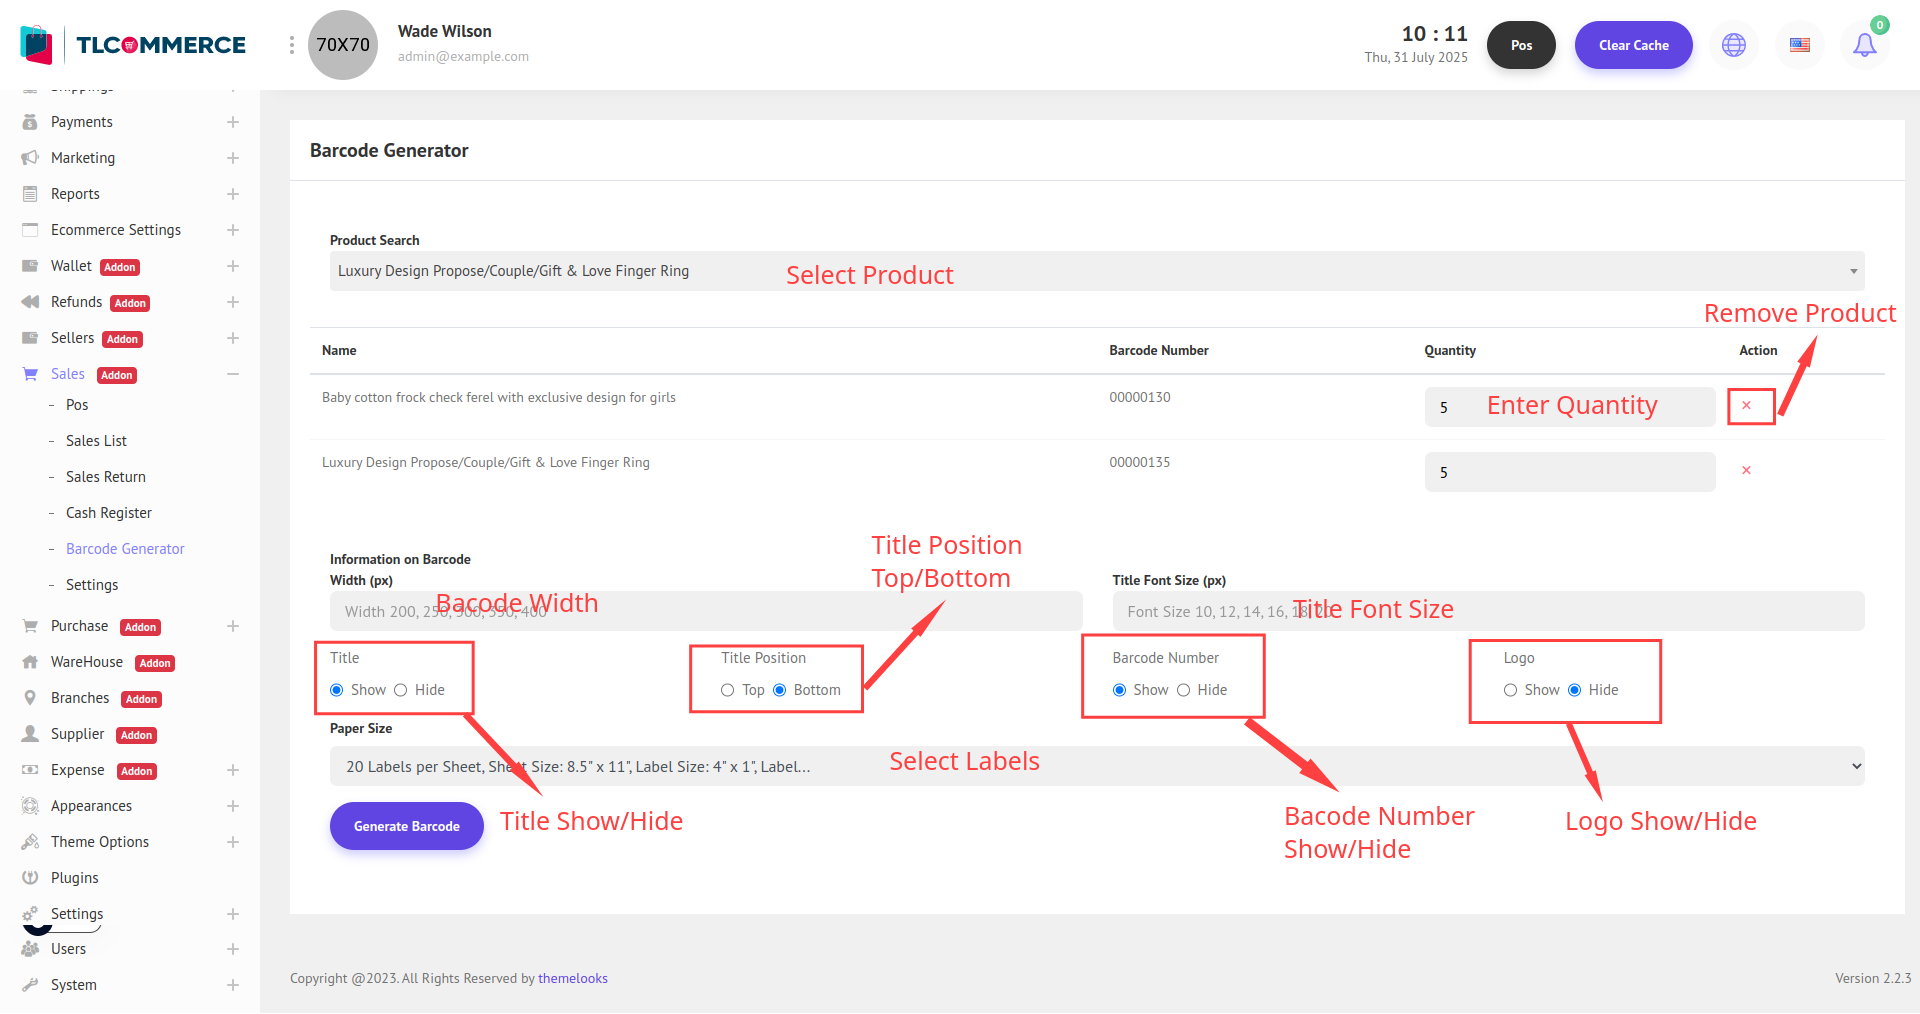
Product Search: Use the product search dropdown to select the product(s) for which you want to generate barcodes.
Product List Table
Name: Product name.
Barcode Number: Auto-generated unique barcode number for the product.
Quantity: Enter how many barcode labels you want to generate for each product.
Action: Click the red "X" to remove the product from the list.
Information on Barcode
Width (px): Enter the barcode label width. Supported widths include: 200, 250, 300, 350, 400.
Title: Show or Hide the product title on the barcode.
Title Position: Choose Top or Bottom for where the title should appear on the label.
Title Font Size (px): Enter the font size for the title. Suggested values: 10, 12, 14, 16, 18, 20.
Barcode Number: Choose to Show or Hide the barcode number below the barcode line.
Logo: Choose to Show or Hide your business logo on the barcode label.
Paper Size: Select the sheet type and label size from the dropdown.
Click the Generate Barcode button to produce the barcode labels based on your selected settings.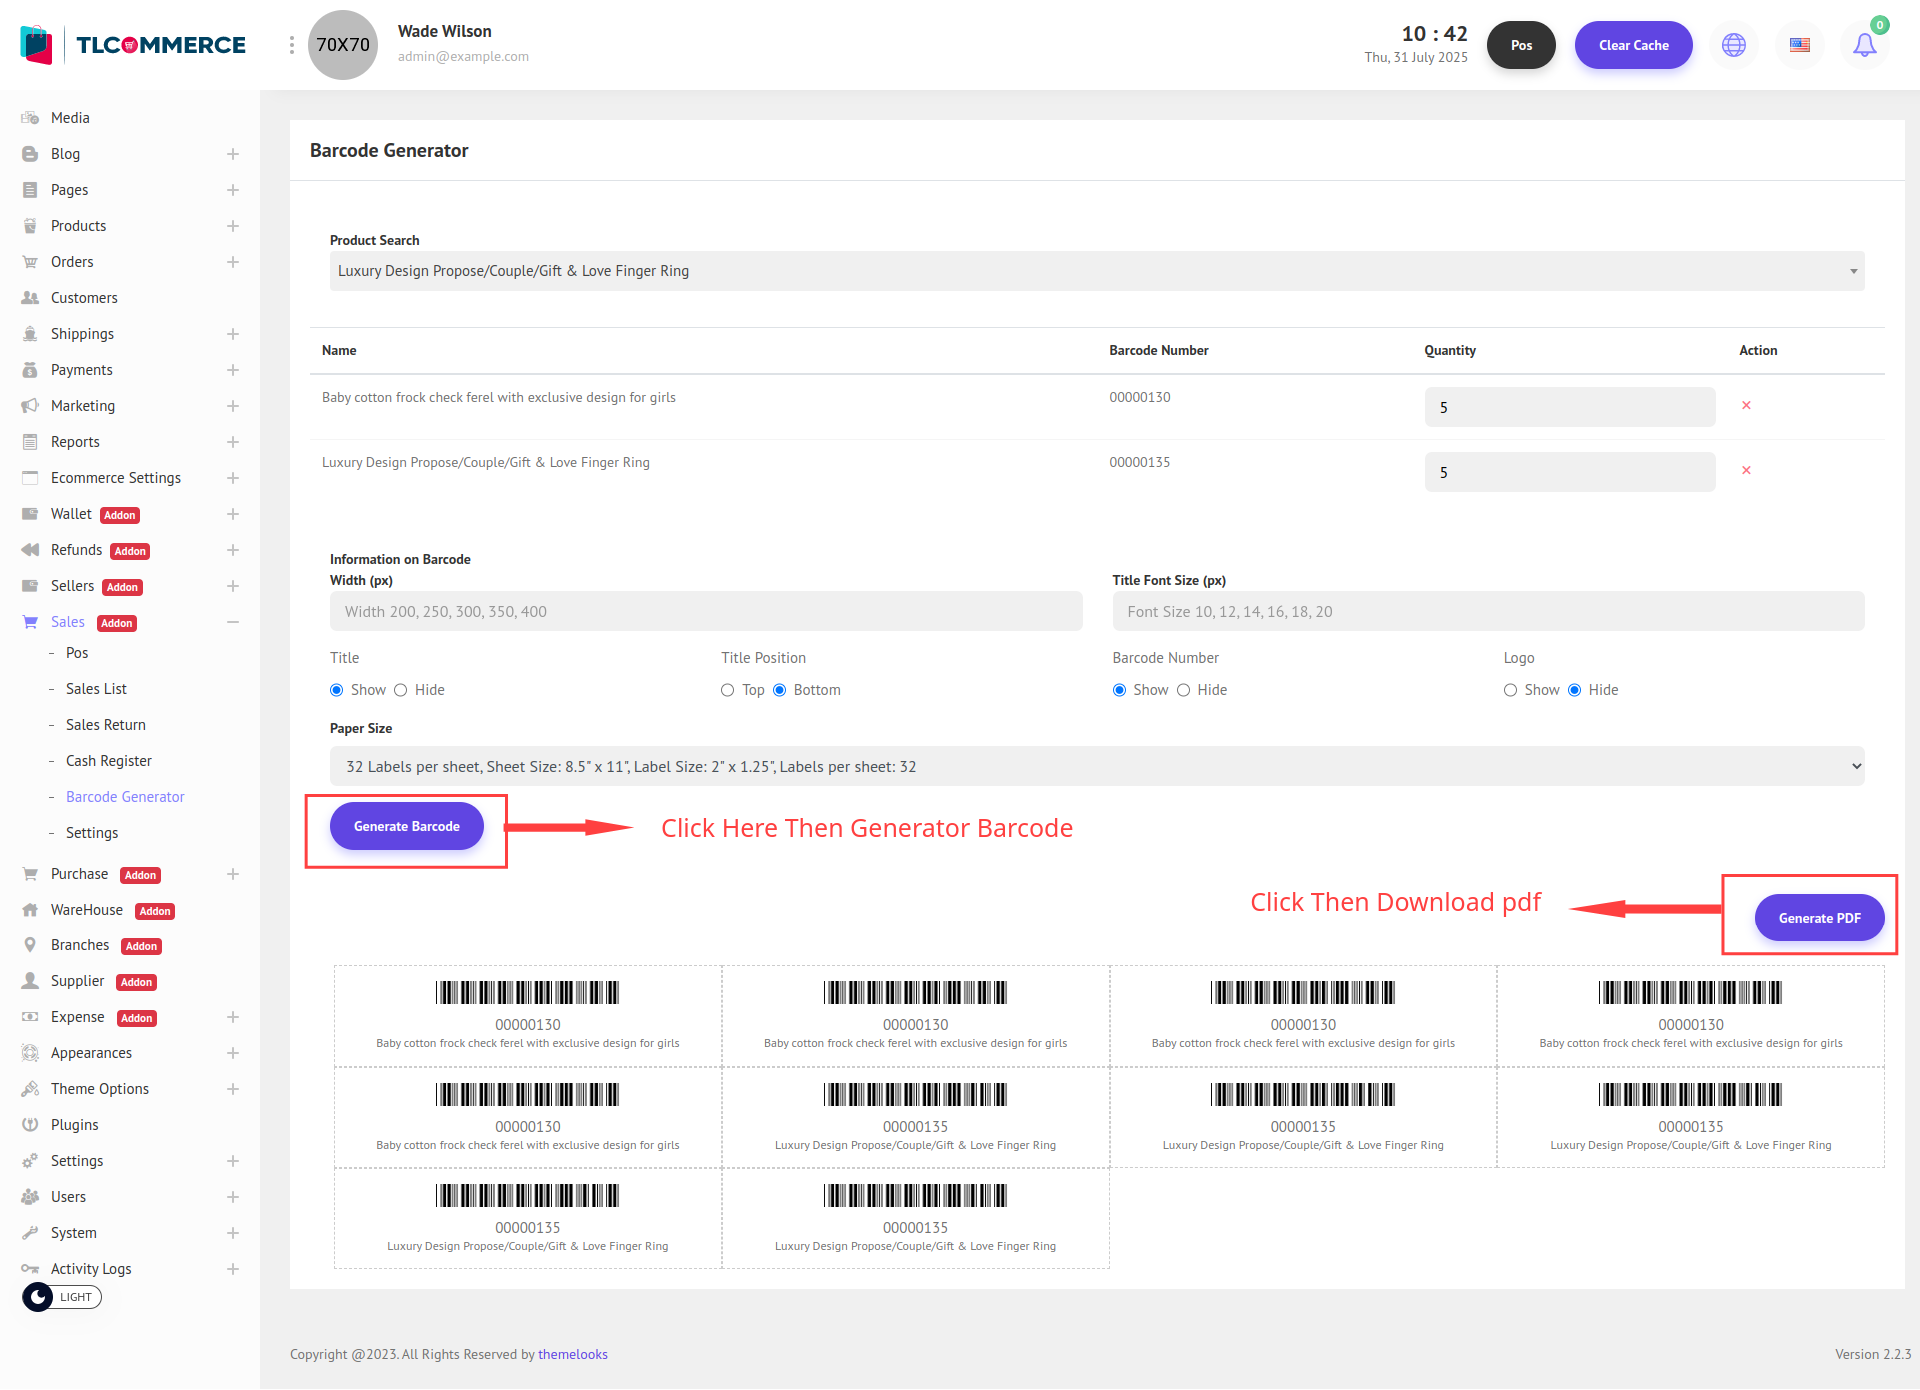
You can also download the generated barcodes by clicking the Generate PDF button. This will create and download a PDF file.