

In this post, we will learn how to manage E-commerce Settings.
Follow Ecommerce Settings > Settings. Here you find many sections on the left side.

General Section.
Default Currency - Here you can set the default currency for your system.
Customer Term & Condition Page - Term and Condition Page for Customers when registering new customers.
Seller Term & Condition Page - Term and condition page for sellers when registering new sellers.
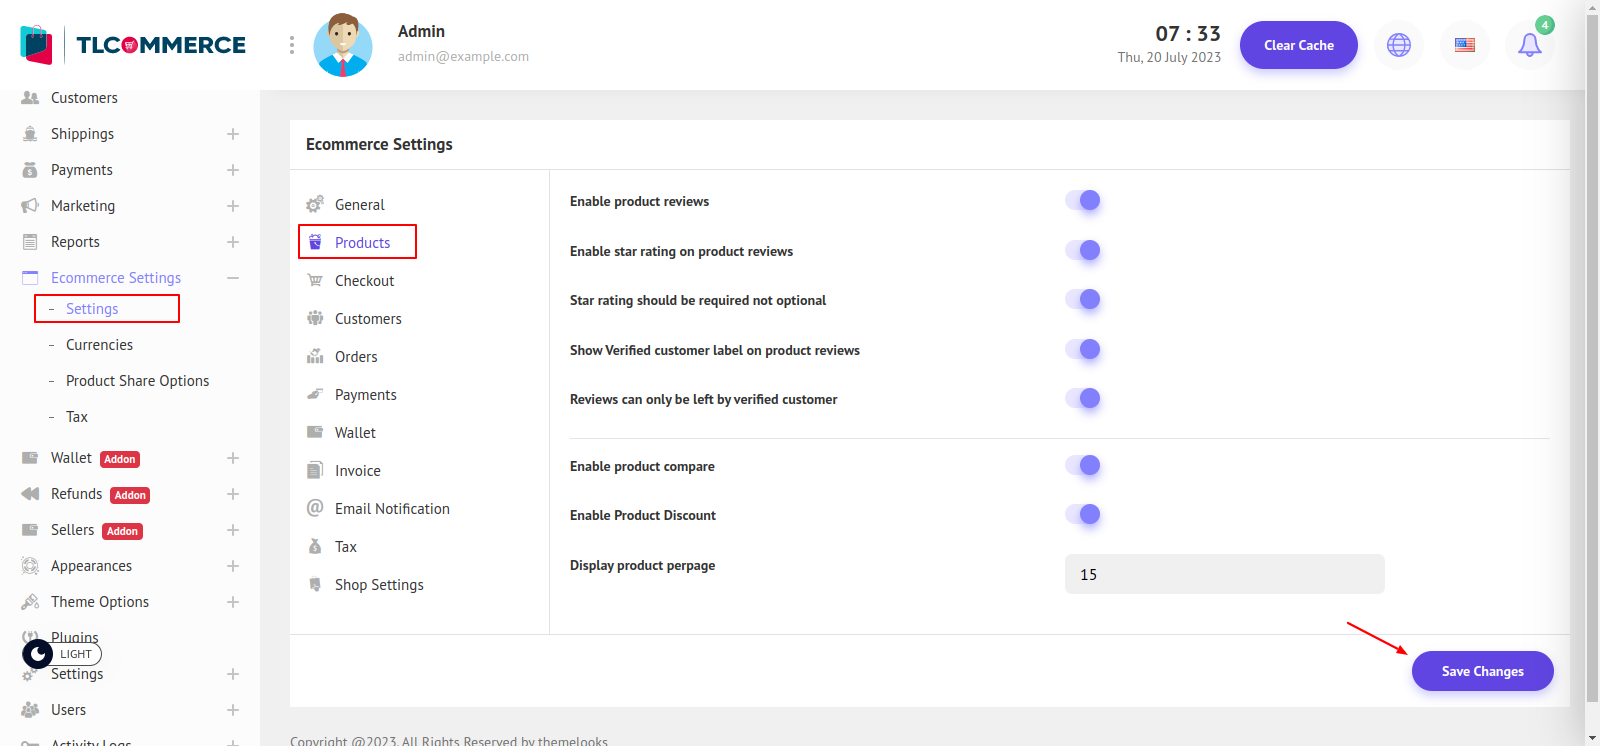
Products Section.
Enable Product Review - Here you can enable or disable the product review system.
Enable Star Rating On Product Reviews - Here you can choose whether the star rating system should be on product reviews or not.
Star Rating Should Be Required Not Optional - Here you can choose whether the star rating system should be required or not.
Show Verified Customer Label On Product Review - Here you can choose if you want to show a customer-verified label on product reviews or not.
Reviews Can Only Be Left By Verified Customers - Here you can choose if only verified customers can give reviews or if all customer can.
Enable Product Compare - Here you can choose if you want to show the product compare option.
Enable Product Discount - Here you can choose if you want to show a product discount or not.
Display Product Per page - Here you can set how many products to show on each page.

Checkout Section.
Enable Billing Address - Here you can choose to enable or disable the billing address system.
Use the shipping address as the billing address by default - If the billing address system is enabled then you can choose to set the shipping address as the billing address by default.
Enable guest checkout - Here you can choose whether the guest can checkout or not.
Hide Country, State, and City dropdown in Checkout - Choose if the Guest need to Give Country, State, and City or hide them. Also for Customers creating addresses. But the shipping option must be flat rate or product-wise.
Mandatory Post Code in Checkout - Here you can choose if Post Code is a must need or optional.
Create account in guest checkout - Here you can choose if you want to create an account for a guest when they checkout.
Send invoice to customer email - Here you can choose if an invoice must send to a customer email or not.
Enable coupon in checkout - Here you can choose if the coupon system should be implemented in checkout or not.
Enable multiple coupons in single order - Here you can choose if multiple coupons can be used on a single order.
Enable wallet in checkout - Here you can choose whether the wallet system should be implemented on checkout or not.
Enable order note - Here you can choose if an order note field should be in checkout or not.
Enable document in checkout - Here you can choose if the document system should be implemented in checkout or not.
Enable pickup point in checkout - Here you can choose if the pickup point system should be implemented in checkout or not.
Enable carrier in checkout - Here you can choose if the carrier system should be implemented in checkout or not.
Enable minimum order amount - Here you can choose if the minimum order amount should be set or not.
Minimum order amount - If the minimum order amount system is enabled, here you can set the minimum amount to order.

Customers Section.
Customer Auto Approval - If this option is enabled, and Email Verification is disabled then the customer will get auto-approved.
Customer Email Verification - If this option is enabled customers must be verified by email.
And if both of them are disabled that customer will be manually approved by Admin.
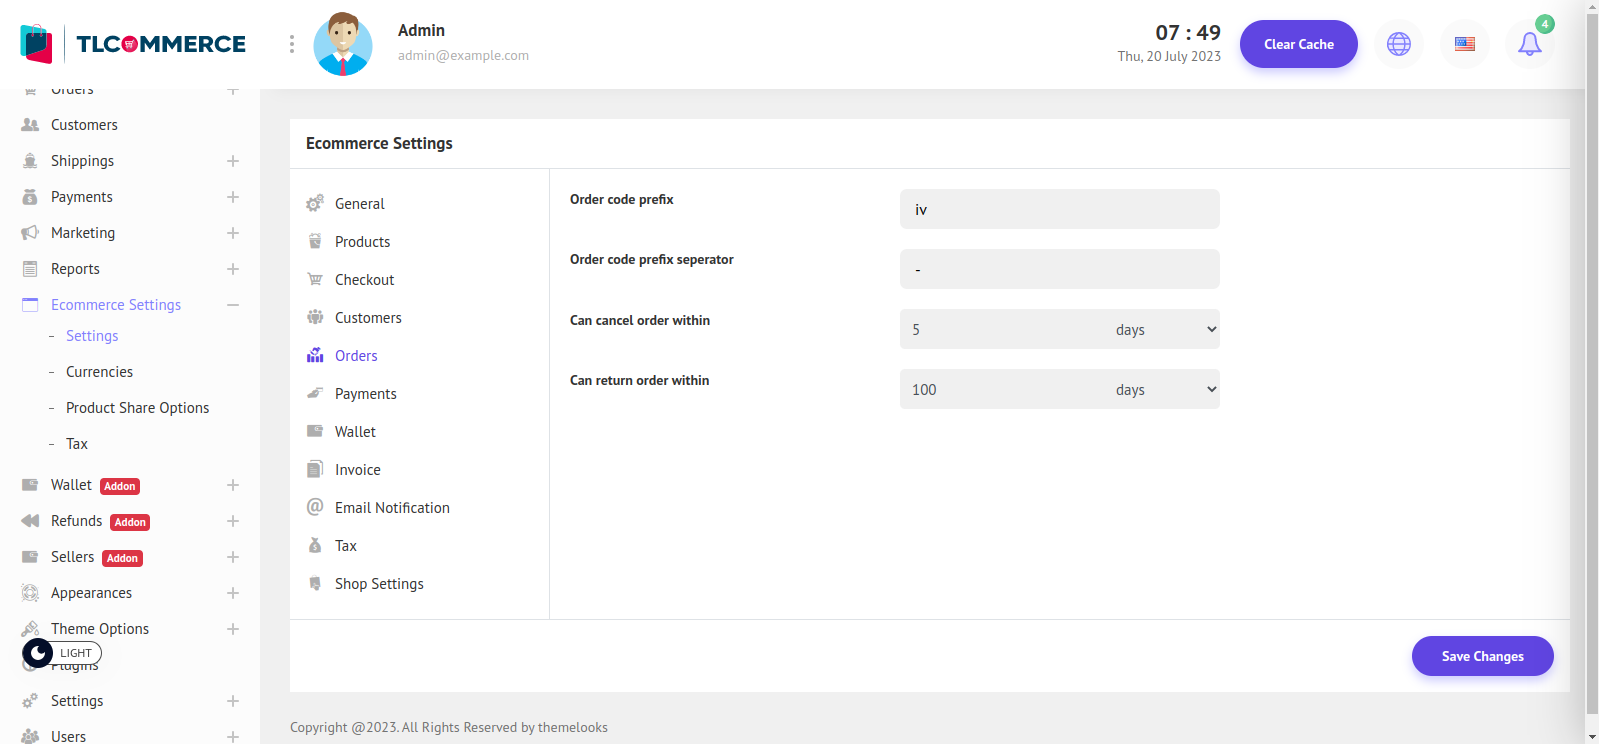
Orders Section.
Order Code Prefix - You can set the order prefix here.
Order Code Prefix separator - You can set the order prefix separator here.
Can Cancel Order within - You can set the expiry time to cancel an order in(Days, Hours, or Minutes). If nothing is set customers can cancel the order anytime they want.
Can Return Order within - You can set the expiry time to return an order in(Days, Hours, or Minutes). If nothing is set customers can return the order anytime they want.

To manage payment methods click from here. It will redirect you to the payment methods page.
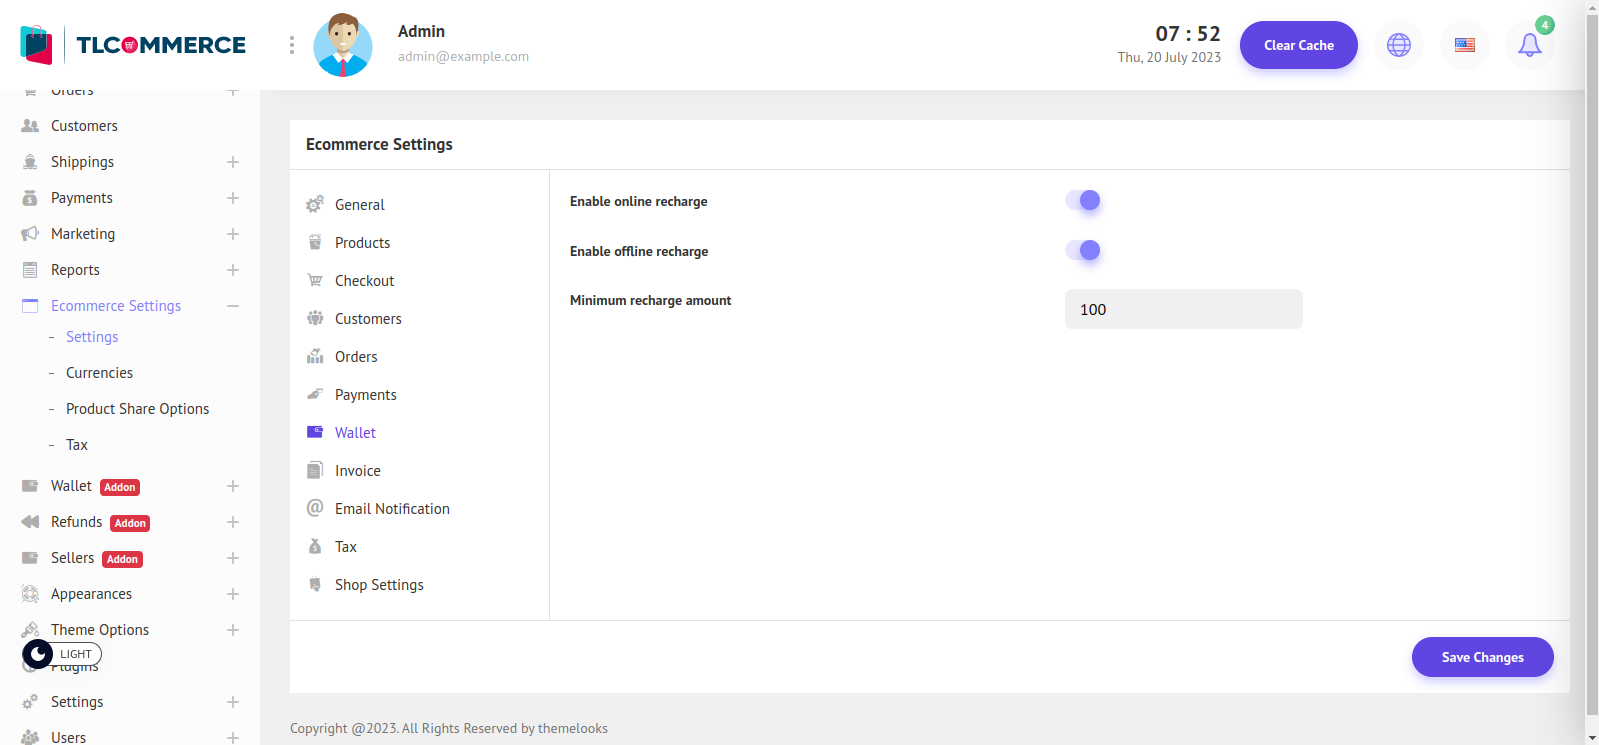
Wallet Section.
Enable Online Recharge - Enable this option for wallet online recharge.
Enable Offline Recharge - Enable this option for wallet offline recharge.
Minimum Recharge Amount - You can set the minimum recharge amount for the wallet.
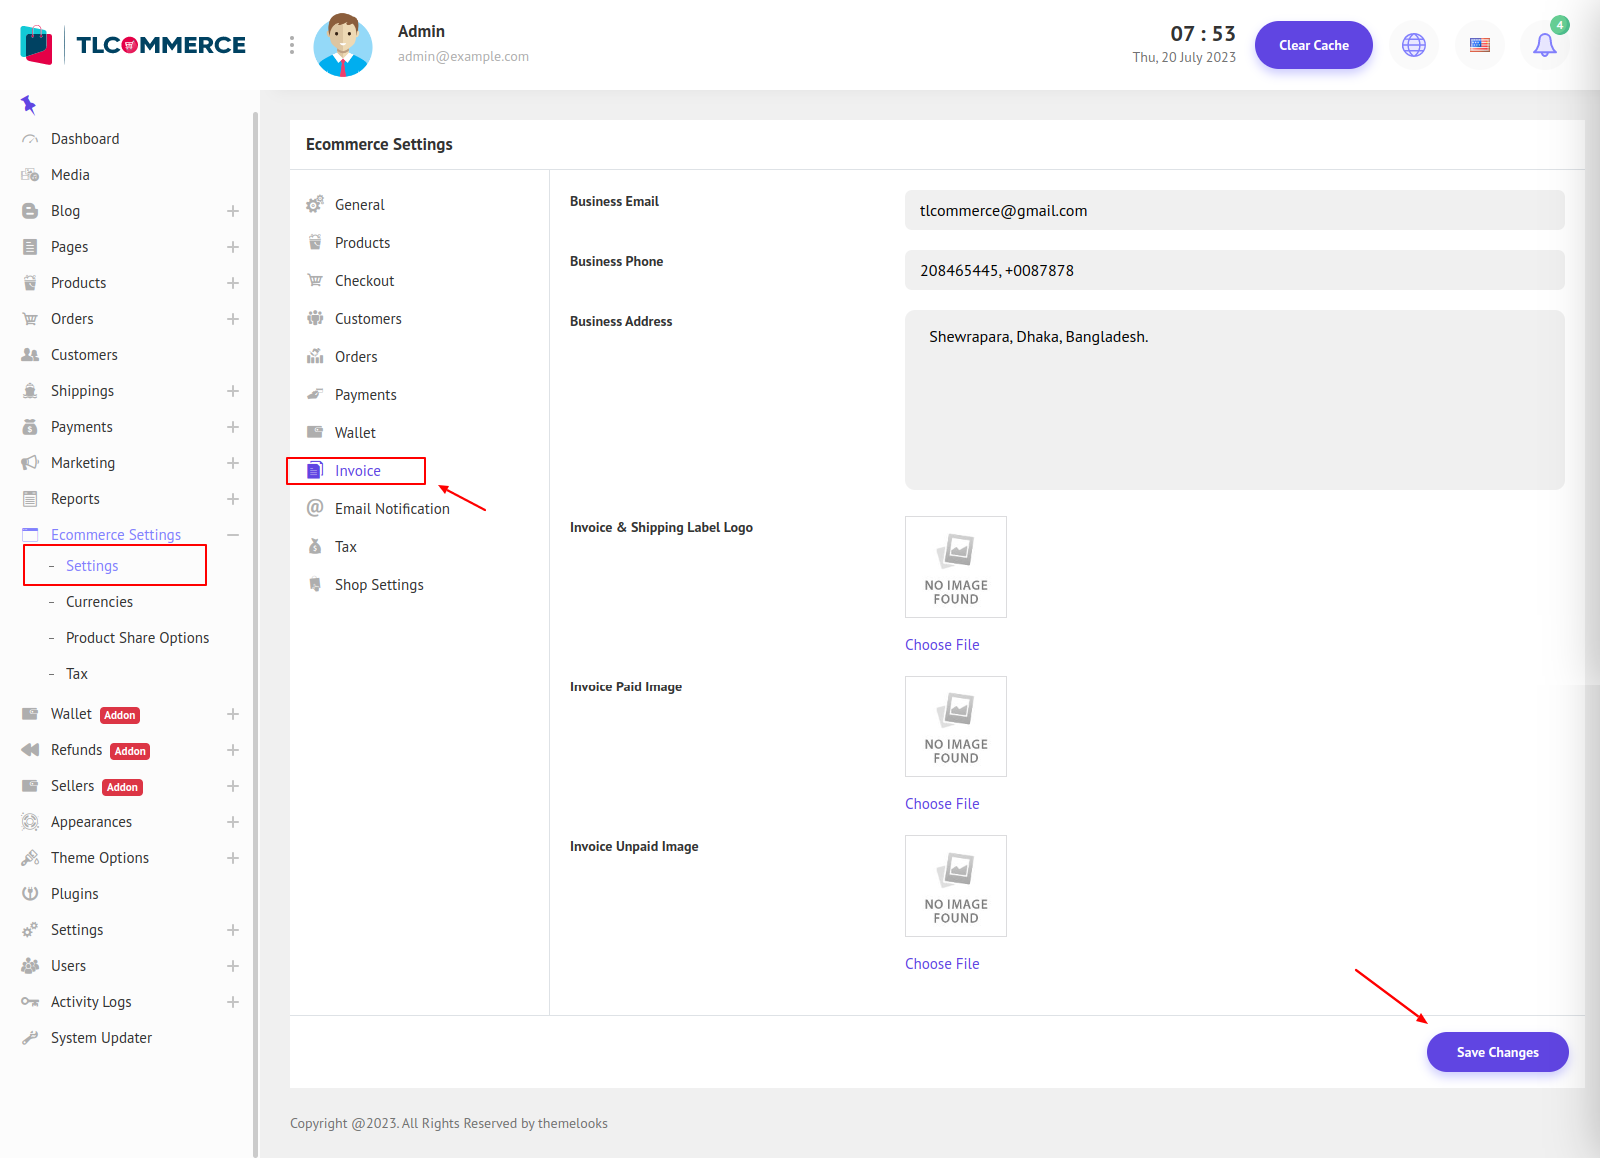
Invoice Section.
Business Email - Set your business email to show in the invoice.
Business Phone - Set your business phone to show in the invoice.
Business Address - Set your business address to show in the invoice.
Invoice and Shipping Label Logo - Set up your invoice and shipping logo.
Invoice paid Image - Payment paid image for the invoice.
Invoice Unpaid Image - Payment unpaid for the invoice.
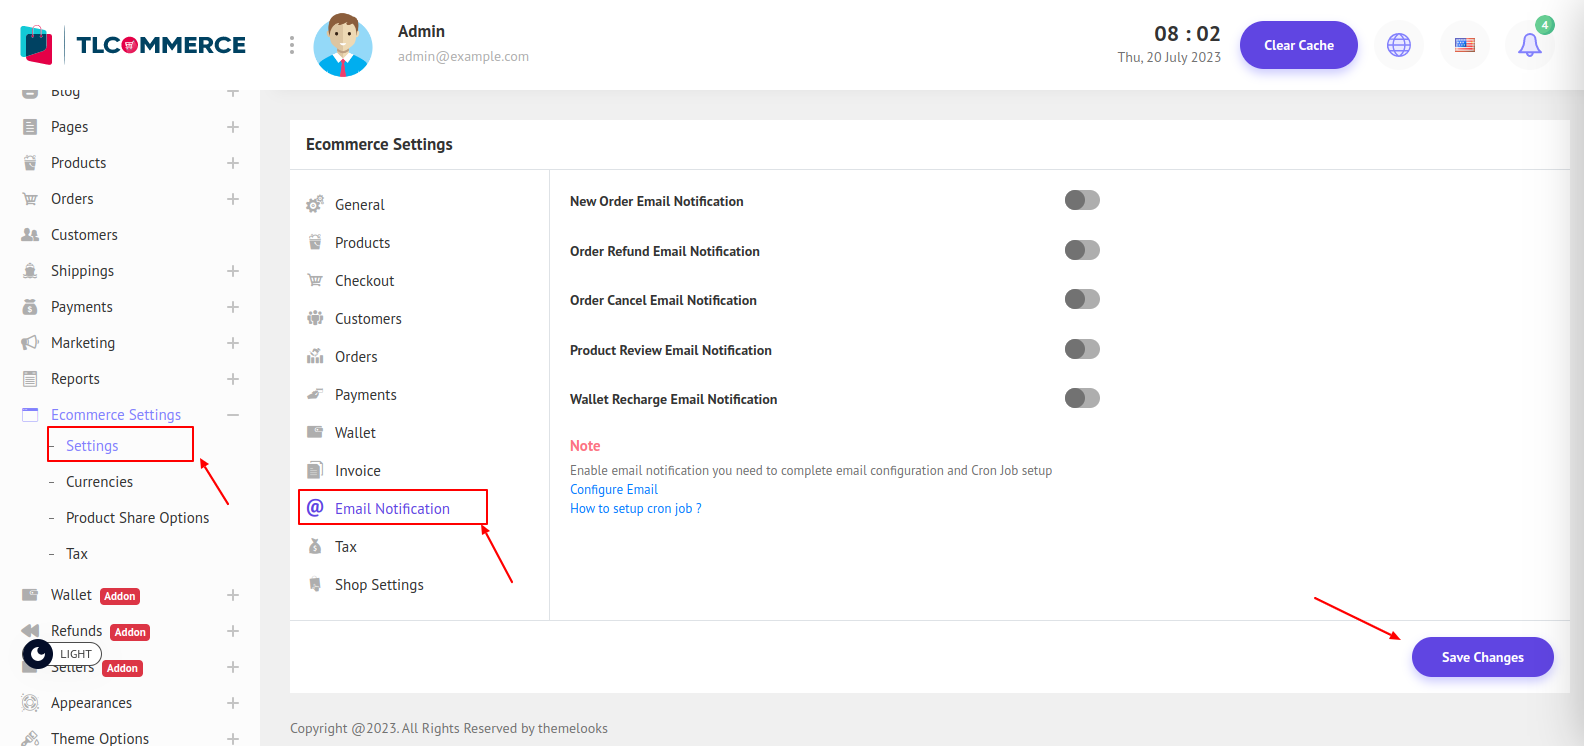
Email Notification Section
New Order Email Notification - Choose If you want to get an Email Notification on every New Order.
Order Refund Email Notification - Choose If you want to get an Email Notification on order Refund.
Order Cancel Email Notification - Choose If you want to get an Email Notification on Order Cancel.
Product Review Email Notification - Choose If you want to get an Email Notification on Product Review.
Wallet Recharge Email Notification - Choose If you want to get an Email Notification on Customer Wallet Recharge.
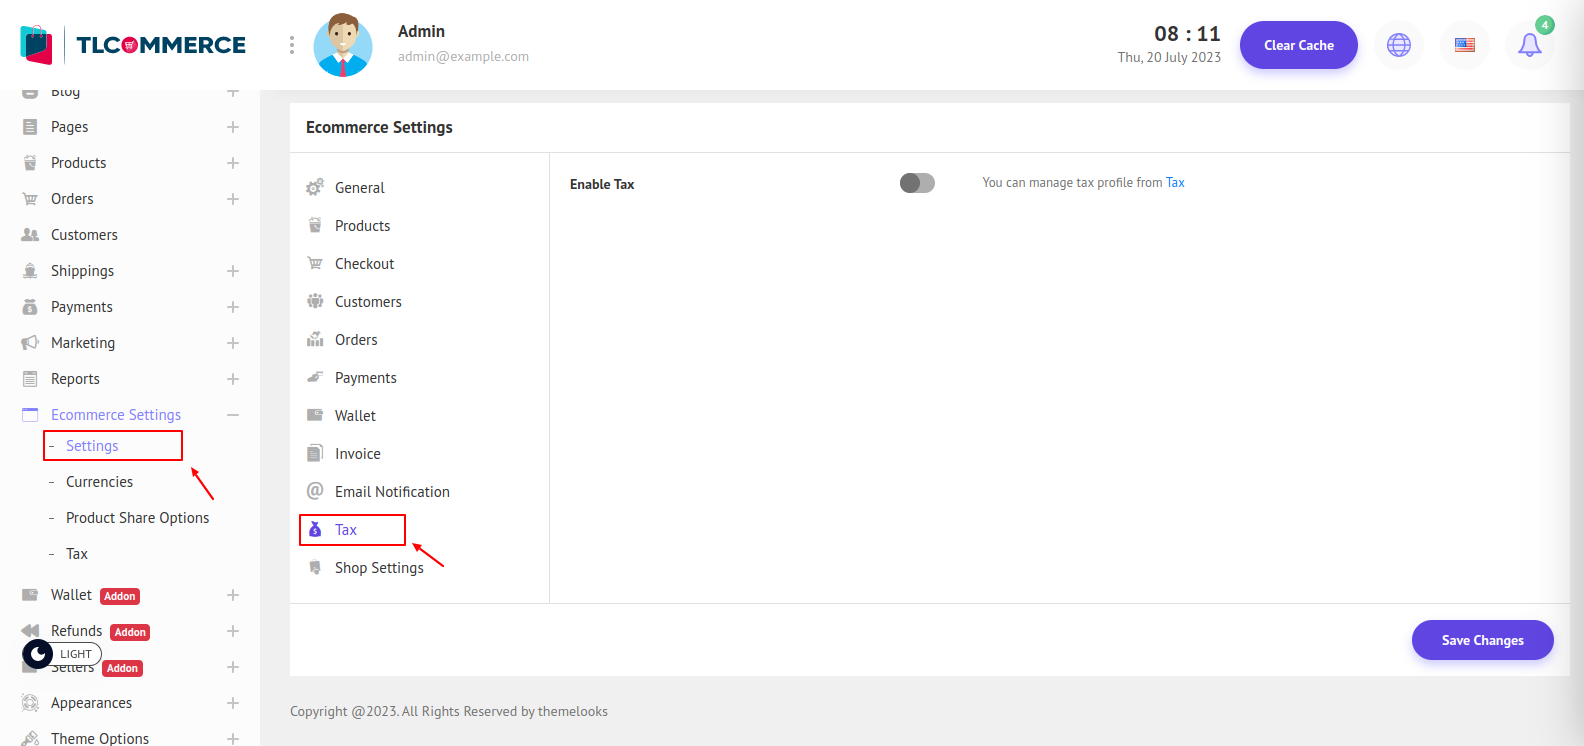
Tax Section
Enable Tax - Choose if Tax should be included in product checkout.
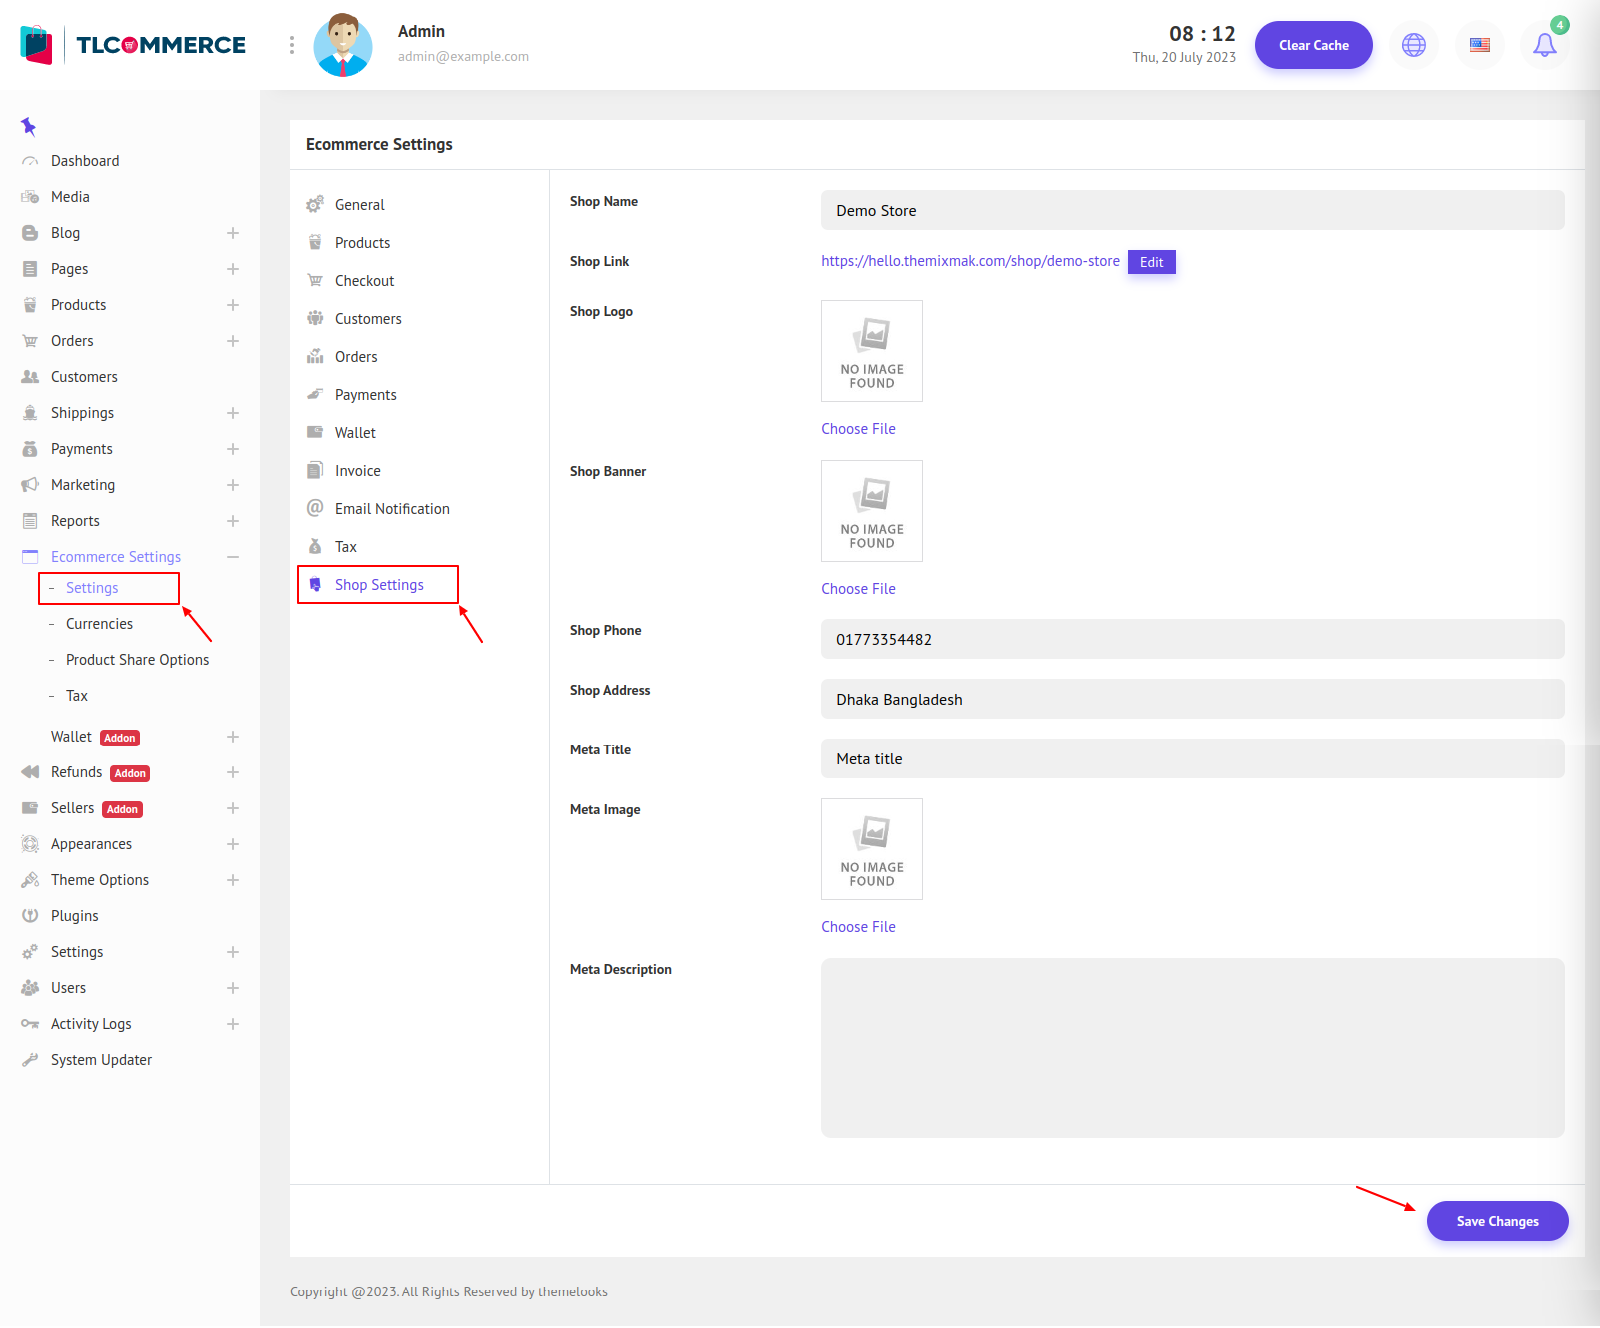
Shop Setting Section. This is the Admin Shop. Only if Multivendor Plugin is Active.
Shop Name - The name of the shop.
Shop Link - The Shop Link.
Shop Logo - Admin Shop Logo.
Shop Banner - Admin shop banner.
Shop Phone - Admin Shop Phone number
Shop Address - Admin Shop Address.