Once the POS Plugin is successfully installed, a new sidebar menu item called Sales will appear.
To view the list of charges, go to Sales -> Settings, then click on the Charges tab.
Here, you will see the list of all configured charges.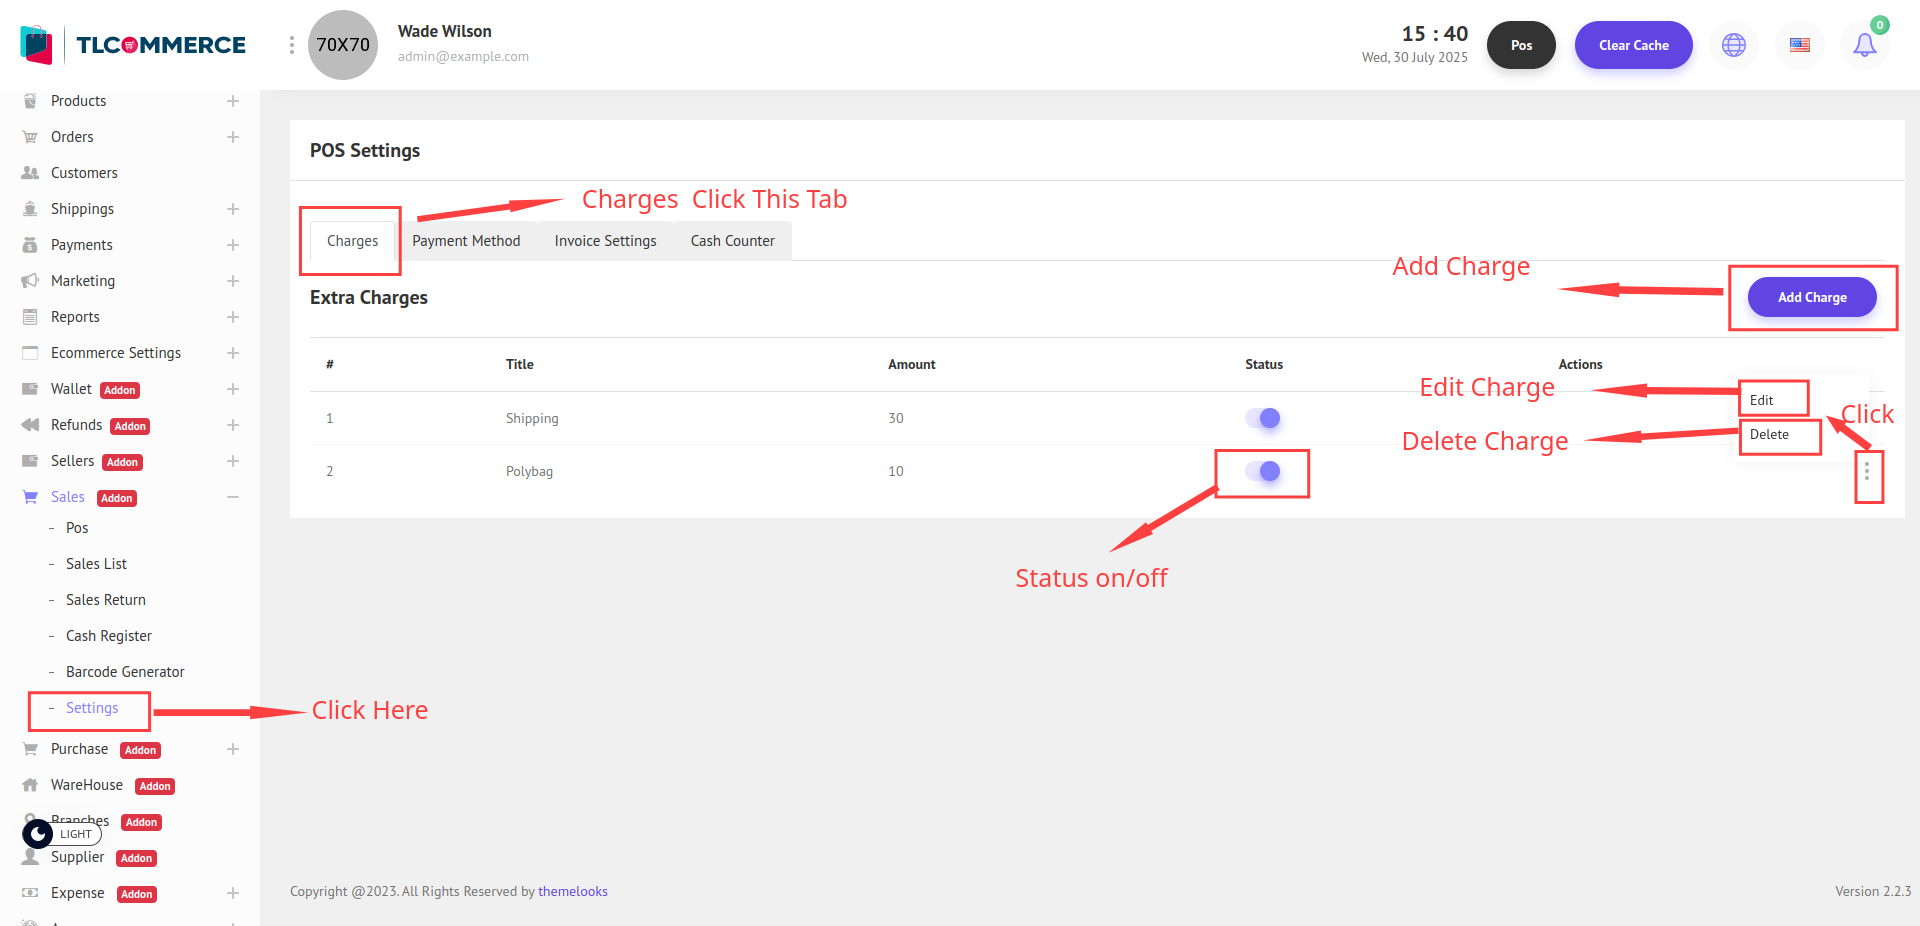
You can add a new branch by clicking the Add Charge button, which will open a pop-up modal on your screen.
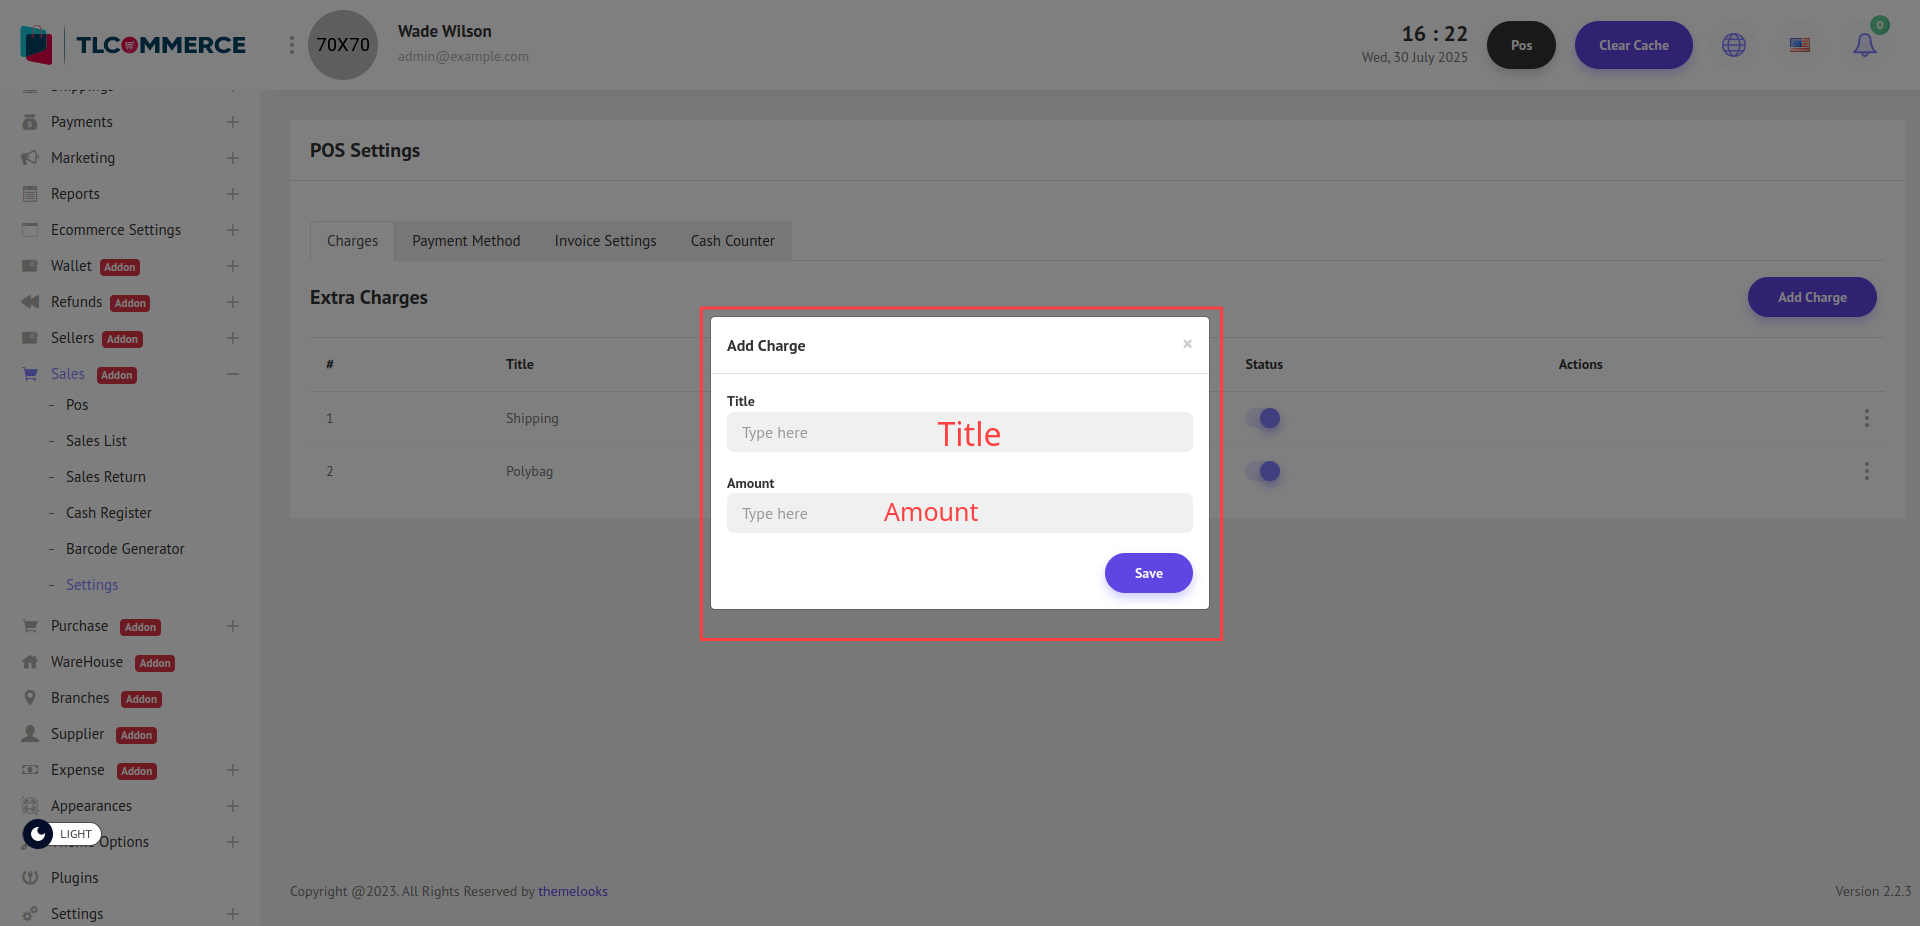
You can now create a charge by providing the necessary details. Enter the Title and Amount.
To edit an existing charge, simply click the Edit button from the list to open the pop-up modal and update the necessary information. And also can delete a charge by clicking the Delete link.

To view the list of charges, go to Sales -> Settings, then click on the Payment Method tab.
Here, you will see the list of all configured payment methods.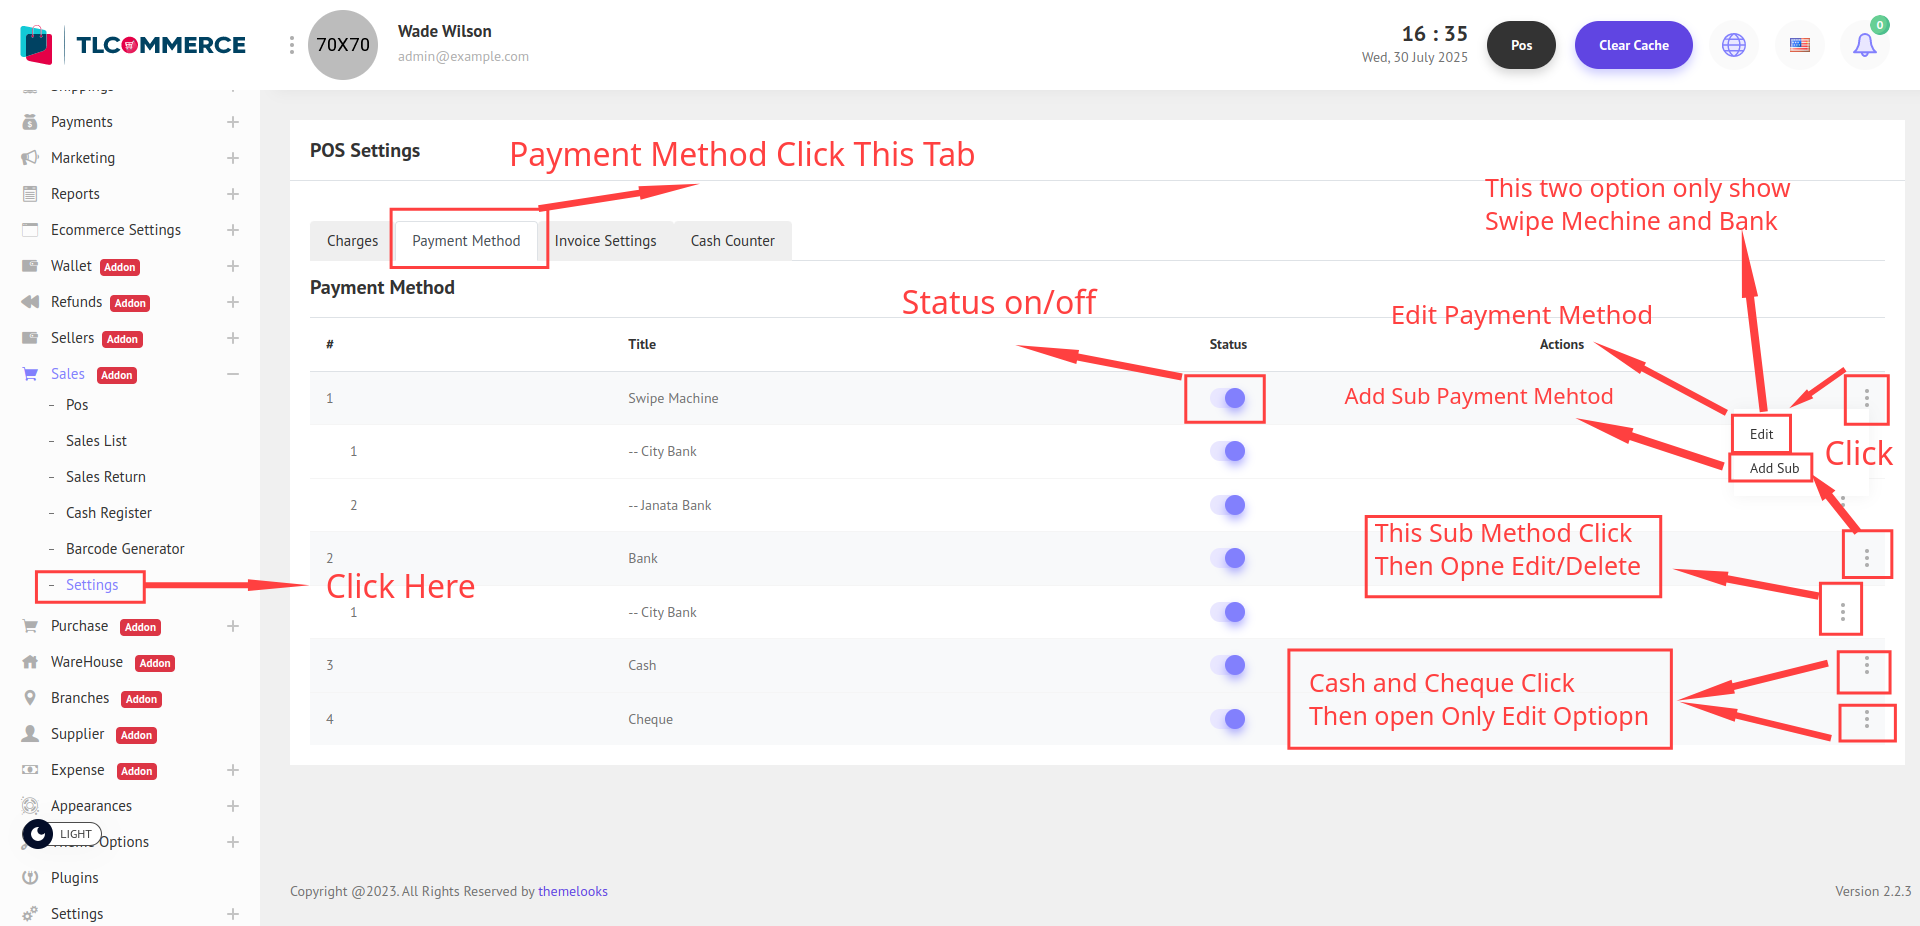
You can add a new sub-method by clicking the Add Sub button, which will open a pop-up modal on your screen.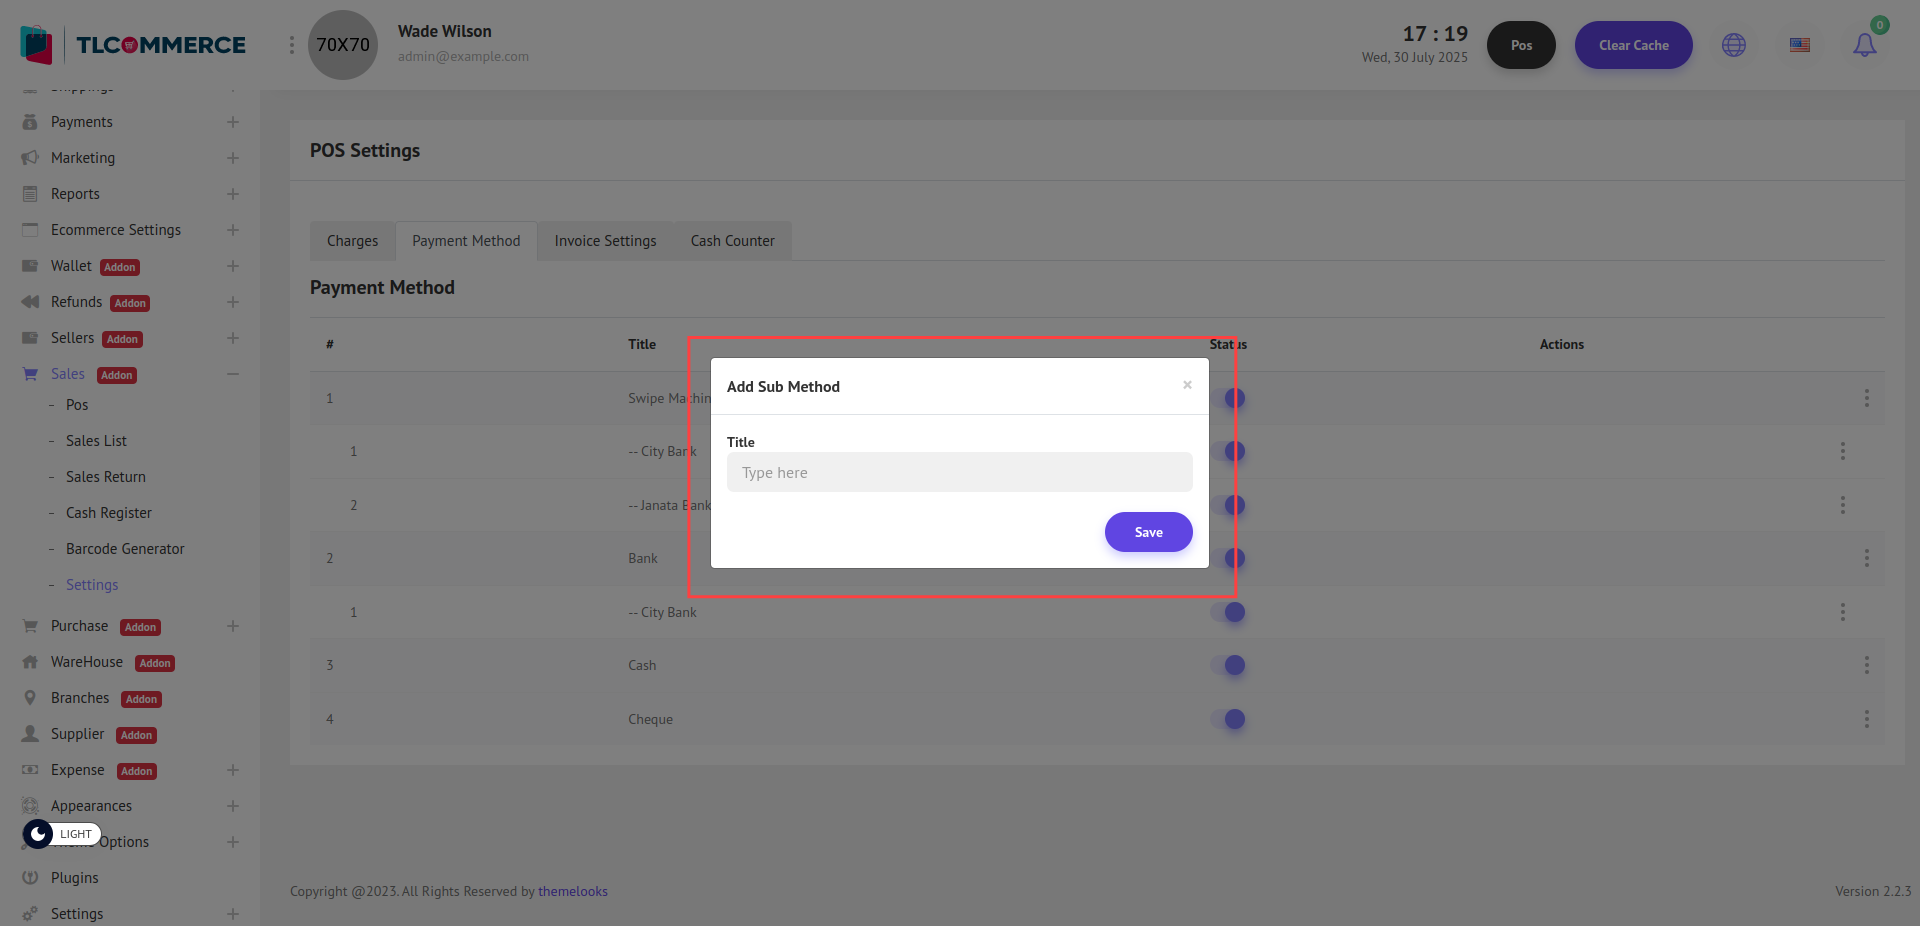
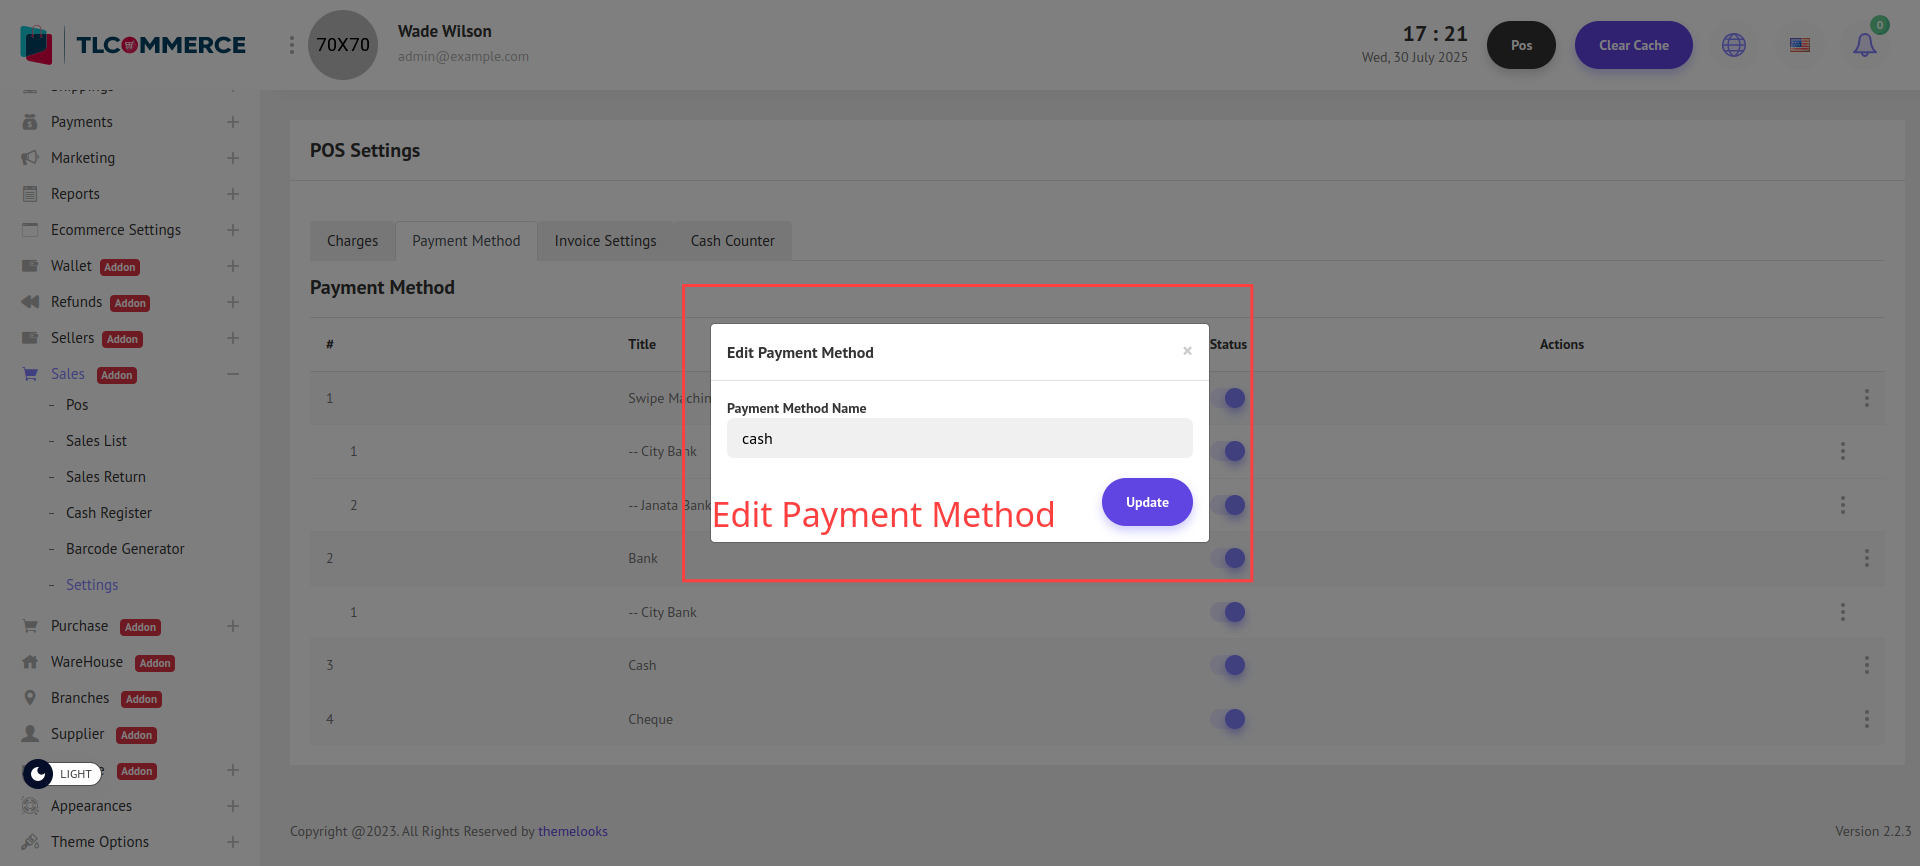
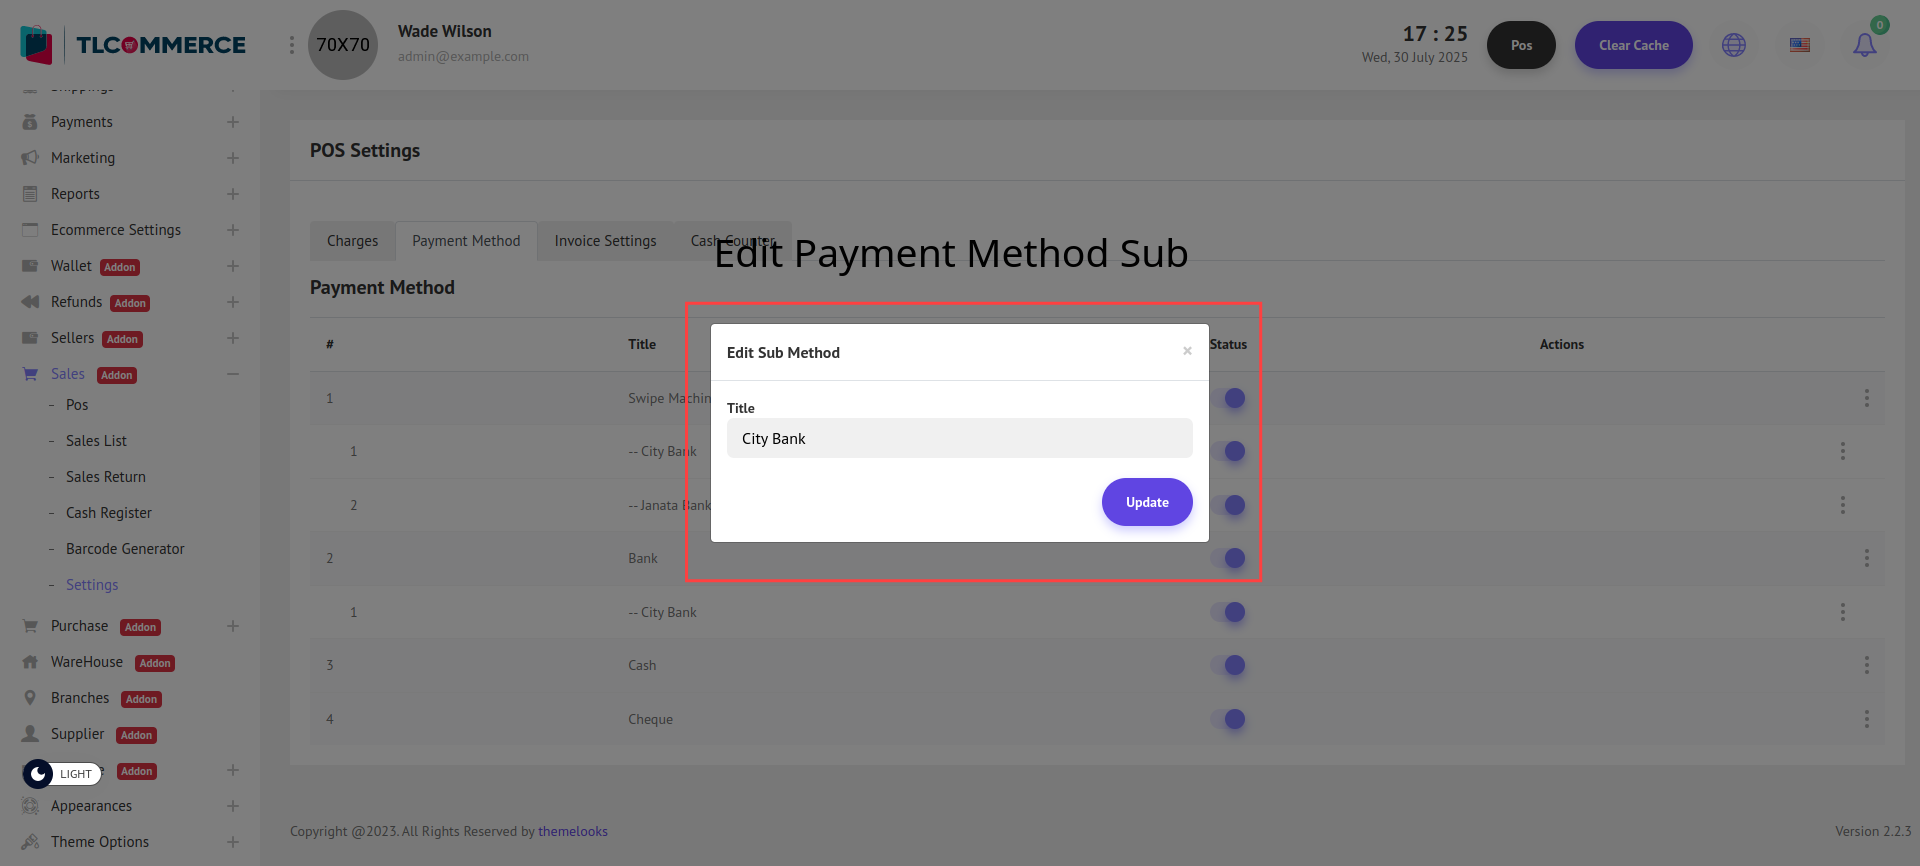
To edit an existing payment method or sub-method, simply click the Edit button from the list. This will open a pop-up modal where you can update the necessary information.
You can also delete a Sub Method by clicking the Delete link next to it.
(Note: Only sub-methods can be deleted directly.)
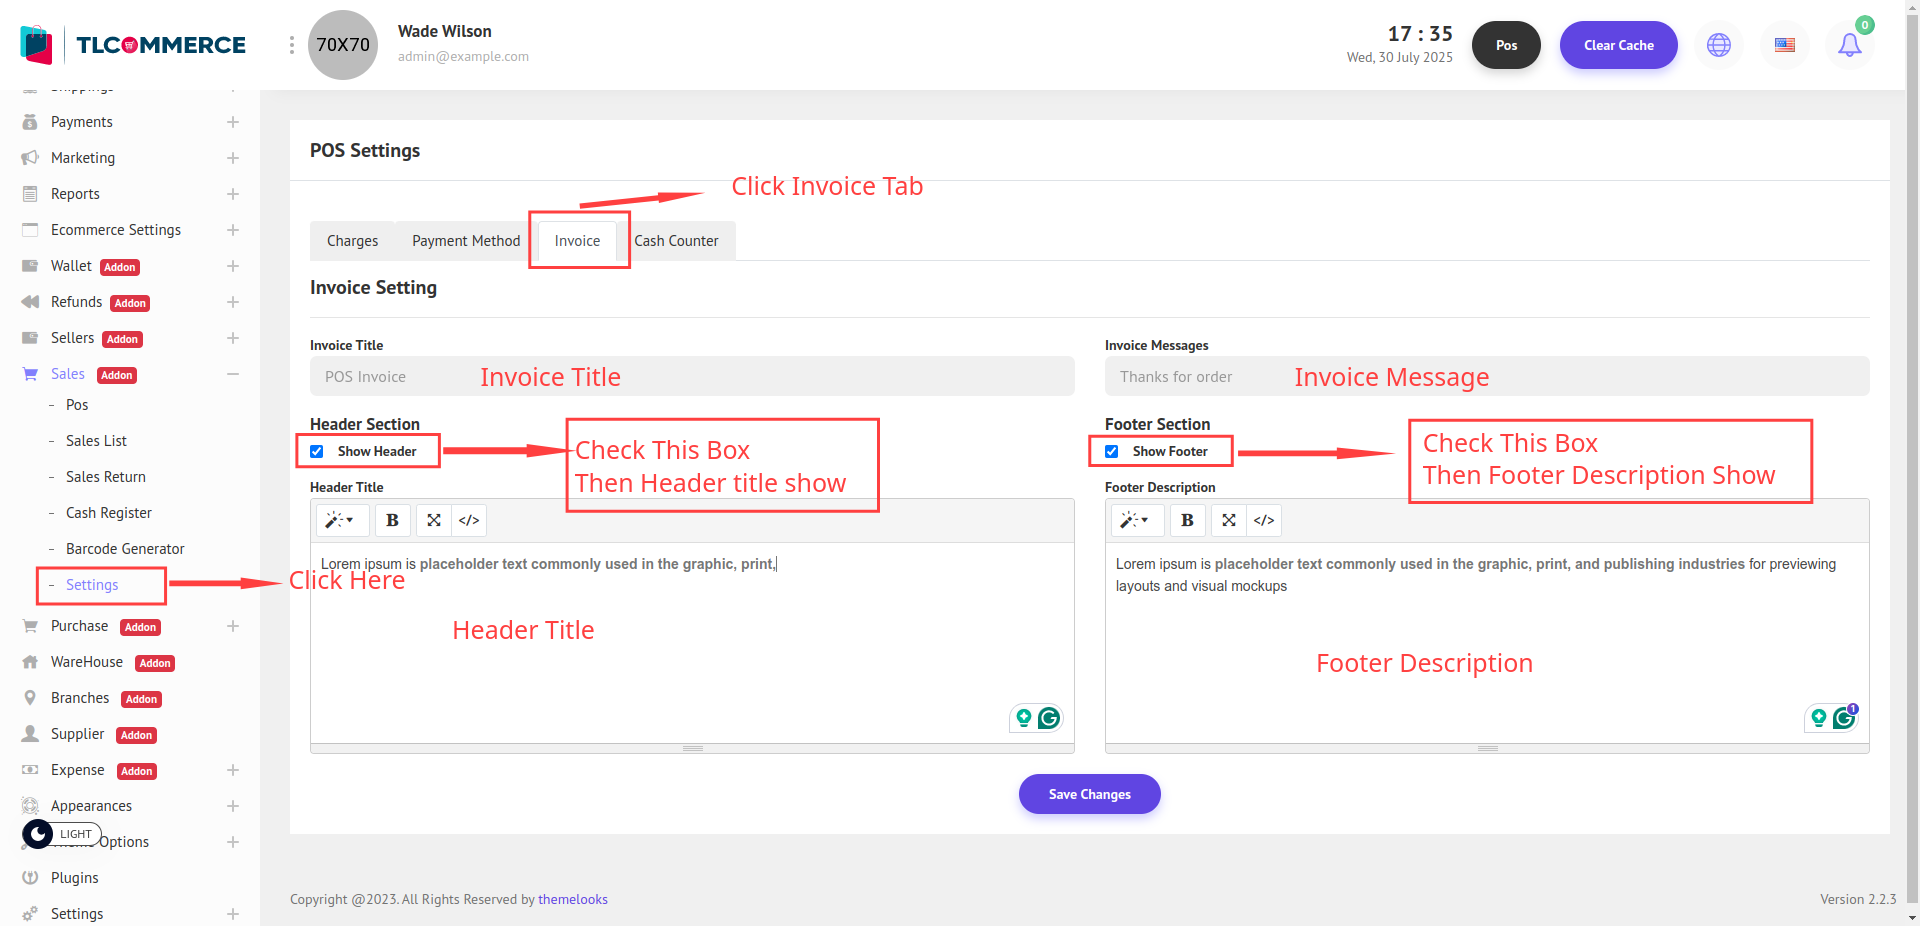
To view the list of invoice-related settings, go to Sales -> Settings, then click on the Invoice tab.
Here, you will see the Invoice Settings page, where you can configure and manage invoice options.
The following options are available:
Invoice Title: Set a custom title for your invoices (e.g., "Sales Invoice").
Invoice Message: Add a default message that will appear on each invoice.
Header Section: Enable Show Header to display a custom header.
Once enabled, you can enter a Header Title.
Footer Section: Enable Show Footer to display a footer on the invoice.
Once enabled, you can enter a Footer Description.
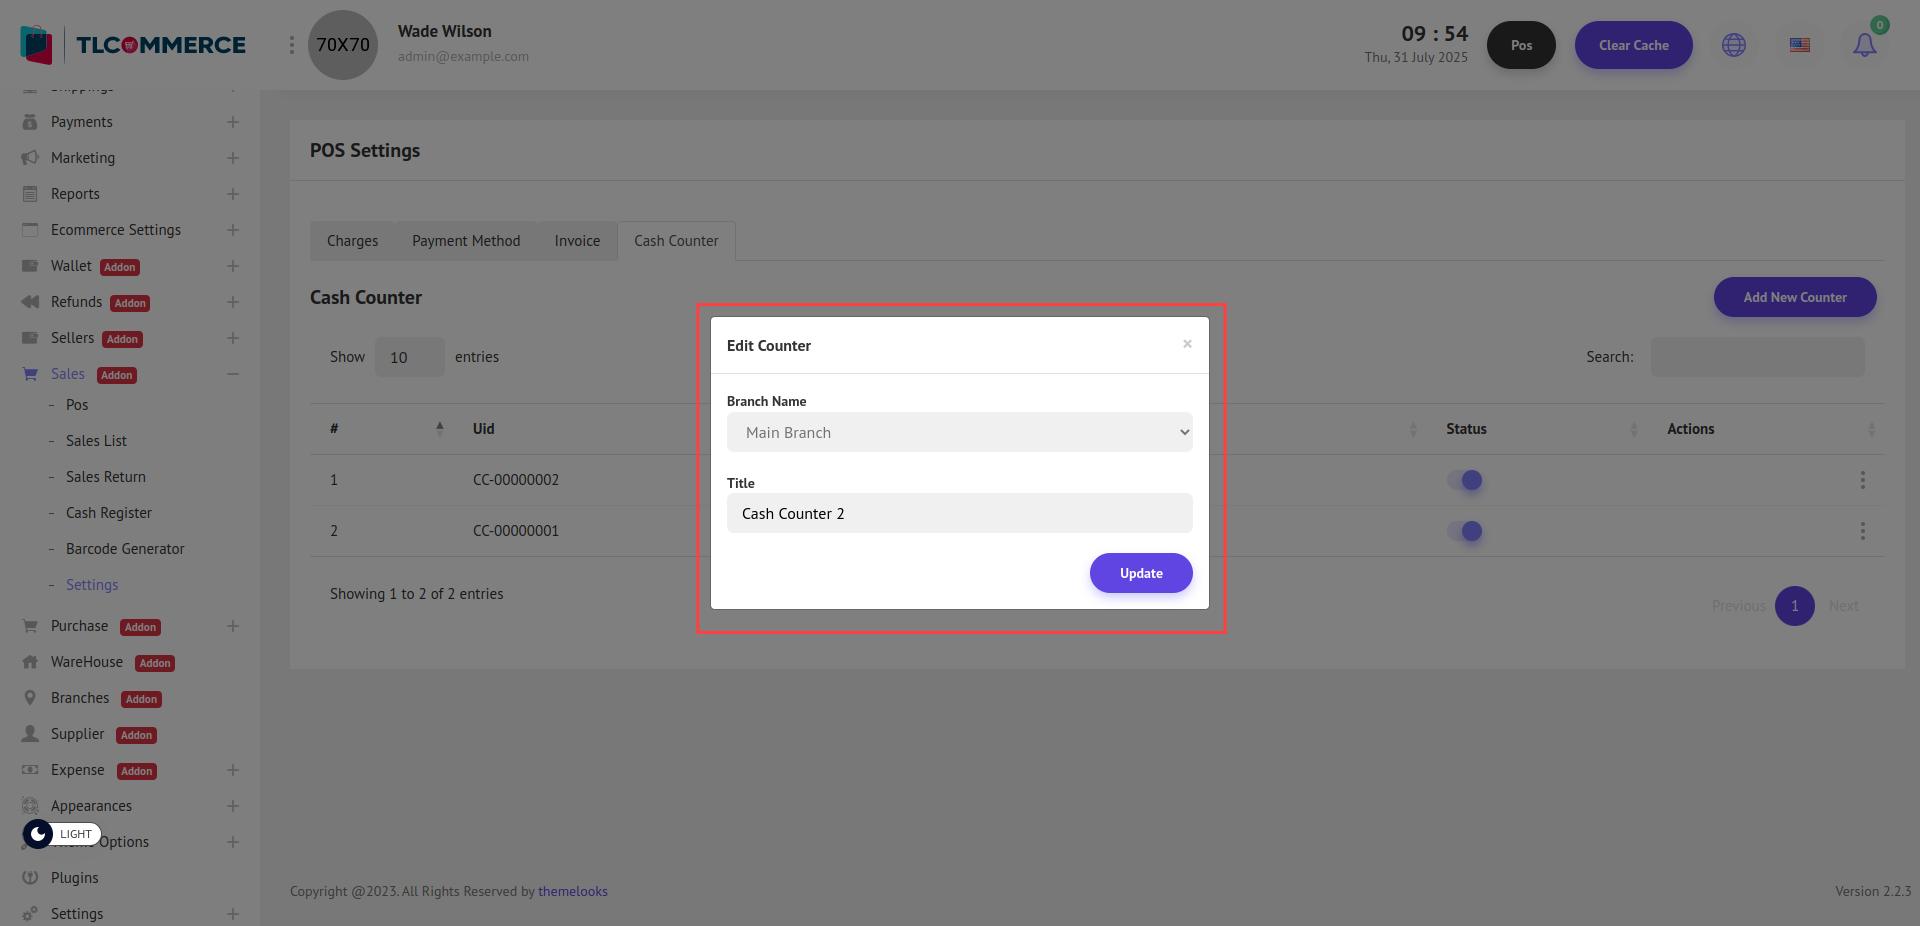
To view the list of Cash Counter, go to Sales -> Settings, then click on the Cash Counter tab.
Here, you will see the list of all configured cash counter.
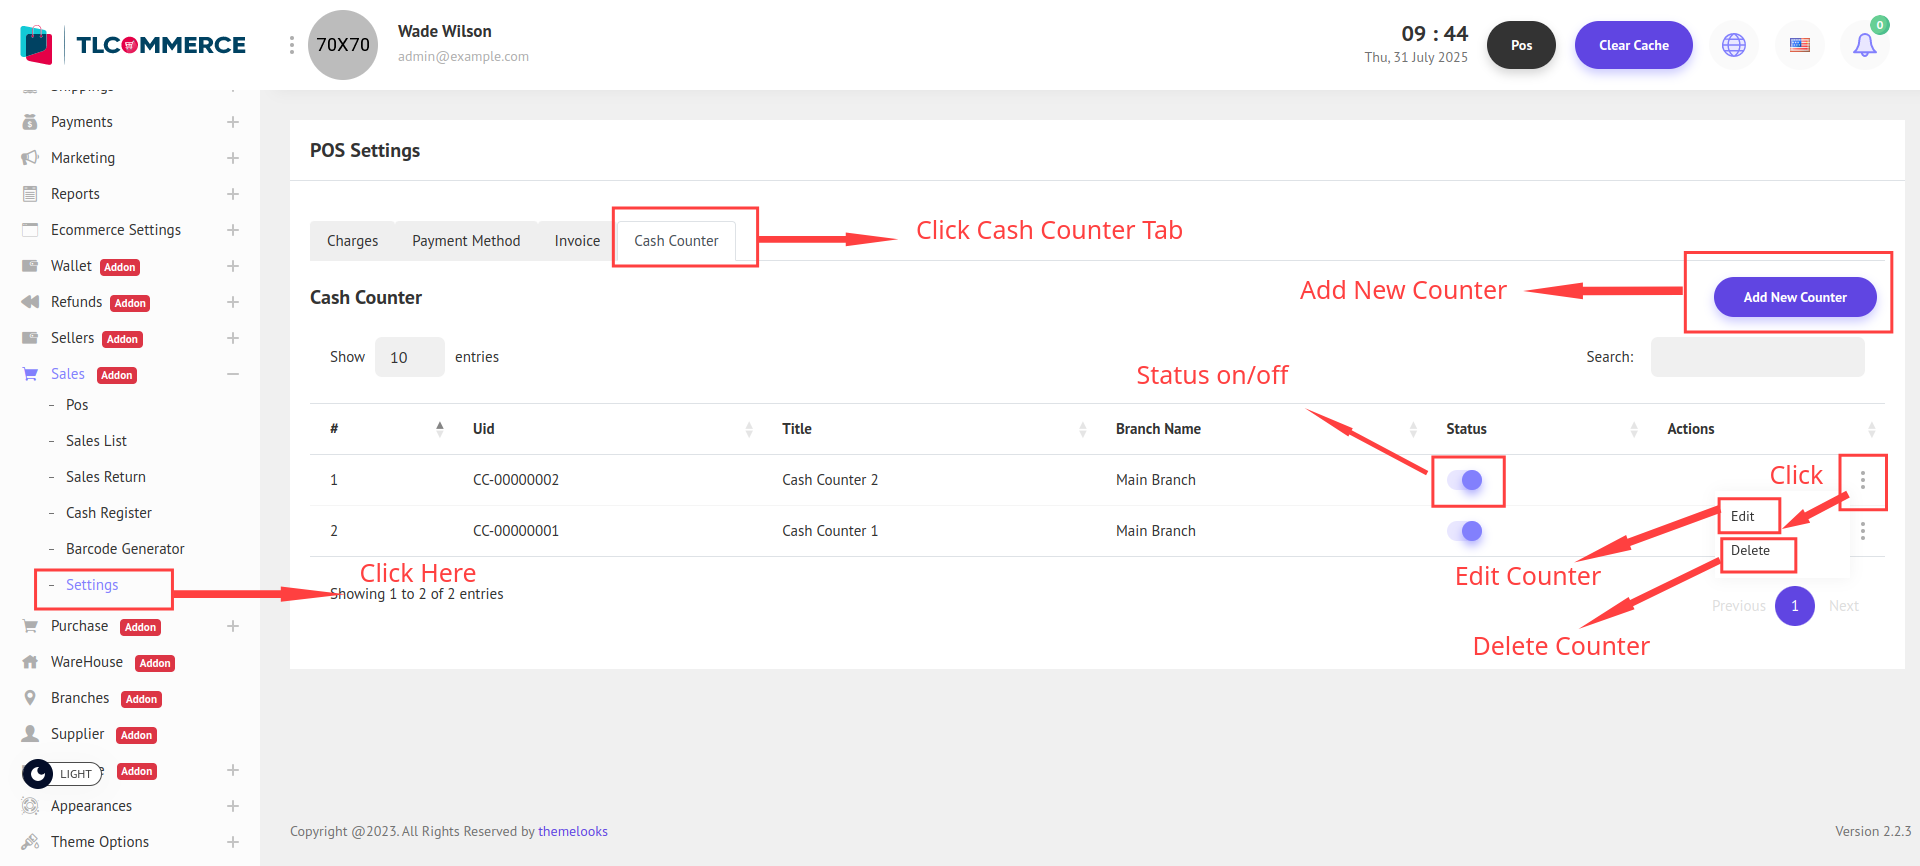
You can add a new counter by clicking the Add New Counter button. This will open a pop-up modal on your screen where you can enter the counter details.
However, if no branch exists, you must first create a branch. Go to Branches to create one. Once a branch is available, you will be able to add a new counter.
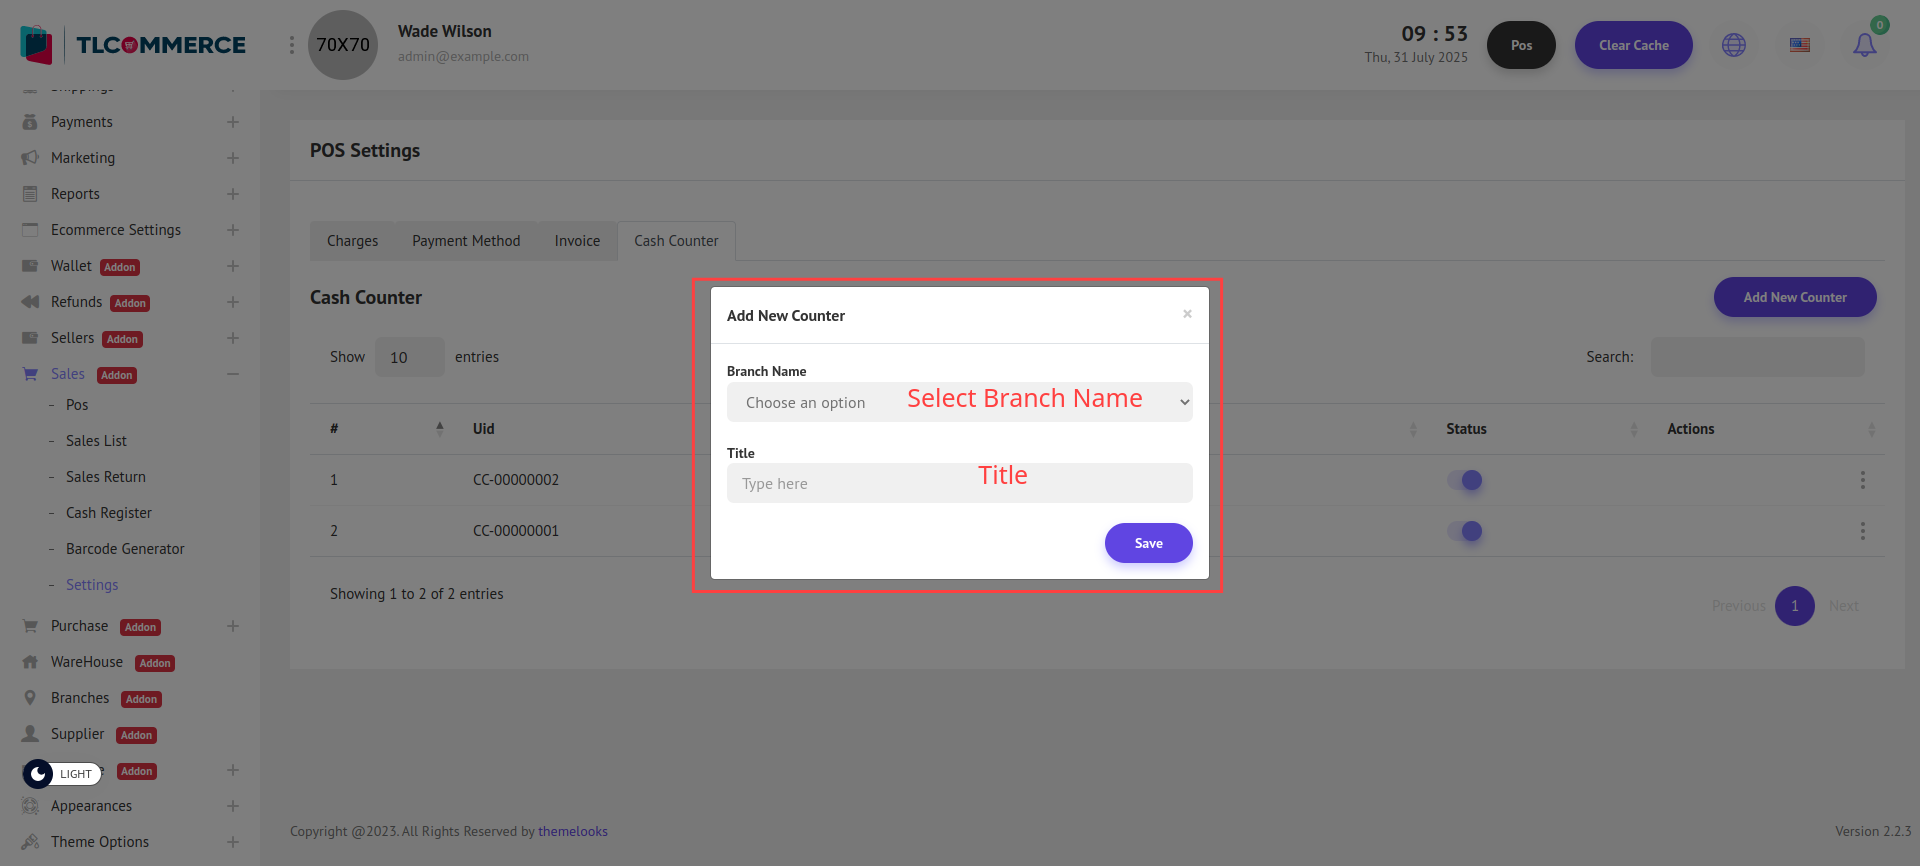
You can now create a cash counter by providing the necessary details. Enter the Select Branch Name and Title.
To edit an existing cash counter, simply click the Edit button from the list to open the pop-up modal and update the necessary information. You can also delete the counter by clicking the Delete Button.