Once the POS Plugin is successfully installed, a new sidebar menu item called Expense will appear. To view expense categories, navigate to: Expense ->Category. Here, you can see the list of all existing expense categories.
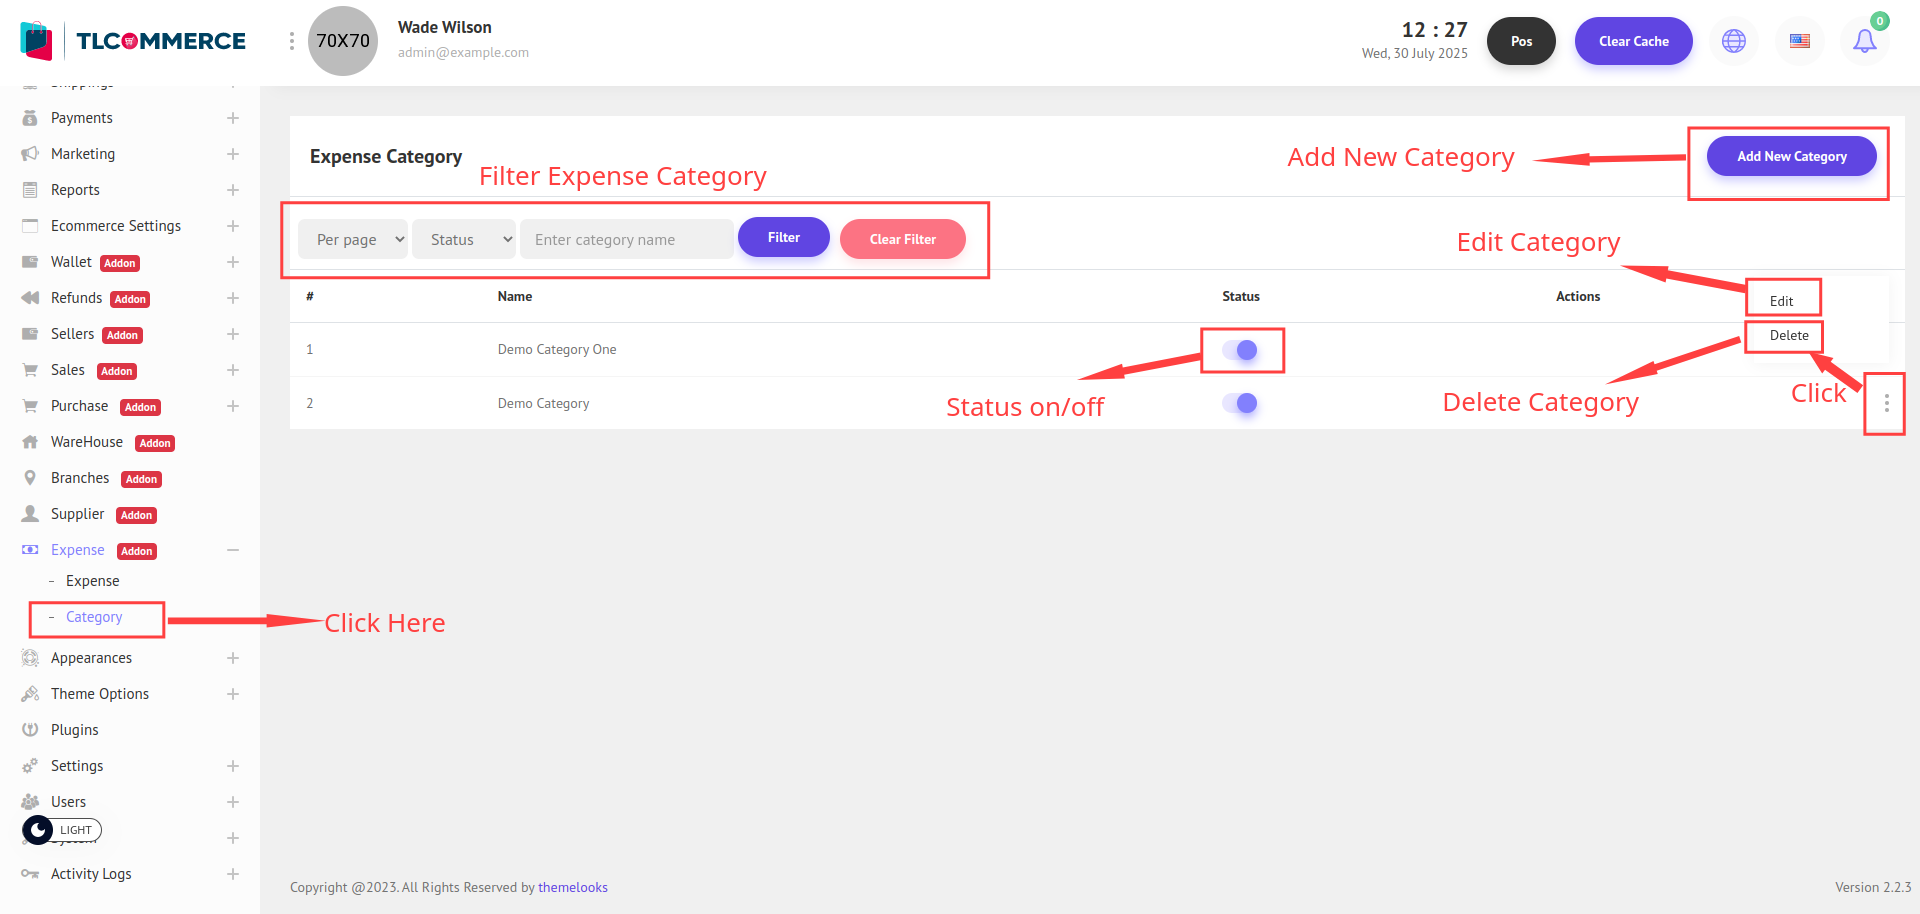
You can add a new category by clicking the Add New Category button, which will open a pop-up modal on your screen.
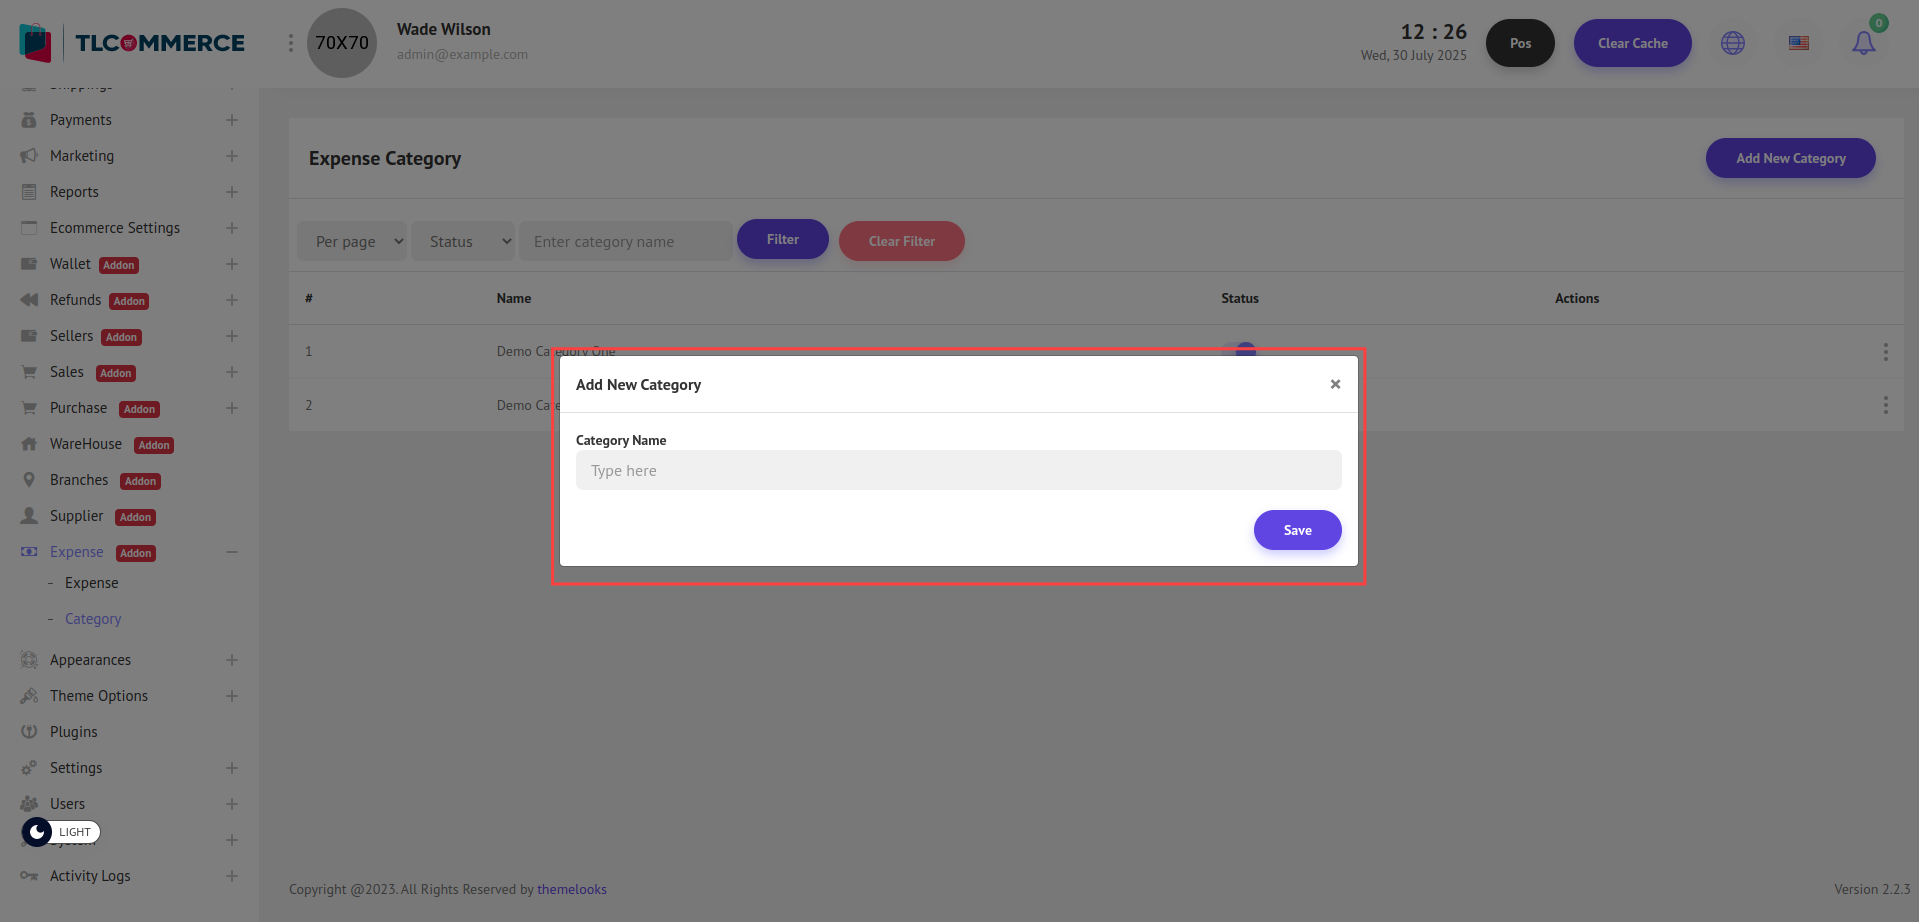
You can now create a category by providing the necessary details. Enter the Category Name.
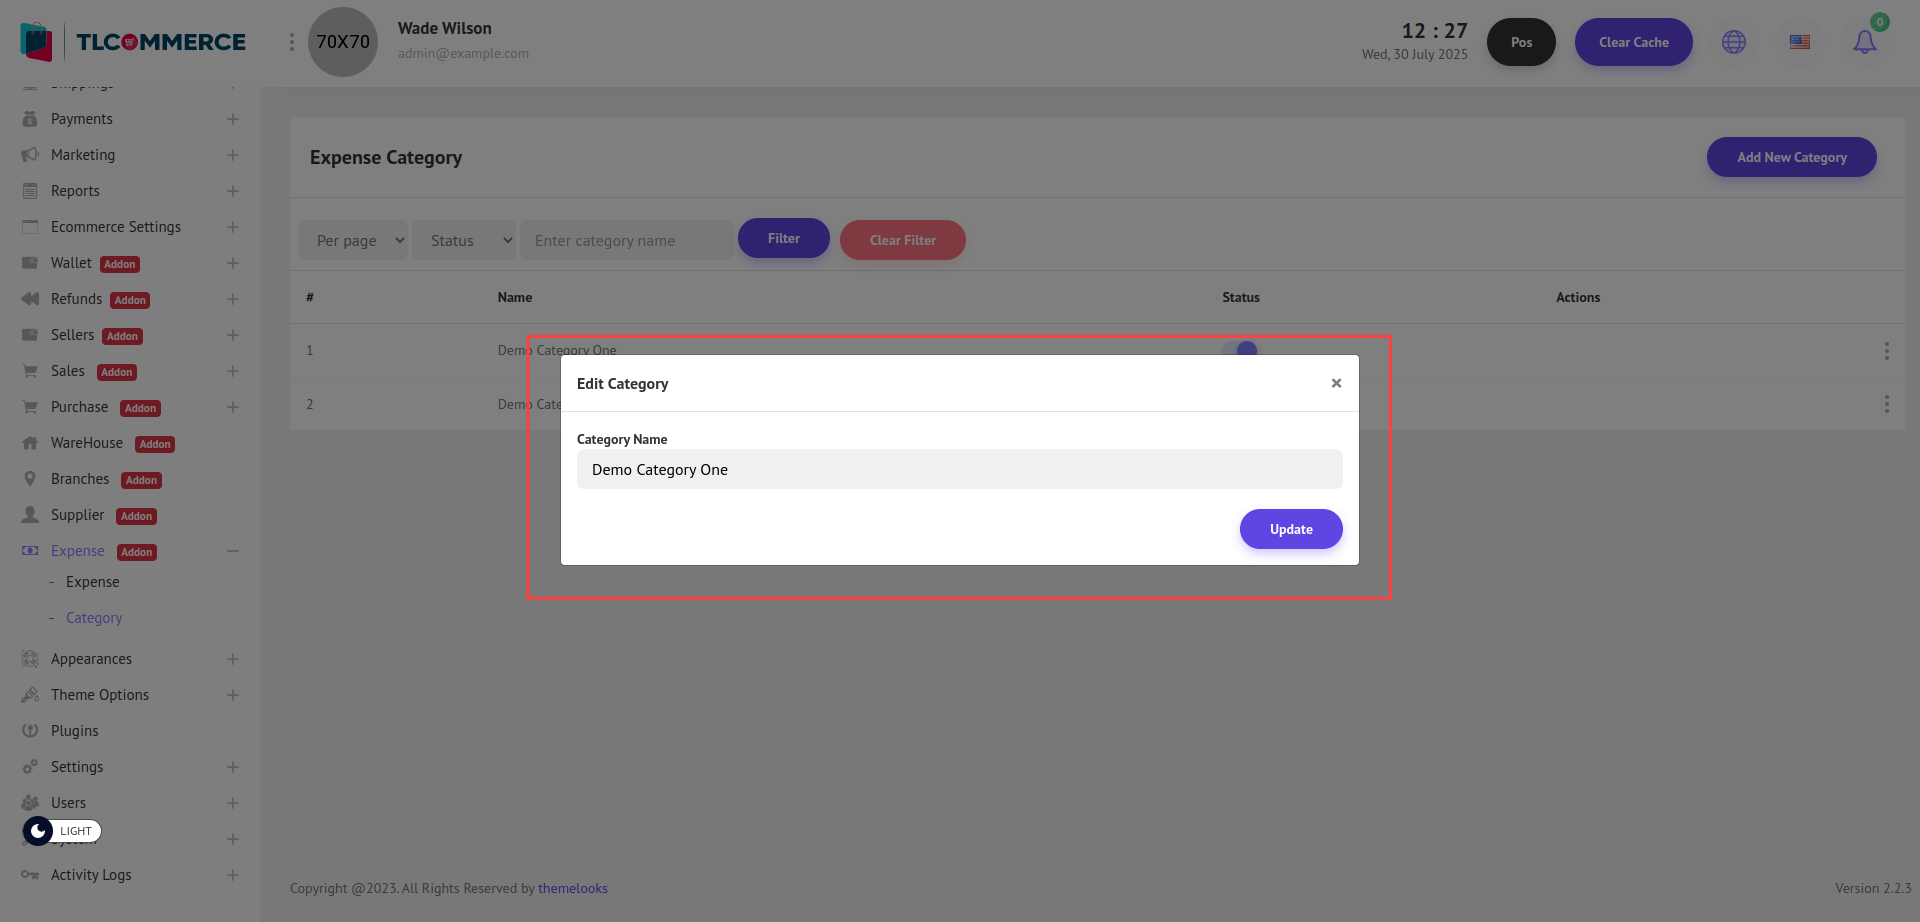
To edit an existing category, simply click the Edit button from the list to open the pop-up modal and update the necessary information. And also can delete a category by clicking the Delete link.
Now, go to Expense -> Expense. Here, you will see the list of all recorded expenses.
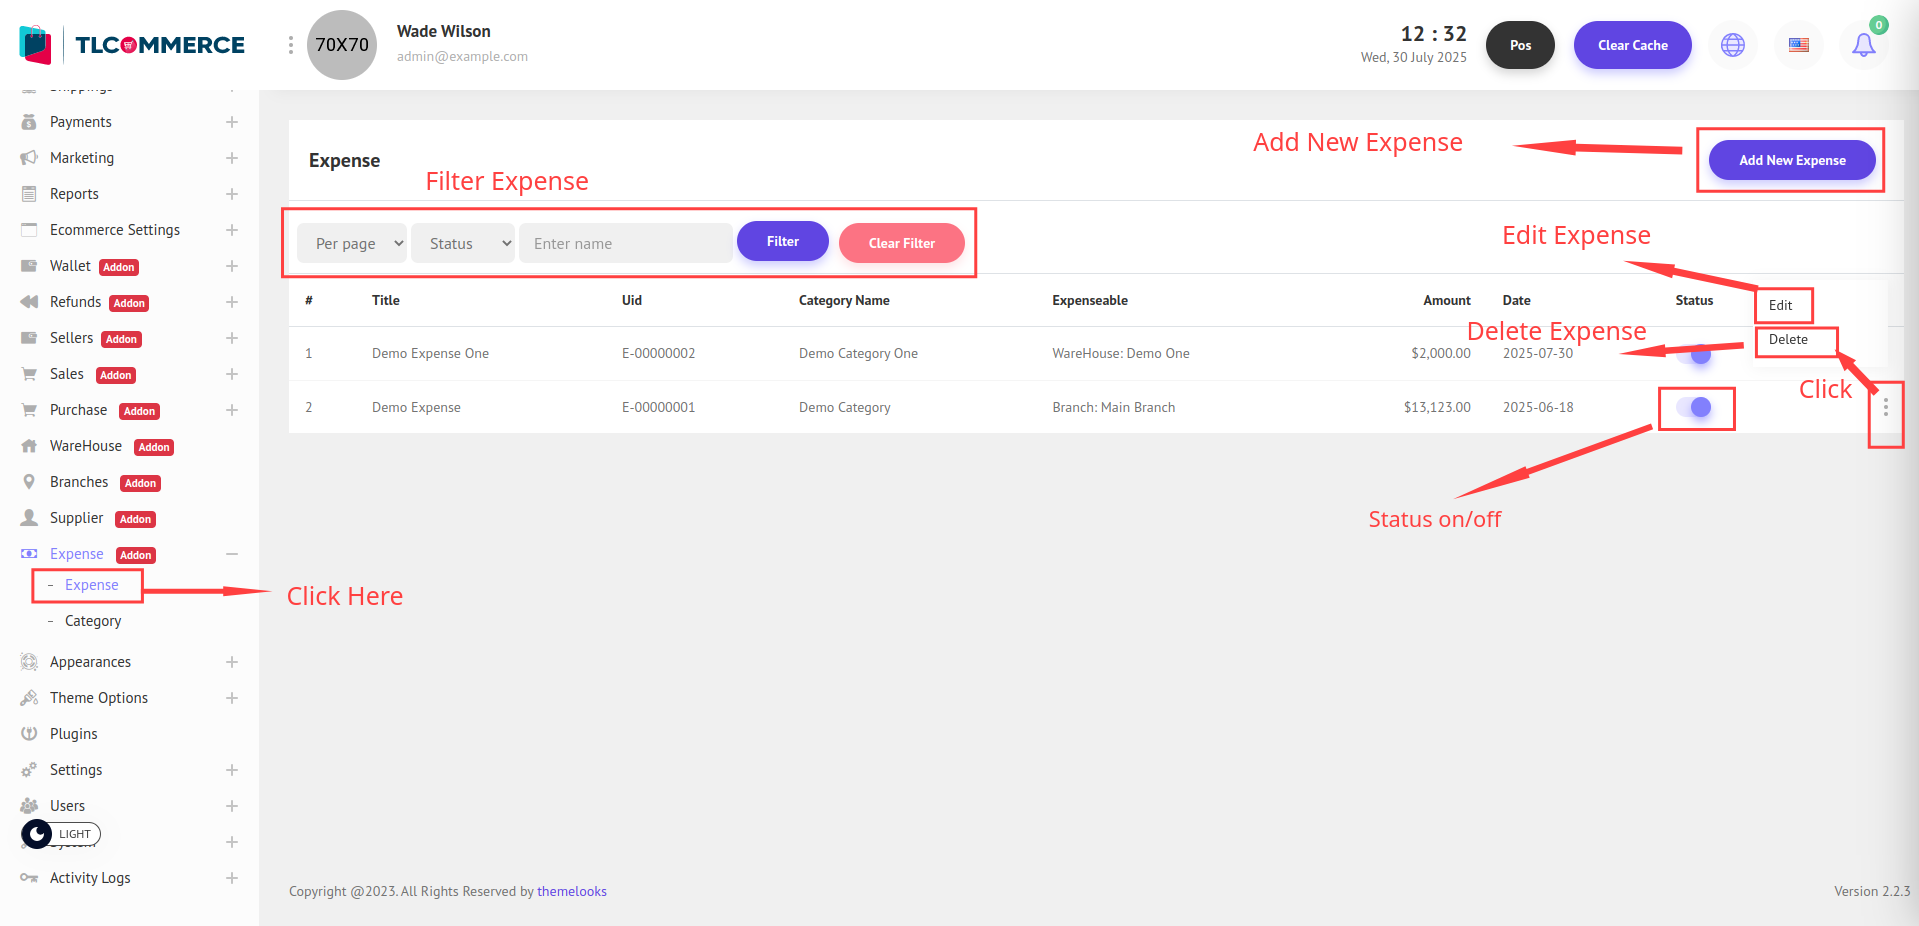
You can add a new expense by clicking the Add New Expense button. This will open a pop-up modal where you can enter the expense details.
However, before you can add an expense, make sure the following are already added:
Expense Category – Go to Expense -> Category to create at least one category.
Branches – Make sure a branch is added under the Branches section.
Warehouse – Ensure a warehouse is added under the Warehouse section.
Once these are set up, you will be able to successfully add a new expense.
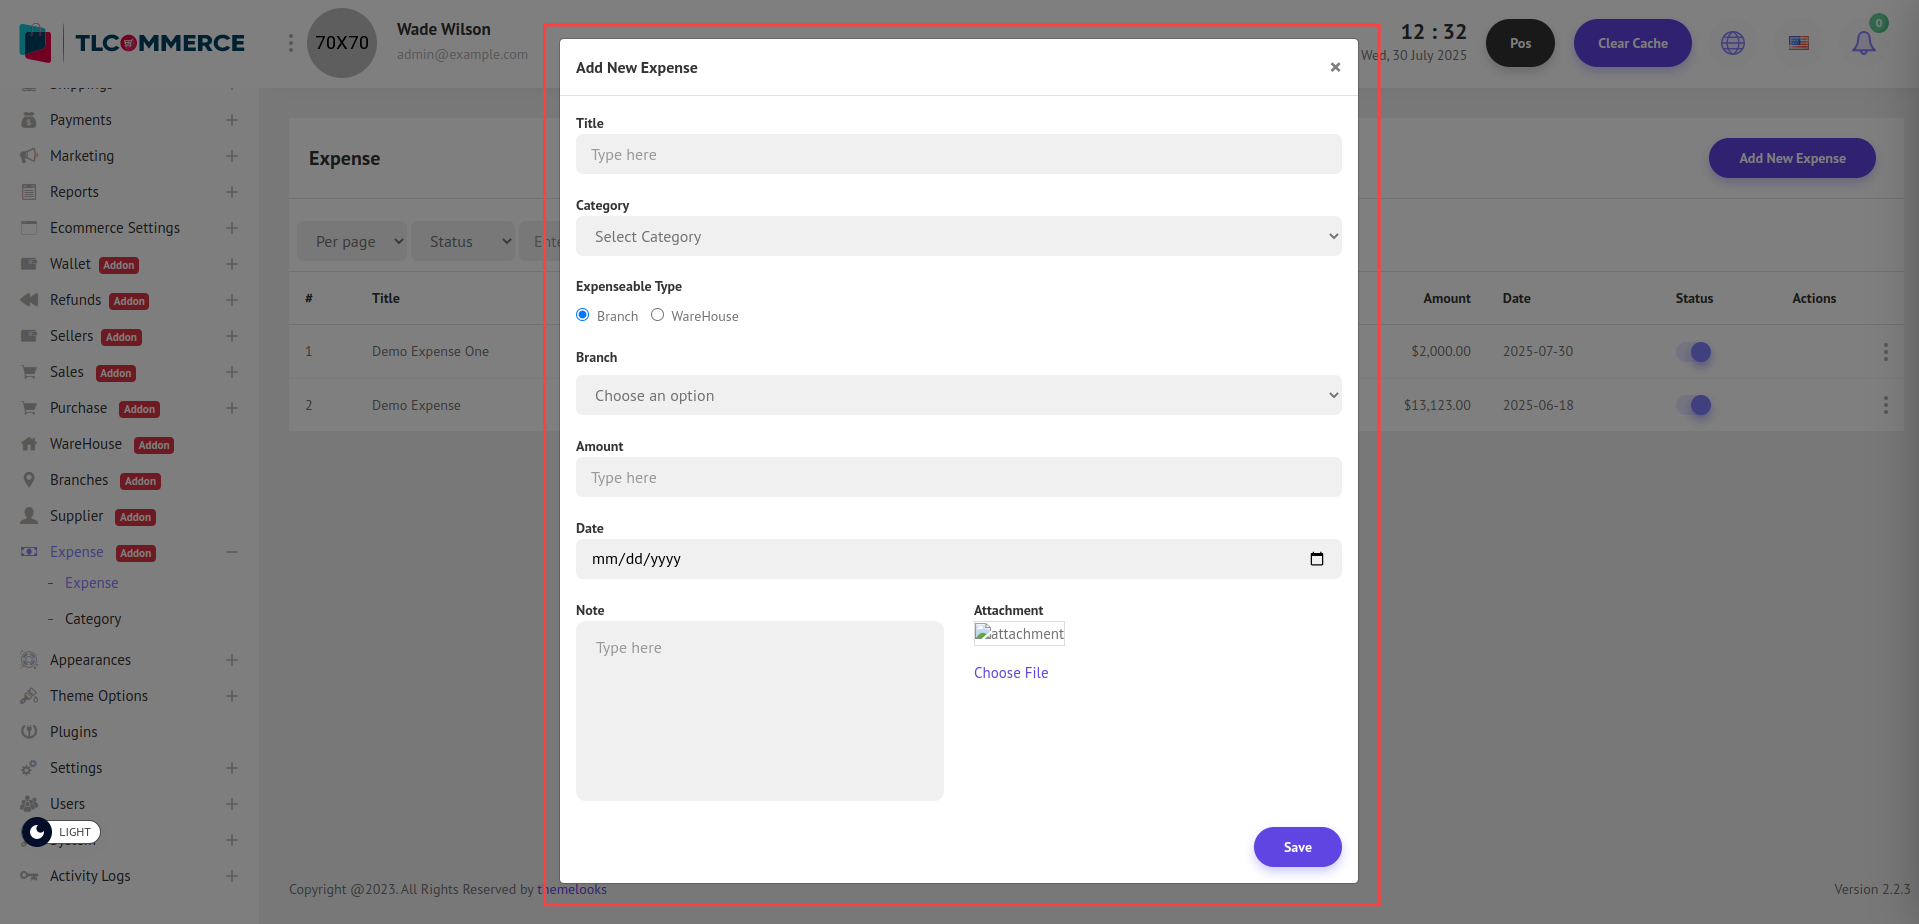
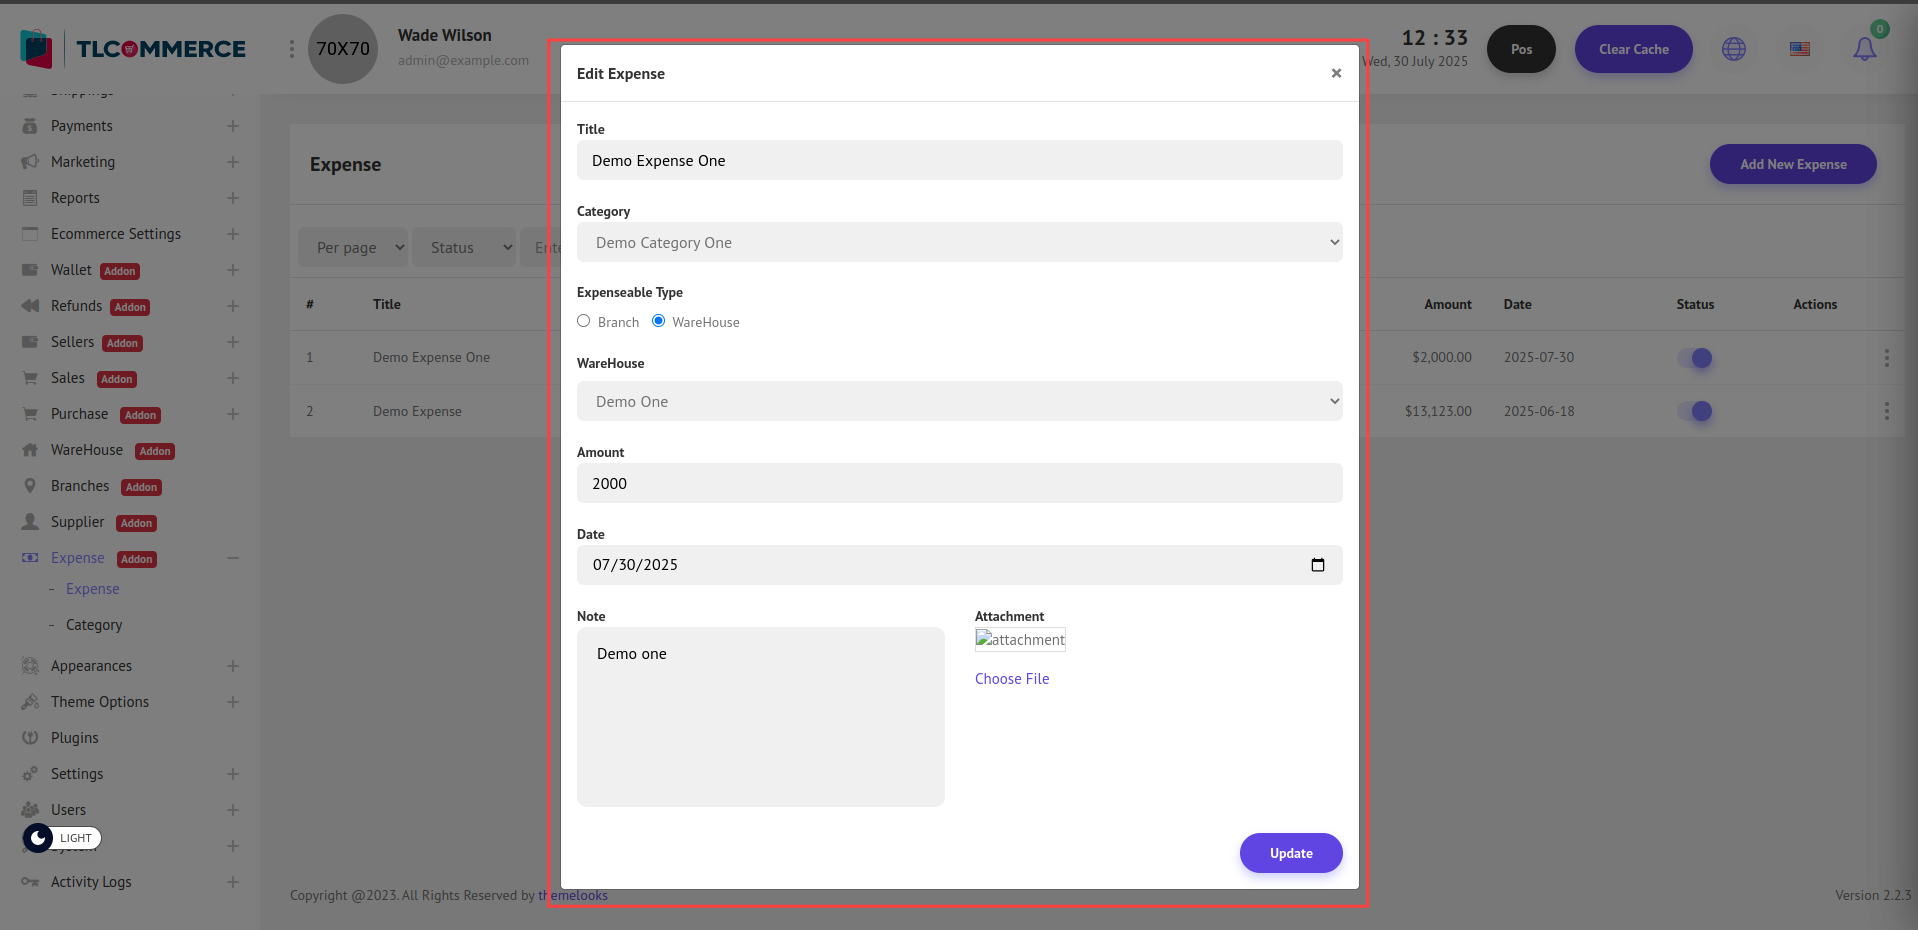
Also, you can create an expense by providing the necessary details. Enter the Title, Select Category, choose Expenseable Type, then open the Branch or Warehouse dropdown, Amount, Date, Note, and Attachment.
To edit an existing expense, simply click the Edit button from the list to open the pop-up modal and update the necessary information. And also can delete an expense by clicking the Delete link.